
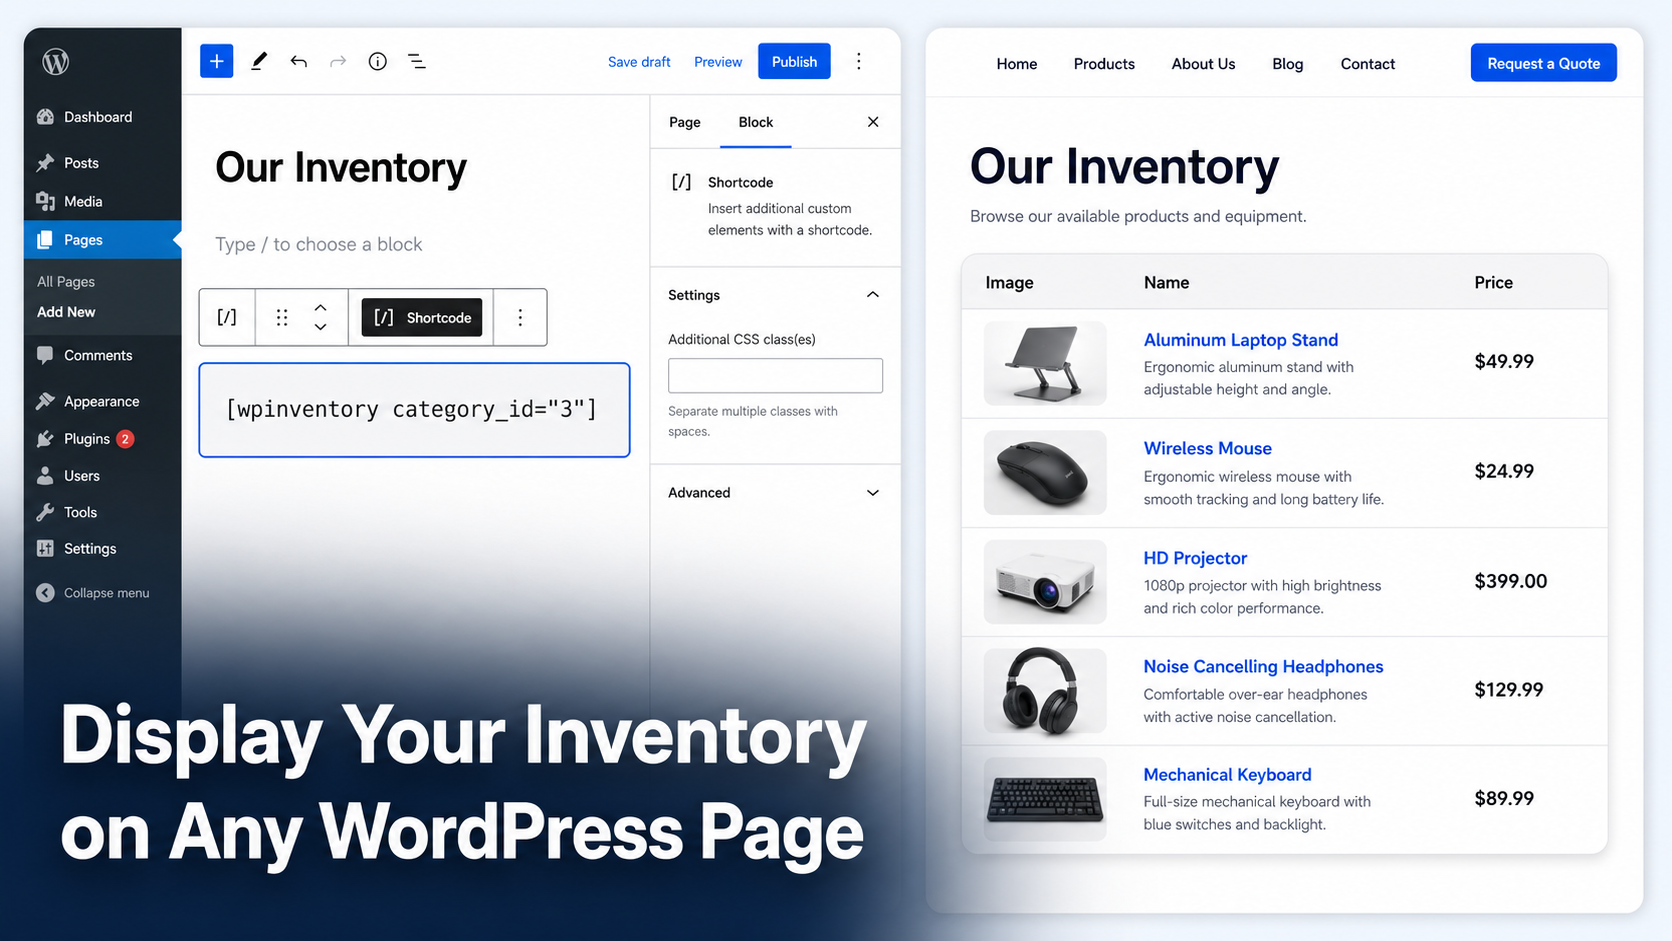
You have entered your inventory into WordPress. Items, categories, quantities, images. Now you want people to actually see it: customers browsing your catalog, staff checking what is on the shelf, or members viewing available equipment.
In WP Inventory Manager that takes exactly one step: paste a shortcode on a page. Everything else in this tutorial is refinement, showing a single category, changing the sort order, limiting the page size or displaying one featured item.
If you search for how to do this, almost every tutorial assumes WooCommerce and a full store. You do not need either. This works on any WordPress site with the free WP Inventory Manager plugin.
Step 1: Put your inventory on a page
Create or edit any page, then add the shortcode:
[wpinventory]
In the block editor, use a Shortcode block (type /shortcode). In the Classic editor, paste it straight into the content. Publish the page and your full inventory appears as a browsable list, with each item linking to its own detail view.
That is the whole core tutorial. The rest is control.
Step 2: Choose what each item shows
The listing pulls its columns from your Display settings, not from the shortcode. Go to WP Inventory > Display to control which fields appear in the list view. By default the listing shows the item image, name, manufacturer, make, model and price.
- Show quantity in the listing so visitors see availability at a glance.
- Listing image size (thumbnail by default) controls load speed on large catalogs.
- Field names come from WP Inventory > Labels. Rename “Make” or “FOB” to whatever fits your business and the listing updates everywhere.
Step 3: Show only one category
Most sites want more than one inventory page: a rentals page, a sale items page, a parts page. Point the shortcode at a category:
[wpinventory category_id=”3″]
Find the ID in WP Inventory > Categories. You can also use the category name with the category attribute. Build one page per category and add each to your menu, and visitors experience separate catalogs while you manage one inventory.
Example: A tool rental shop keeps three pages: Power Tools, Trailers and Lawn Care. Each page holds one shortcode with a different category_id. When a new chainsaw is added to Power Tools in the admin, it appears on the right page instantly with no page edits.
Step 4: Control sorting and page size
[wpinventory order=”inventory_name” page_size=”10″]
- The order attribute sorts by any field: inventory_name, inventory_number (the default), inventory_price and so on.
- The page_size attribute sets items per page. The site-wide default is 20, set in Settings.
- Pagination appears automatically when your inventory exceeds the page size.
Step 5: Feature a single item
To spotlight one item on a landing page, pass its ID:
[wpinventory inventory_id=”42″]
This renders that item’s detail view. The backlink=”0″ attribute removes the back-to-list link when you want the item to stand alone.
Step 6: Make an internal inventory page (staff only)
Not every inventory belongs on the public site. Internal asset lists, staff equipment or member-only catalogs work the same way with one difference: the page’s visibility.
The simplest route is built into WordPress. Edit the page holding the shortcode and set its visibility to Private (visible only to logged-in editors and admins) or Password Protected (anyone with the password). For a proper members-or-staff area, any membership plugin that restricts pages will restrict your inventory page along with it, because the inventory is just page content.
This is the pattern our own internal asset tracking users rely on: full inventory in the admin, one protected page for staff lookups and nothing exposed to the public.
If the shortcode shows nothing
Three checks solve nearly every blank-listing report:
- Items exist and are published. The listing only shows items with a status that allows display. Check WP Inventory > Inventory Items.
- The shortcode is plain text. Page builders sometimes wrap pasted text in formatting that breaks shortcode parsing. Re-type the brackets by hand in a Shortcode block.
- A category filter matches nothing. If you passed category_id, confirm the ID against WP Inventory > Categories. A typo returns an empty list, not an error.
Two more shortcodes worth knowing
- [wpinventory_categories] outputs your category list, each linking to its items. Useful as a catalog landing page.
- [wpinventory_latest_items] shows your most recently added items. Useful on a homepage to surface new stock.
Both also exist as widgets for sidebars and footers. The full attribute reference lives in the user documentation.
When the shortcode is not enough
The built-in listing covers browsing. Two situations call for more:
- Large catalogs need search. The Advanced Search add-on adds keyword search and field filters to your front-end display, so visitors narrow hundreds of items without paging through them.
- Reservations need a cart. The Reserve Cart add-on lets visitors request items from the listing, without payments or WooCommerce.
Both are included in the All Access pass alongside Locations Manager and Pro.
Shortcode questions, answered
Where do I put the [wpinventory] shortcode?
On any page or post. Use a Shortcode block in the block editor or paste it directly in the Classic editor. The inventory listing renders where the shortcode sits.
Can I show different categories on different pages?
Yes. Use [wpinventory category_id=”X”] with a different ID on each page. Category IDs are listed under WP Inventory > Categories in your admin.
How do I change which fields show in the list?
Field visibility is controlled in WP Inventory > Display, not in the shortcode. Choose the fields for list and detail views there; the shortcode picks up the settings automatically.
Does the shortcode work with any theme?
Yes. The listing uses your theme’s page width and typography. If you need deeper styling control, the plugin supports custom templates through its theming system.
Can visitors search the inventory on the page?
Basic category browsing is built in. Keyword search and field filters on the front end come with the Advanced Search add-on, available separately or in the All Access pass.
Everything the shortcode can do, in one reference
The user documentation covers every attribute, display setting and template option, with examples you can copy straight into your pages.
