Add-On: QR code

QR Codes

Print QR code asset tags for your inventory items. A staff member scans a tag with any phone and lands straight on that item’s record, with no searching and no typing.

This is built for the moment a customer asks about an item and your team is standing next to the stock rather than a computer.

What you need

– WP Inventory Manager Pro with an active licence
– PHP 8.1 or higher
– The QR Codes add-on, installed and activated

Installing the add-on

1. Download the add-on from your account on wpinventory.com.
2. In WordPress, go to Plugins, then Add New, then Upload Plugin.
3. Choose the zip file and click Install Now, then Activate.
4. If prompted, enter your licence key.

Once activated you will see a QR Codes page under the WP Inventory menu.

Printing tags

Add your inventory items first. Tags are generated from items that already
exist, so a tag always points at a real record.

Go to WP Inventory, then QR Codes, and choose how you want to print:

Single item. Enter one item ID.
Multiple items. Enter several IDs separated by commas, for example `1,2,3`.
Range of items. Enter a starting and ending ID to tag a whole batch. Any IDs in the range that do not have an item are skipped, so you never get a blank tag.

Then set your options:

  • How many would you like to print: copies of each label
  • Width of the QR Code: size of the code in pixels
  • Margin: white space around the code, in pixels

Click Print, then use your browser’s print dialog.

Printing a tag for one item

You can also print from the item itself. Open any inventory item, scroll to the QR Code section, and click Print Code.

What is on a tag

Each tag shows the QR code with the item’s name and number underneath, so your team can identify a tag at a glance without scanning it.

What happens when a tag is scanned

Scanning opens that item’s record in the WordPress admin, where staff can check details and make changes.

Because it opens the admin, the person scanning needs to be signed in to your site on that device. If they are not signed in, WordPress asks them to log in first and then takes them straight to the item. Signing in once per device is usually enough.

Choosing who can print codes

On the QR Codes settings you can set Minimum Role to Use QR Codes. This is the lowest role allowed to generate and print codes. It defaults to Administrator.

Tips for good tags

– Print one sheet first and check it scans before running a large batch.
– Keep some margin. Scanners need white space around a code to read it reliably.
– The codes are vector, so they stay sharp at any size. You can print small tags without them turning fuzzy.
– If you are sticking tags on small items, reduce the width rather than shrinking the printed page.

Troubleshooting

“QR Codes does not appear in the WP Inventory menu.”

The add-on needs WP Inventory Manager Pro with a valid licence. Check your licence key under WP Inventory settings.

“Scanning a tag asks me to sign in.”
That is expected. Tags open the item in the WordPress admin, so the device needs to be signed in. Log in once and the scan will take you to the item.

“Some items in my range did not print.”
IDs in the range that do not have an inventory item are skipped on purpose, so you do not end up with tags that lead nowhere.

“The plugin will not activate.”
The add-on requires PHP 8.1 or higher. Ask your host to update PHP if you are on an older version.

Add-On: Analytics

Installation

  1. Download the plugin zip from your account page.
  2. Go to Plugins → Add New → Upload Plugin and upload the zip.
  3. Click Activate Plugin.
  4. Go to WP Inventory → Analytics → License.
  5. Enter your license key and click Activate License.

Requirements

  • WP Inventory Manager Pro (active license)
  • WordPress 5.0 or higher
  • PHP 7.4 or higher

Optional integrations

  • Reserve Cart: Reservation Overview, weekly trend chart, CSV export
  • Ledger: Pending and completed value summary
  • Locations Manager: Inventory by location breakdown
  • Advanced User Control: Top users by inventory items

FAQ

Do I need WP Inventory Manager Pro?
Yes. Analytics requires an active Pro license. Without Pro you will see an upgrade prompt.

What happens if my license expires?
The dashboard continues to work. License renewal is required for updates and support after expiry.

Does the date filter apply to all sections?
The date filter applies to reservation and ledger data. Core inventory tables show all-time data and are not date-filtered.


WP Inventory Manager

This is a free download of WP Inventory Pro. We offer the core inventory management plugin for $0.00 and no license is required. You’ll have access to our main inventory management tool. Create unlimited inventory items, configure the settings and fields to meet your custom needs, display the information you choose with a convenient shortcode, and allow your users to reserve items from your inventory.  We’re proud of our 4.6 star rating over 33 reviews on the WordPress repository, and believe it speaks to the value of this powerful inventory management plugin.

DOWNLOAD NOW


However, without a license for the Pro version, you’re missing out on several benefits:

  • Add Ons – While WP Inventory Manager comes with a robust set of features, we’ve also expanded its capabilities with a variety of add ons. However, all add ons require a licensed version of WP Inventory Manager in order to function.
  • Premium Support – Unfortunately, we can only offer our documentation and basic support to our non-licensed users. But with a license, you’re entitled to a much deeper level of support where we can answer personalized questions and even help troubleshoot issues on your site.
  • Automatic Updates – We’re constantly developing and improving WP Inventory Manager, and with a license, you’ll be prompted to install these updates right in your WordPress dashboard.

If you’re interested in a license, you can learn more on our Licensing page.

Add-On: Disable Detail Page

This add on will remove the detail page and all settings related to the front end detail page. Effectively making it so that a detail page is inaccessible and leaving only the listing view in place. Over the years we have had numerous questions and/or requests to hide the detail page. User’s simply don’t need it because their listing page tells the whole story and therefore going to the detail page would only be redundant and bad user experience. We heard you. Just download and install and your detail page will be gone.

Add-On: Notifications

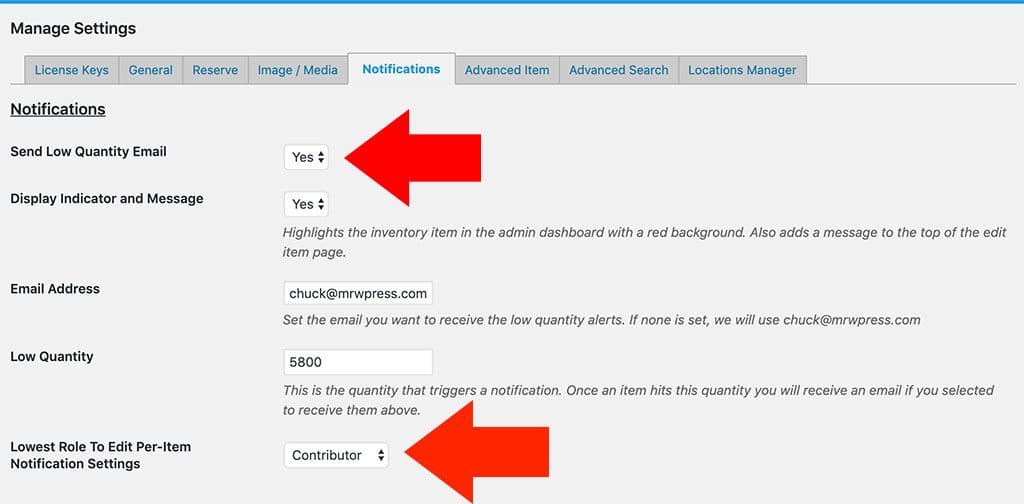
This light-weight add on allows you to set per-item quantities and email addresses you would like to send out alerts for.  Once you install and activate the add on, you will see one new permission setting on the “Notifications” tab to set the minimum user role that can access this override.

You will also need to be sure that you have the “Send Low Quantity Email” set to “Yes”.  Without setting this to yes, the system is basically not sending notifications so the per item override notification section will not show.  So be sure these two settings are set appropriately.

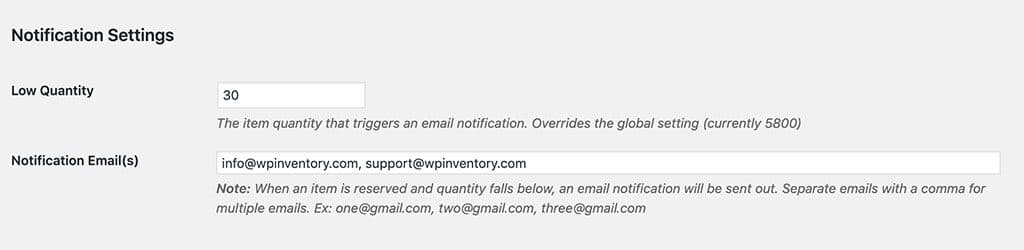
Once you have set these, you can now visit any item in your dashboard.  Scroll to the bottom of the item when you are on the item edit page and you will see a notifications section that looks like this:

As seen here, there is a quantity of 30 for this item.  When this item’s quantity reaches 30 or less, emails will be sent out to the two emails set.

Note:  These alerts are sent out when reservations are made.  They do not send when an admin edits an item or makes a ledger entry.

Breadcrumbs

This free add on will provide a navigational breadcrumb trail for the user to go back to previous pages. Great for complex inventories with many different layers of inventory listings. The breadcrumb links will display on any WP Inventory Manager listing pages and item detail pages.

Add-On: Stripe

With this add on, you are able to sell your inventory.  There are a couple of caveats, however:

  1. You must have an SSL certificate.  Most good hosting providers issue SSL certificates and can install them for you.
  2. You must have a Stripe.com account.

Add-On: Advanced Search

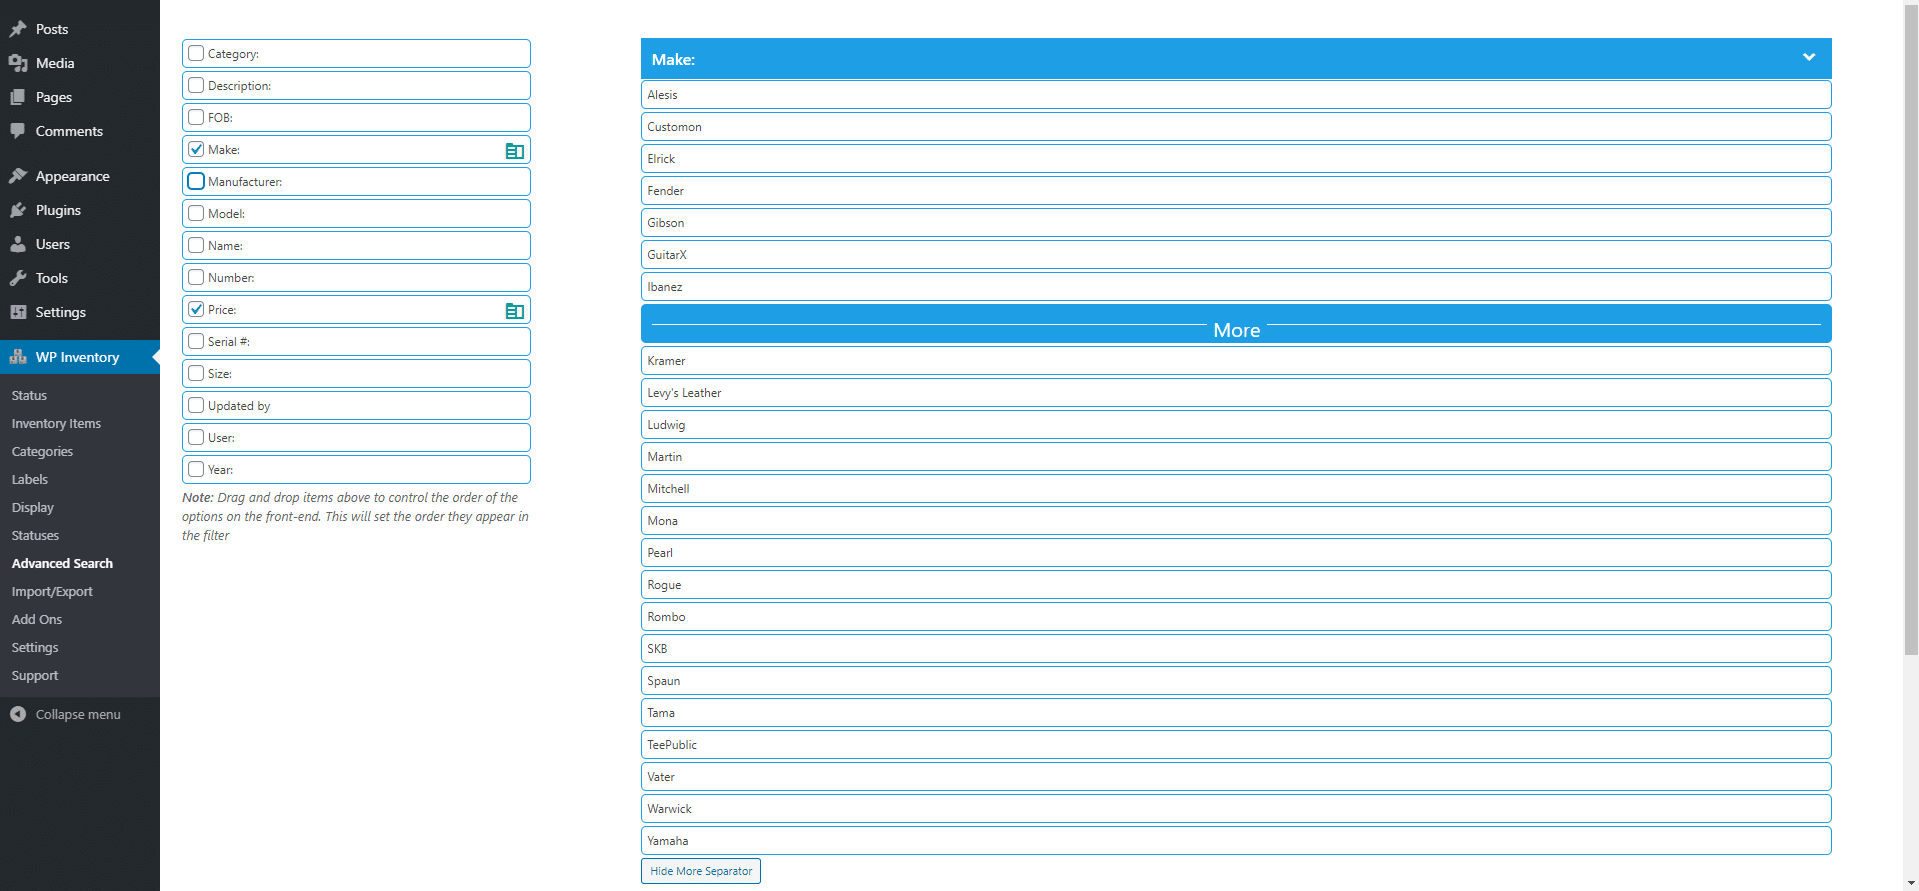
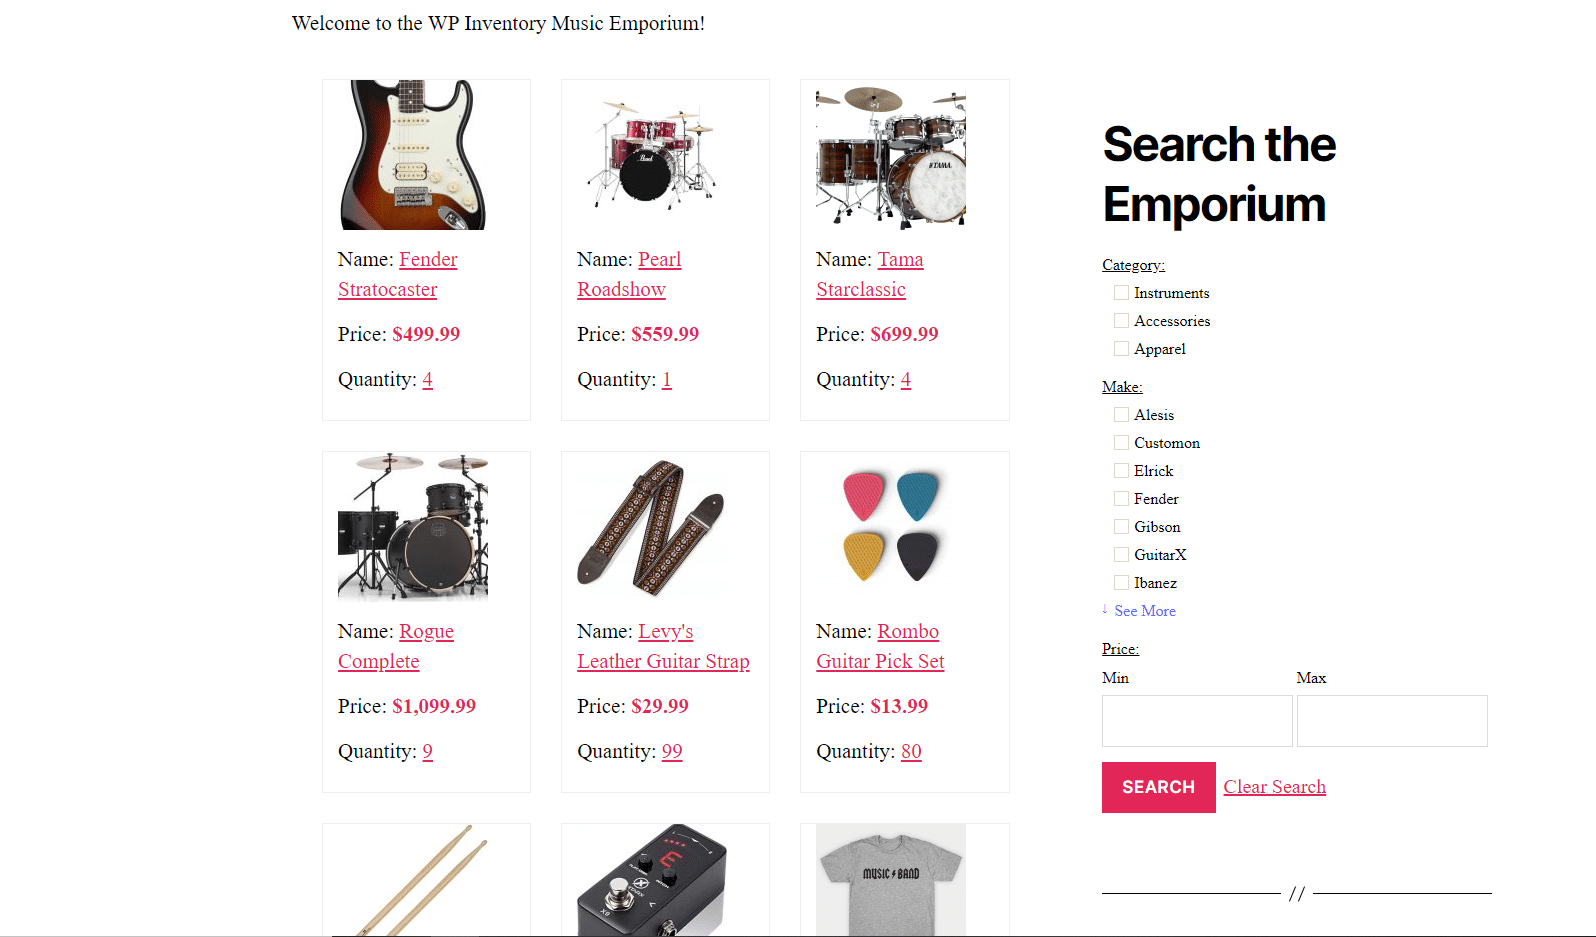
The Advanced Search add on adds Amazon-like search filters to your inventory. Totally customize which fields you’d like users to filter by, the order of those fields, and how many of the fields to show before a “See More” dropdown. All of this customization is done with an intuitive drag-and-drop interface, and includes instructions right on the page.

You can put the search filters on the frontend either through a widget in any sidebar, or anywhere through a shortcode with tons of parameters to ensure it meets your needs. Users will be able to search using as many filters as are available, and available filters will be updated in real-time to ensure there are no empty queries. For example, if the user selects to filter by the Accessories Category, and there are no accessories under the Alesis make, Alesis will automatically disappear to ensure a fulfilling user experience.

Add-On: Locations Manager

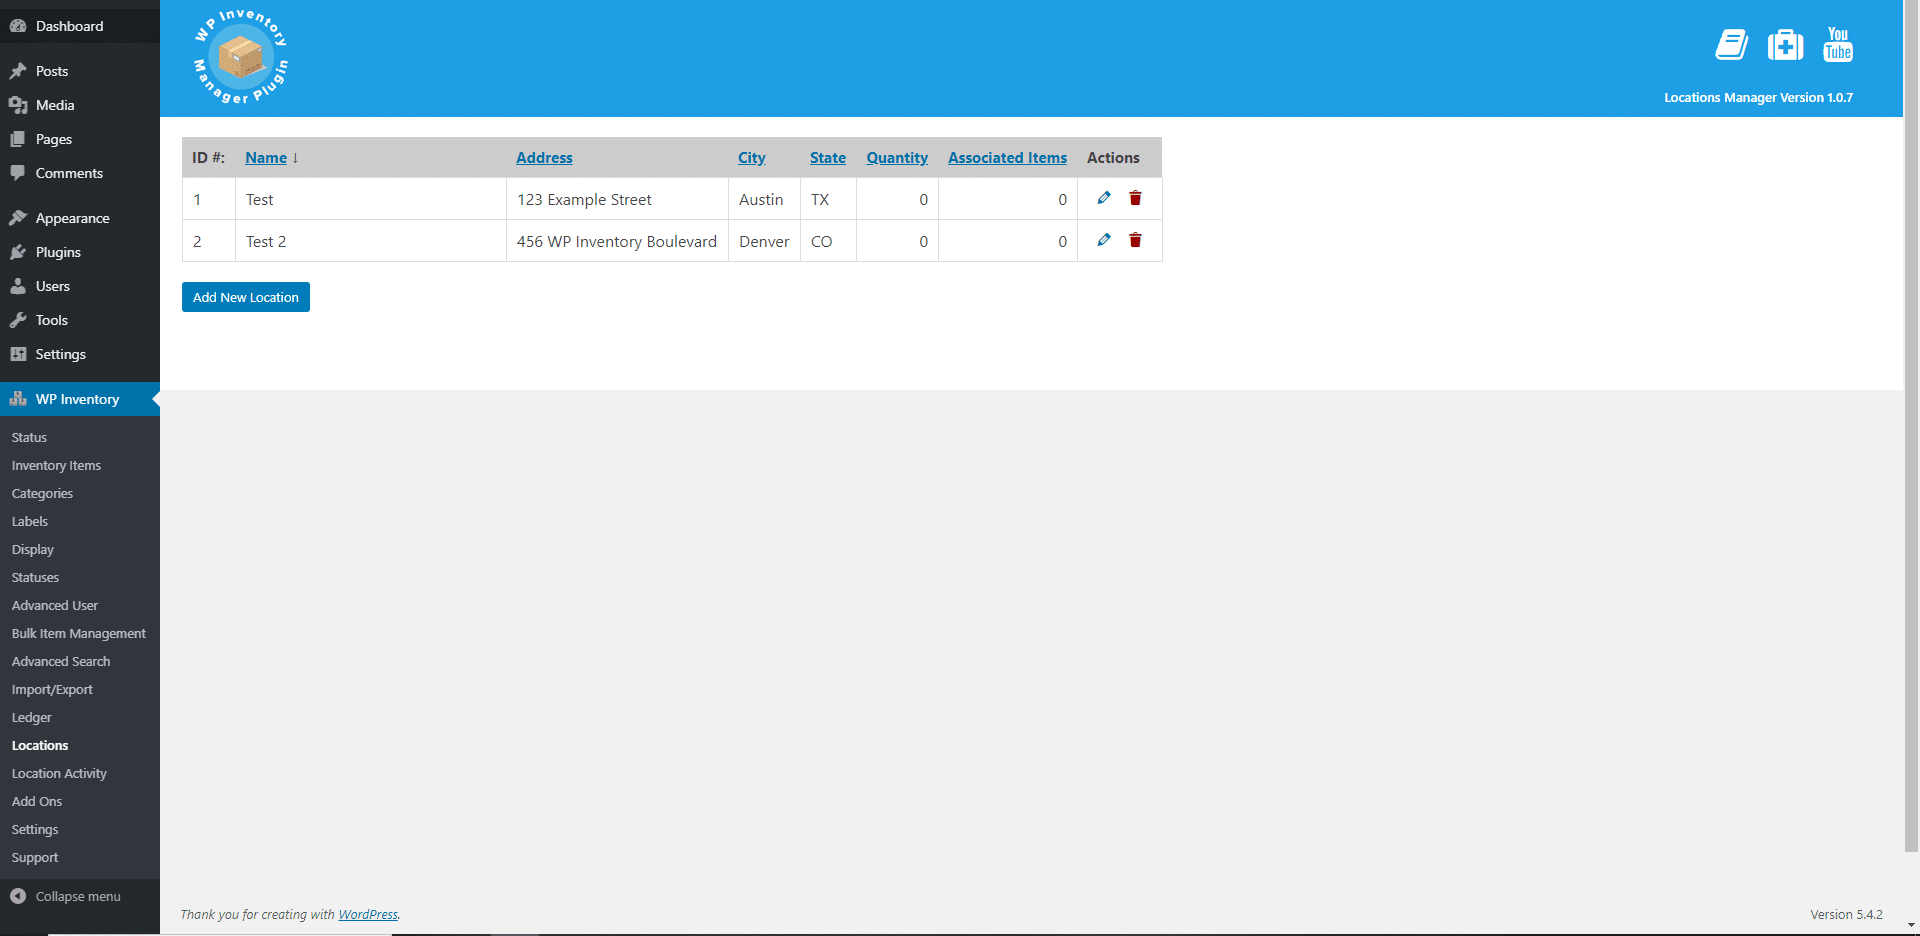
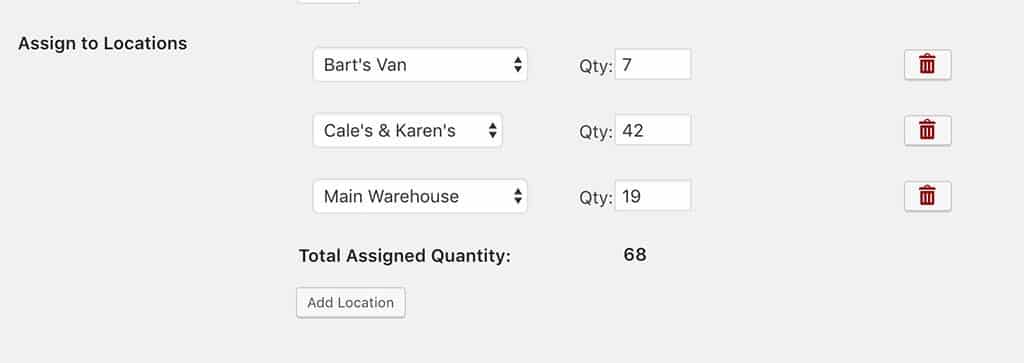
Specify multiple locations where your items are stored and sold from. With Locations Manager, you can easily manage inventory at any number of locations, from three to three hundred. You can even see how many items are assigned to each location, and the total quantity of all items in that location. Edit each item to specify the quantity available at all of your created locations, and transfer stock between locations with simple quantity changes. You can even customize the priority of which locations have inventory reducted first upon a reservation.

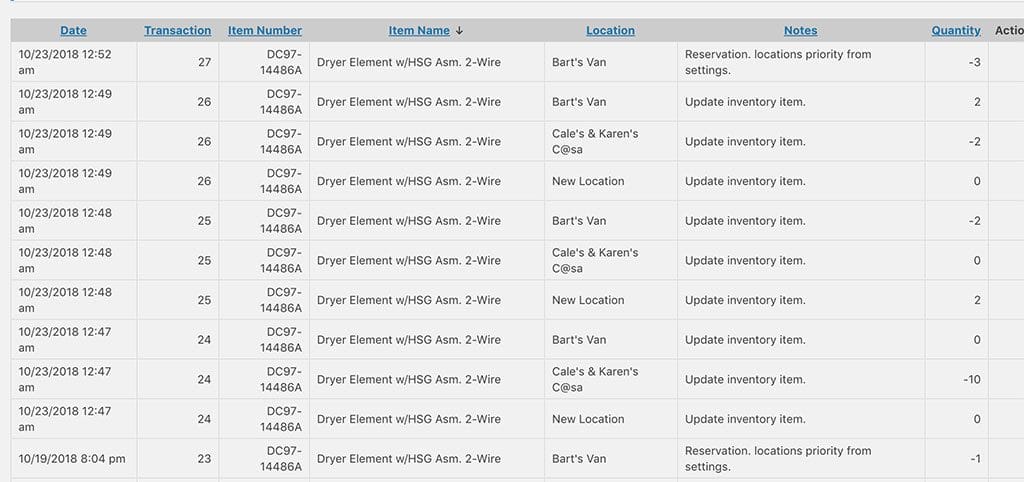
Track the inventory in and out of locations with the handy Locations Activity ledger. Dates and quantities allow you to keep detailed records and avoid clerical errors.

Watch the Demo:

Add-On: Reserve Cart

WP Inventory Reserve Cart

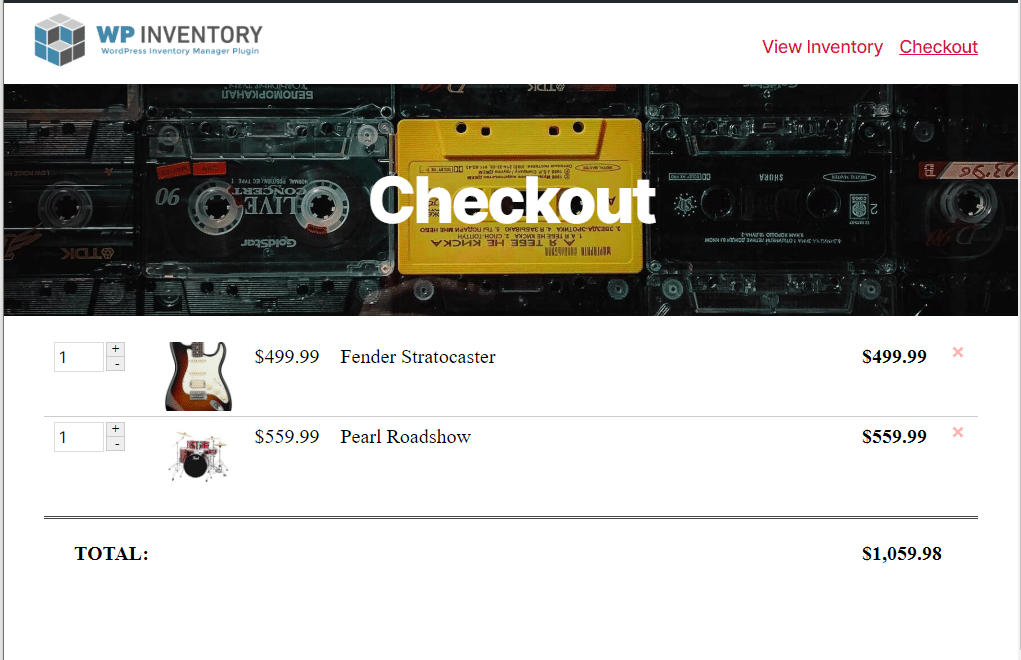
Create a total shopping experience and allow your users to reserve multiple items at once with the Reserve Cart add on.  By default, users can only reserve one at a time, but with Reserve Cart the sky’s the limit! Utilize two simple shortcodes to display just the cart anywhere, or an entire checkout page with one form for all items.  All the functionality is built right in for you, with plenty of customization options in the settings to boot.

Watch the Demo:

30-day money-back guarantee

Reviews on WordPress.org

Trusted by 127,000+ businesses since 2013

★★★★★

"Created an online museum for my club. Really impressive plugin. Support was responsive and helpful."

@hackrepair

★★★★★

"Excellent, clean, simple inventory management. Well structured code — use it right away or customize it to your liking."

@techlocally

★★★★★

"We purchased the entire suite. Installation was easy, small issues were fixed immediately, and the guidance during setup was invaluable."

@design4dotcom

★★★★★

"Plugin support was helpful and rapid. Highest mark."

@drgar

★★★★★

"Great support. Very thorough when looking for a solution, and upfront with exactly how to fix it or institute a workaround."

@shoidahl

★★★★★

"I used this plugin and eventually hired the developers for all my WordPress work. Responsive, competent, and clean code. Would recommend to anyone."

@justenhong