How-to
Asset Tracking in WordPress: The Definitive Guide
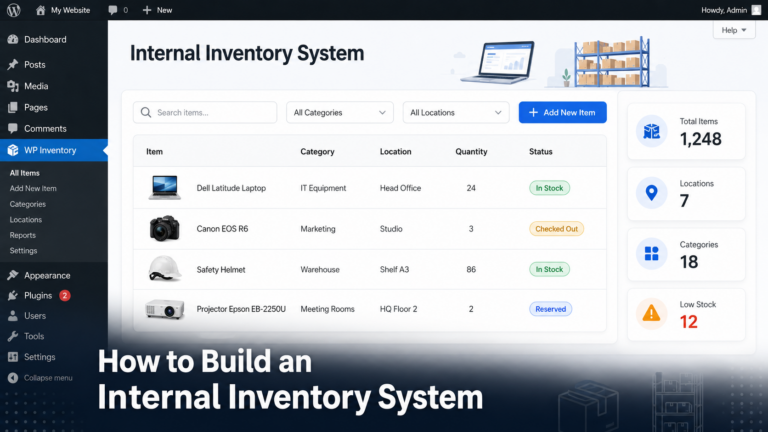
Inventory is what you sell. Assets are what you keep. The laptop your bookkeeper uses, the projector in the meeting room, the mowers in the shed,…
Read More