Ask any school office manager where the third cart of Chromebooks is and you will get one of three answers: a shrug, a guess or a spreadsheet last updated in September.
Schools own a surprising amount of stuff. Student devices, textbooks, science lab kits, AV equipment, musical instruments, athletic gear, furniture. Most of it moves constantly between classrooms, students and storage. And most of it is tracked in spreadsheets that drift out of date the week after inventory day.
The software built for this problem is real but priced for districts. Platforms like VIZOR, Incident IQ and Frontline are excellent at 10,000-device scale, with contracts to match. A single school, a small private school or a homeschool co-op rarely needs that. What it needs is a shared, current list of what the school owns, where it is and who has it.
If your school website runs on WordPress, you already own the platform that can do this. Here is how.
What schools actually need to track
School inventory breaks down into five groups, and each one has a slightly different tracking need:
- Student devices. Chromebooks, tablets and chargers. These need serial numbers, condition notes and a record of who each device is assigned to.
- Textbooks and curriculum materials. Tracked by title and quantity. The question is rarely “where is this one book” and usually “do we have 28 copies for next term”.
- AV and lab equipment. Projectors, microscopes, cameras and kits. High value, frequently borrowed, rarely returned to the right shelf.
- Fixed assets. Furniture, playground equipment and appliances. Mostly static, but auditors and insurers want a current list with values.
- Consumables. Art supplies, paper, first aid stock. Here the job is simple quantity tracking with a warning before you run out.
No spreadsheet handles all five well, because spreadsheets have no concept of check-outs, alerts or per-user views. An inventory system does.
Setting it up with WP Inventory Manager
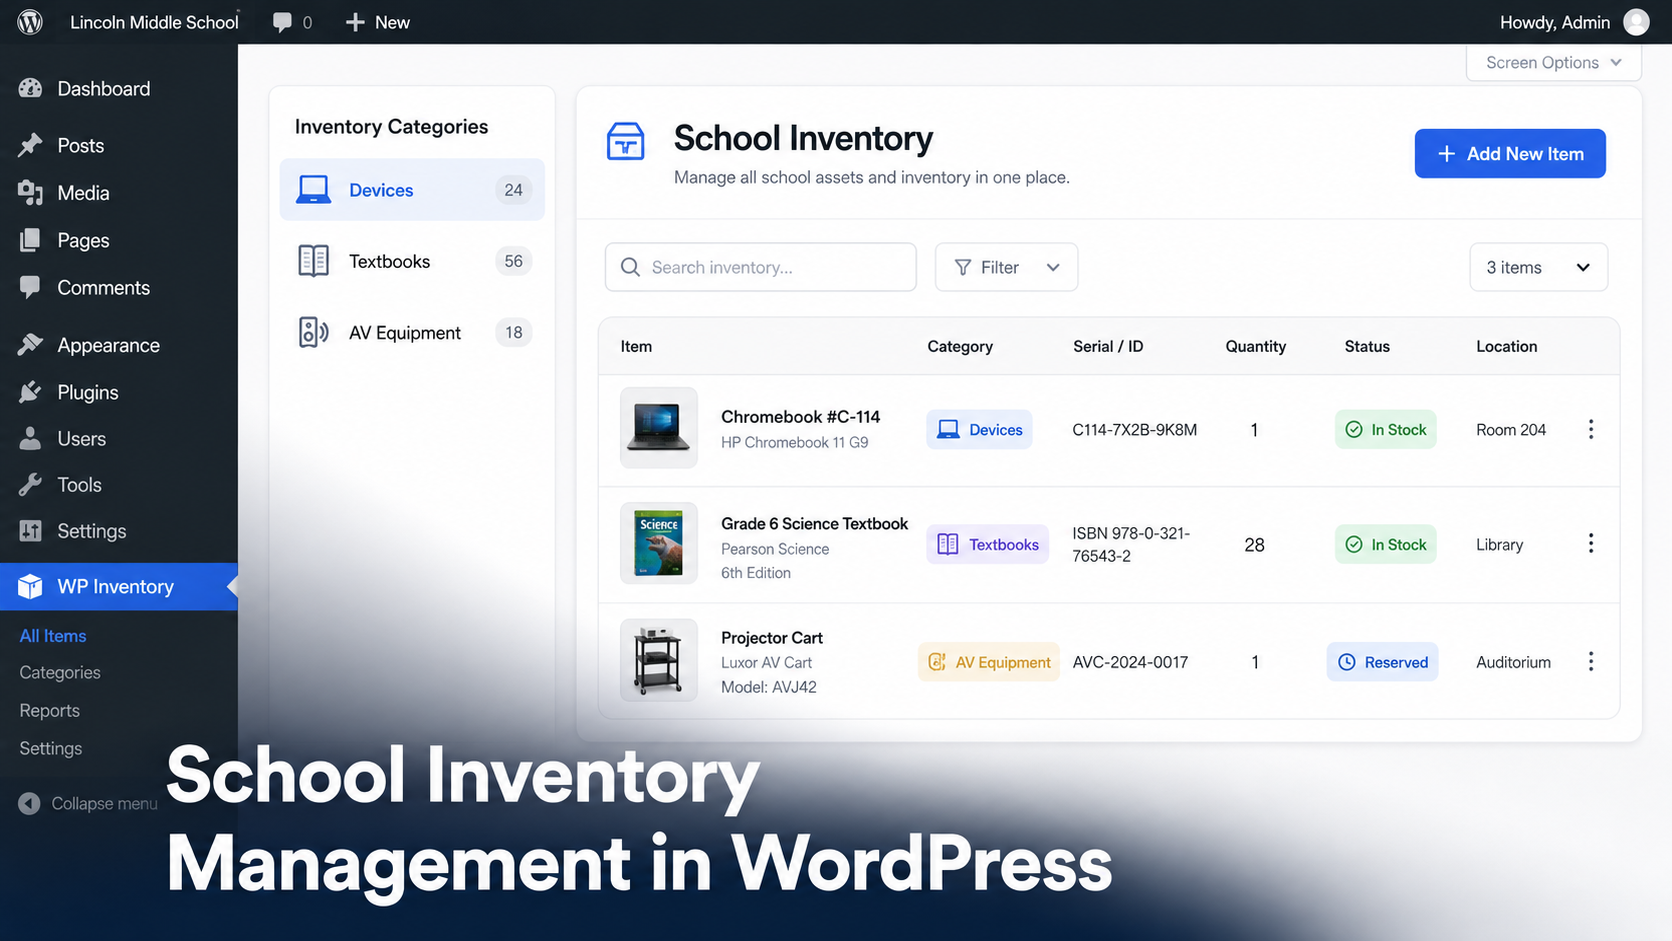
The free WP Inventory Manager plugin adds an inventory system to the WordPress admin your staff already log into. Setup for a school looks like this.
Create your categories
Go to WP Inventory > Categories and mirror the groups above: Devices, Textbooks, AV Equipment, Lab Equipment, Furniture, Supplies. Categories keep a few hundred items browsable instead of overwhelming.
Rename fields to match school language
Every item in WP Inventory Manager carries fields for name, inventory number, serial number, make, model, year, quantity and description. Under WP Inventory > Labels you can rename any of these. Turn “FOB” into “Assigned To”, or “Year” into “Purchase Year” for audit purposes. The fields fit the school, not the other way around.
Add your items
From WP Inventory > Inventory Items, add each asset or batch. Serialized items like Chromebooks get one record each with the serial number filled in. Bulk items like textbooks get one record per title with a quantity.
Example: A K-8 school with 220 students enters 240 Chromebooks as individual records with serial numbers and condition notes, 35 textbook titles with quantities, and 35 AV and lab items. Total setup time was two afternoons with a student aide doing data entry. The librarian now answers “do we have enough copies of the 6th grade science text” in ten seconds from the school’s own website admin.
Publish a staff-facing list
Add the [wpinventory] shortcode to any page to display the inventory. Put it on a page behind a staff login and teachers can check what is available without emailing the office. The user documentation covers display settings and shortcode options.
Handling device and equipment check-outs
The single most common school request is a check-out flow: a teacher reserves the projector cart for Thursday, or a student is issued a Chromebook for the year.
The Reserve Cart add-on handles this without any payment system. Staff browse the equipment list, add what they need and submit a reservation request. The office approves it, quantities update and there is a record of who has what. When the item comes back, the reservation is cleared and the quantity is restored.
For annual device assignments, the serial number plus the renamed “Assigned To” field gives you a simple issue log: which student has which device, recorded on the item itself.
Multiple buildings and campuses
If your school spans more than one building, the Locations Manager add-on tracks quantity per location. The science department can see that the main building has two microscope sets while the annex has none, before anyone walks over there with a cart.
Pair it with the Advanced User Control add-on and each building’s staff manage only their own inventory. The front office keeps the full view. Both add-ons are included in the All Access pass, along with Reserve Cart and Advanced Search.
Never run out of supplies mid-term
For consumables, WP Inventory Pro adds low-stock email alerts and minimum quantity fields. Set the art room’s paint stock to alert at 5 units and the office gets an email before the shelf is empty, not after. Pro also records quantity history, so you can see usage patterns across the school year and budget the next one accurately.
What this costs a school
The core plugin is free with no item limits. A single-building school tracking devices and supplies typically adds Pro at $79 per year. A multi-building school that wants check-outs, locations and per-staff access takes the All Access pass at $199 per year. Compare that with dedicated K-12 asset platforms, which usually start in the thousands per year and are quoted per district.
Browse the full list of add-ons to see what fits your school’s setup.
School inventory questions, answered
Can we track which student has which Chromebook?
Yes. Enter each device as its own inventory item with its serial number, then rename an unused field to “Assigned To” under WP Inventory > Labels and record the student there. The device’s full record lives on one screen.
Do teachers need special software to check equipment availability?
No. The inventory displays on a normal WordPress page via shortcode. Teachers view it in a browser like any other page on the school site, behind a login if you prefer.
Is there a limit on how many items a school can track?
No hard limit. The free plugin handles catalogs with thousands of records. A typical school inventory of a few hundred items is well within comfortable range on ordinary hosting.
Can each campus manage its own inventory separately?
Yes, with the Locations Manager and Advanced User Control add-ons, both included in All Access. Each building’s staff see and edit their own stock while administration keeps the school-wide view.
We already have a spreadsheet. Can we import it?
Yes. The Import/Export add-on brings in existing inventory from a CSV file, so the spreadsheet you have today becomes the starting point rather than wasted work.
Put your school’s inventory where your website already lives
No new logins, no district-scale contract, no sync between systems. The free plugin sets up in an afternoon and the add-ons grow with you.