
Stop managing your inventory in a spreadsheet. The Import and Export add-on moves your stock into WP Inventory Manager from any CSV file in one pass: upload the file, map each column to an inventory field, choose whether categories should be created on the fly, and import. Hundreds or thousands of items that would take days to type in arrive in minutes, with images attached from links in the file and categories and statuses matched by name or ID.
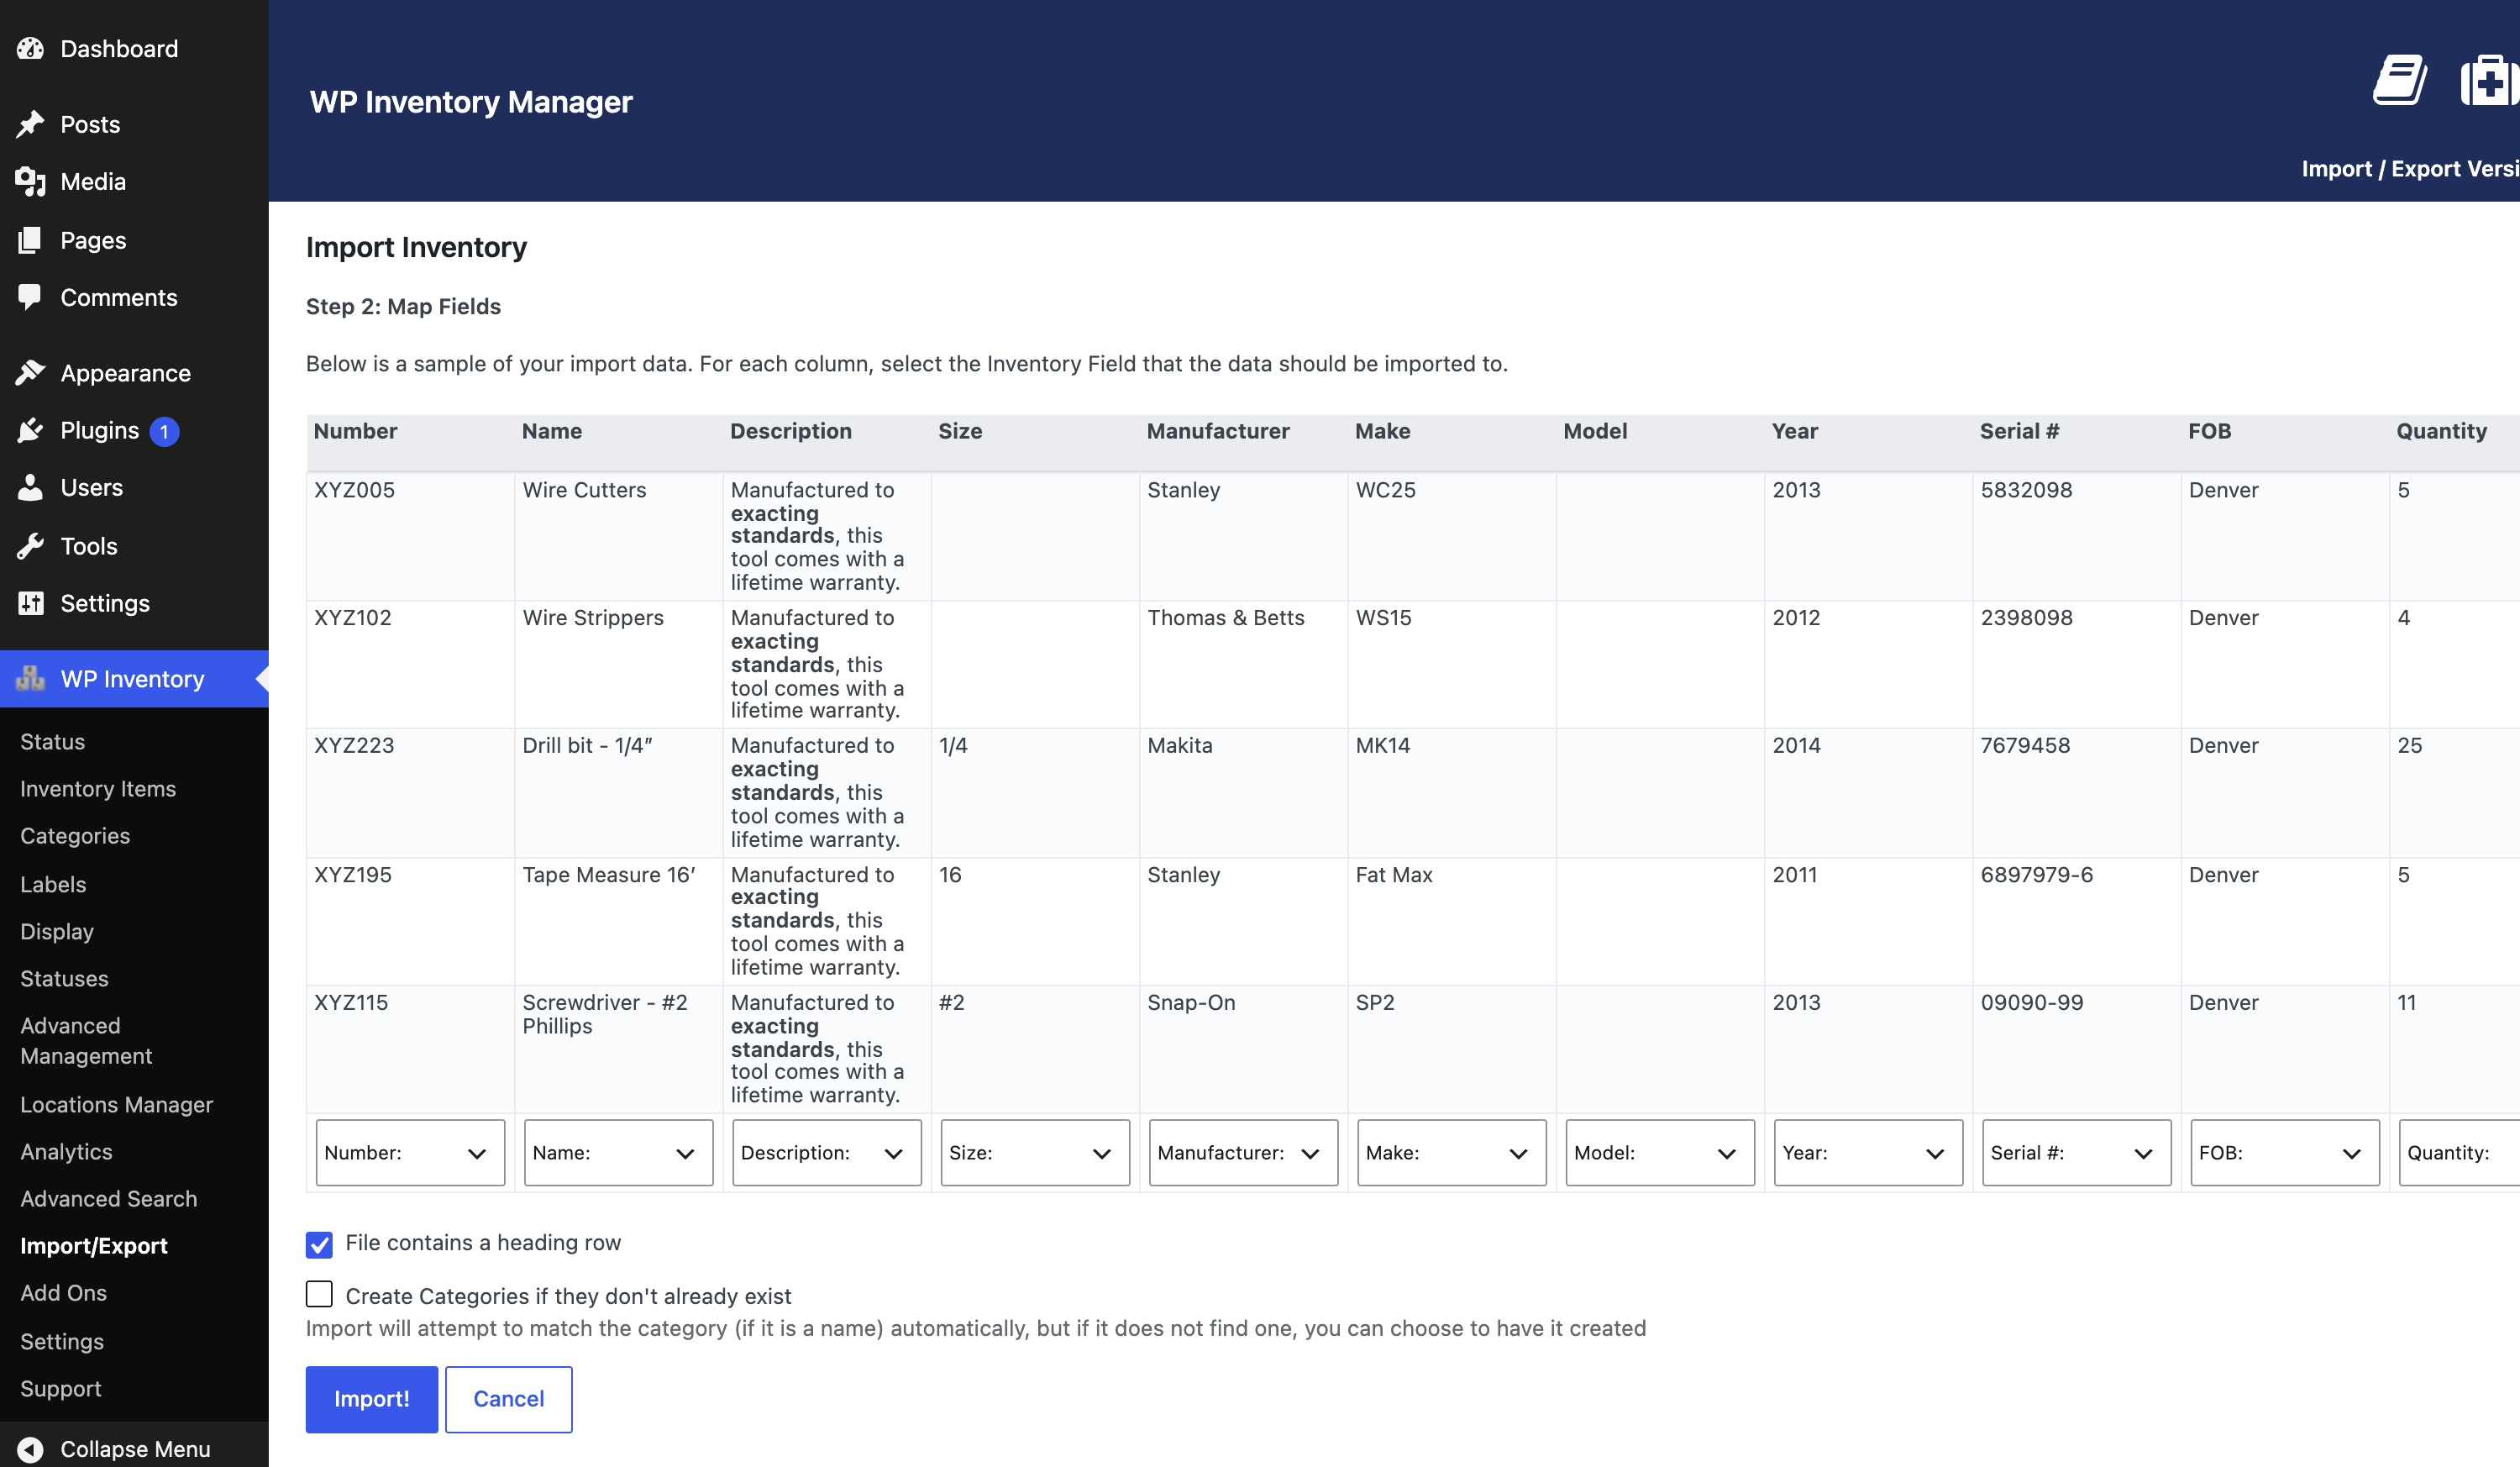
What the import and export add-on does
The export side works in reverse. Export your entire inventory to CSV with one click from the Import / Export screen, or export a subset by filtering the Inventory Items listing in your dashboard and clicking Export at the bottom, so a weekly backup, a price list for a supplier, or a stock count for the accountant is a filter and a click away. The file opens in Excel, Numbers or Google Sheets, and the same file can be imported again later, which is the simplest way to move an inventory between two WordPress sites or to migrate from the legacy version of Inventory Manager.
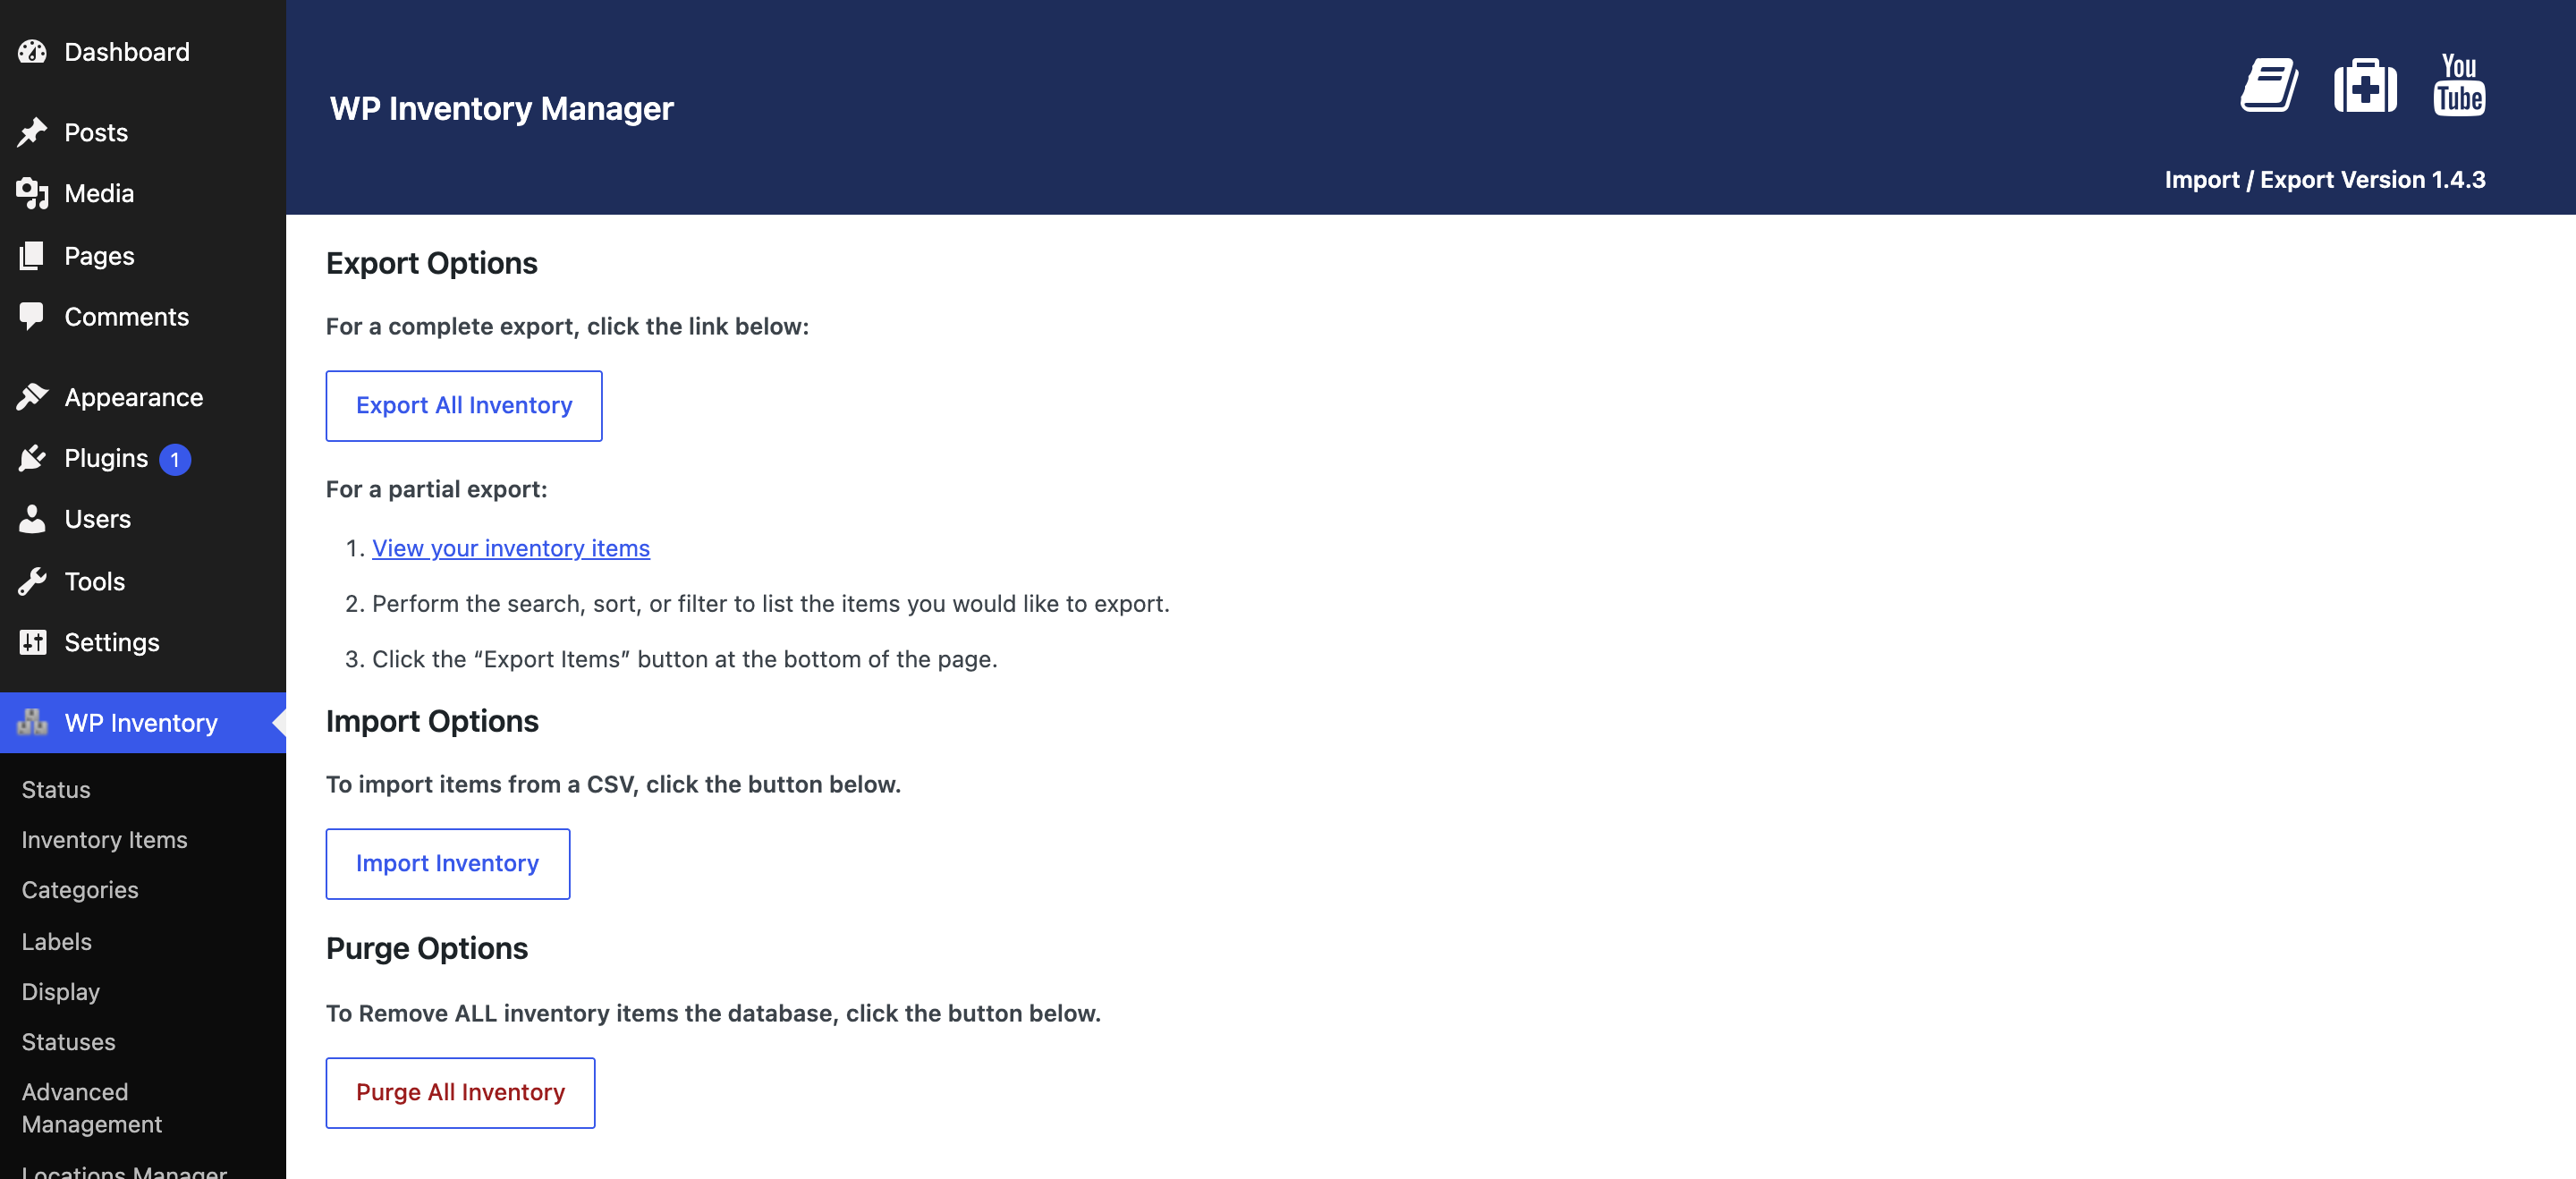
Imports are forgiving. A sample CSV ships with the plugin so you can see the supported columns, a heading row makes the mapping step almost automatic, and if a run goes wrong you can remove the items it created and start again. If you use the Advanced Inventory Manager, each inventory type imports from its own file so its custom fields map correctly, and the Bulk Item Manager is the natural companion for cleaning up prices or names once the data is in. For a step-by-step walkthrough of preparing a spreadsheet, see our guide to importing inventory into WordPress from a CSV file; the documentation covers every option, and there is a short demo on YouTube.
(Note: This add-on requires a licensed copy of the WP Inventory Manager)
