Turn your inventory into a shopping experience
Allow your users to reserve multiple items at once
Note: To actually take money, you also need to have the free Stripe.com extension installed and configured.
Want to turn your inventory database into a more traditional e-commerce experience? Then you need the Reserve Cart add-on. This tool allows your users to fill up a virtual shopping cart as they browse through your inventory, and then reserve everything all at once. You can either utilize the instructions below, or follow along with this video tutorial:
Installation
- Purchase and Download the Reserve Cart add-on.
- Install the add-on through your WordPress dashboard by navigating to the “Plugins” tab.
- After browsing and uploading the ZIP file, activate the plugin.
- Enter your license key on the settings page.
Adding Items to Cart
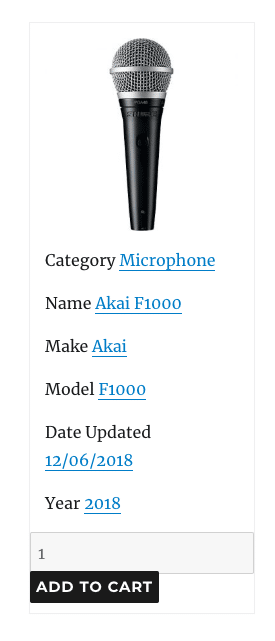
As soon as your add-on is activated, users will be able to add inventory items to their cart on the front-end. This can be done anywhere the inventory is displayed: inventory listings using the display shortcode, search results, or individual product detail pages. Each product will now have a quantity field and an “Add to Cart” button appended to their listing. The exact location these buttons are displayed can be managed in the settings, detailed in the Reserve Cart Settings section below.
The Checkout Process
There are a few settings and elements necessary to prepare the checkout process:
- Set your cart-specific Display settings. This is done the same way as detailed in the Quick Start Guide.
- Create a page in WordPress you want to use for checkout, and include the checkout shortcode on that page: [wpinventory_checkout]
- Specify the Checkout URL in the Reservation Cart settings under the Reserve tab in your WP Inventory settings.
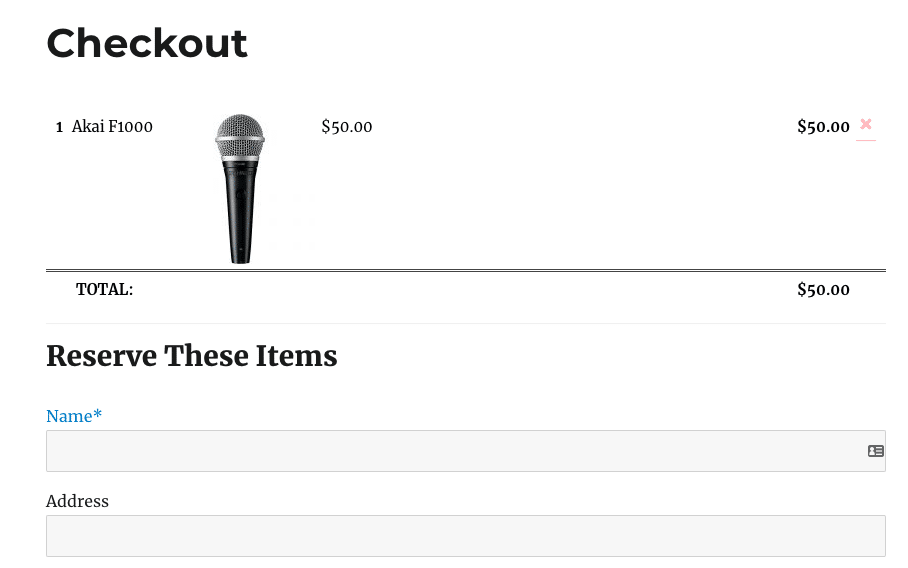
Once you’ve finished these three steps, the checkout will be available on the same page created in step 2. The cart will be above the typical reservation form used for single items, but when submitted reservation requests will be submitted for all items in the cart.
Reservation Cart Settings
There are several settings you can use to configure and customize the reservation cart, found in the Reservation Cart section under the Reserve tab on the WP Inventory settings page.
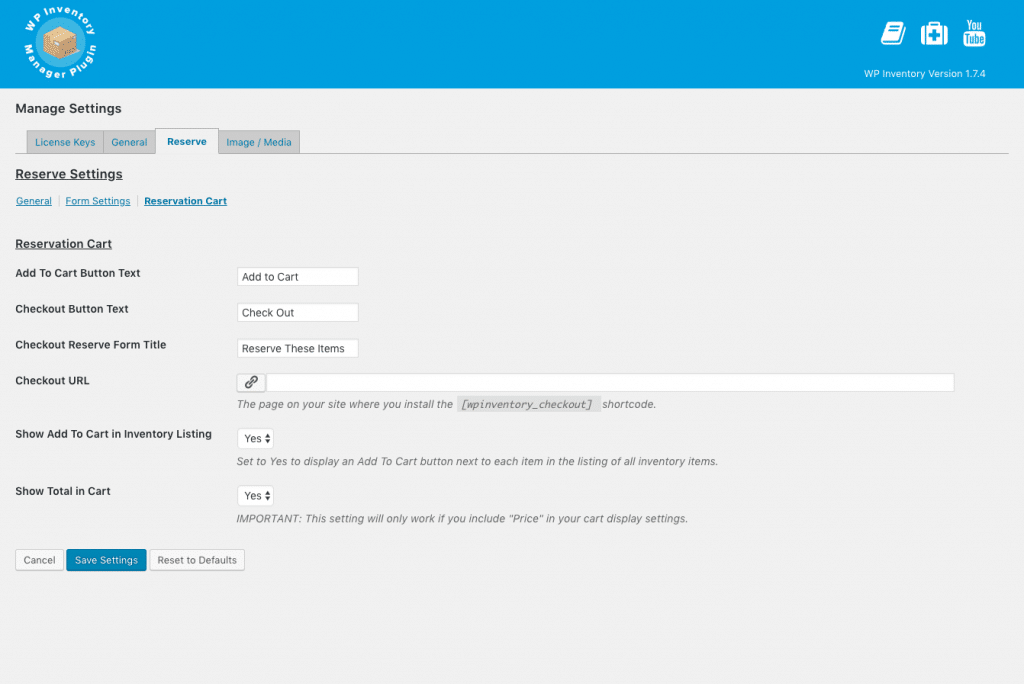
- Add to Cart Button Text – Allows you to customize the text of the “Add to Cart” button
- Checkout Button Text – Allows you to customize the text of the “Checkout” button
- Checkout Reserve Form Title – Allows you to customize the title of the reservation checkout form
- Checkout URL – The page where the [wpinventory_checkout] display shortcode is installed, where your checkout will be available to users.
- Show Add to Cart in Inventory Listing – If enabled, this setting will allow users to add inventory items to cart from the inventory listing page and search results.
- Show Total in Cart – If enabled, this setting will show the total sum of all inventory items in a user’s cart. Please note, this will only work if the “Price” field is included in your cart-specific display settings.
