Advanced Inventory Manager
Categorize your inventory to create an expansive database
If you have many different Types and categories of inventory items, you the Advanced Inventory Manager (AIM) add-on. This tool allows you to create different “Types” of inventory, with completely customized fields. For instance, you wouldn’t give the same attributes to a hammer as you would to a refrigerator. With AIM, you can eliminate confusion and expand the capabilities of your inventory database. You can utilize the instructions below, or follow along with this tutorial video:
Installation
- Purchase and Download the Advanced Inventory Manager add-on.
- Install the add-on through the WordPress dashboard by navigating to the “Plugins” tab.
- After browsing and uploading the ZIP file, activate the plugin.
- After entering the license key, there will be a new link under the WP Inventory tab in the dashboard called “Advanced Management.”
Adding New Inventory Types
- Navigate to the “Advanced Management” page of WP Inventory Manager.
- Click the “Add Type” button at the top right of the page
Once clicked, the button will bring up a form with a set of fields corresponding to the default inventory item attributes. The Type can be named at the top of this form, and the attributes of the Type are customizable below. New attributes can also be added using the “Add Field” button at the bottom right of the page.
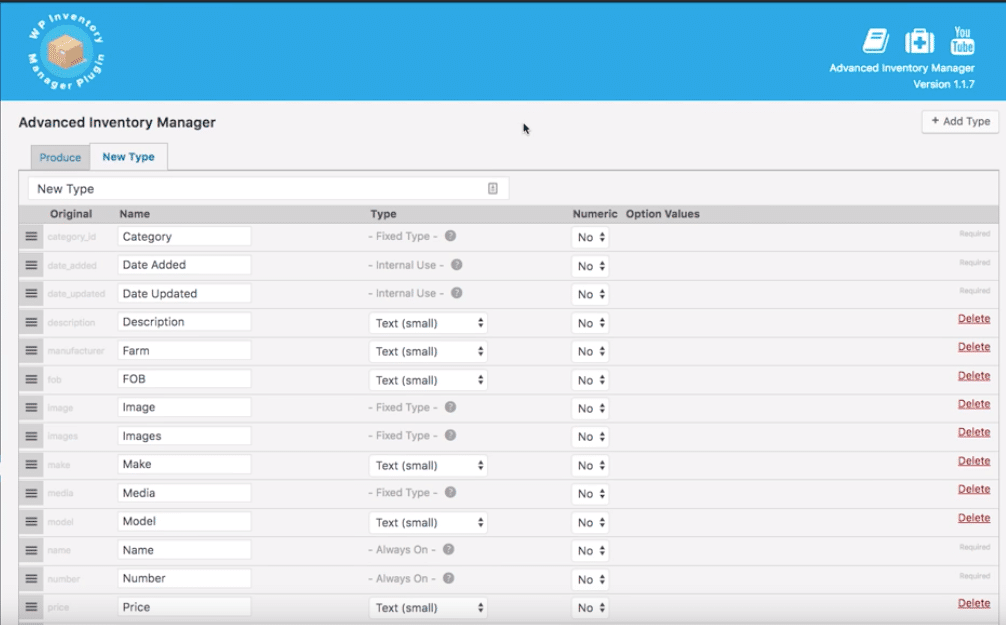
- Original – The default name of the field. This cannot be changed. New fields will have the word “custom” in this column.
- Name – The name of the field that will display in all places on both the backend and frontend of the website. This can be used to rename default fields or give a name to new, custom fields.
- Type – A dropdown choice between a small Textbox, a large Textarea, a Number, a Dropdown / Select, or a Radio select. The option values are set in the Option Values column.
- Numeric – A Yes/No selection as to whether the attribute is exclusively numeric.
- Option Values – The defined choices available in the item creation form when the Type of attribute is either a Dropdown or Radio selection.
- Delete – Aside from a few foundational attributes, most attributes can be deleted if they are unnecessary by clicking the button in this column.
Finally, be sure to set the Display settings for the new Type. This can be done either by clicking the “Manage Display Settings” button at the bottom of the page or navigating to “Display” in the WP Inventory Manager menu. This is done in the same way as detailed in the Quick Start Guide.
Categorizing Inventory Items
Once Types have been created, when trying to create inventory items, the first option provided (before anything else is available) is setting the Type of the item.
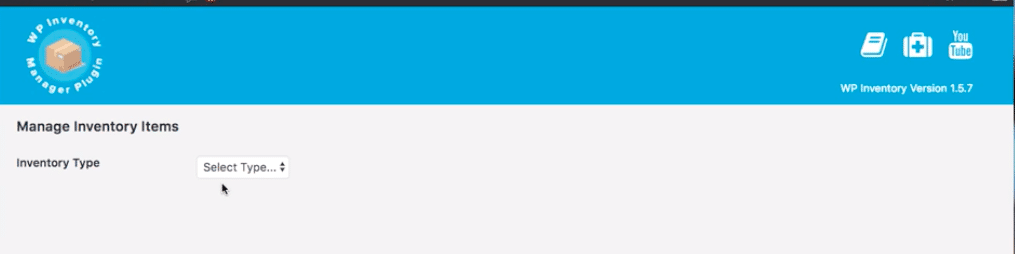
Once a Type is assigned, the rest of the fields will become available. The fields available, as well as their names, are determined by the attribute settings defined in the Adding New Inventory Types process.
Filtering Inventory Items by Type
On the Manage Inventory Items page, there are now several tabs above the list of inventory items. The All tab displays all items in the database, but each new Type added will create a new tab here that only lists items in the corresponding Type.
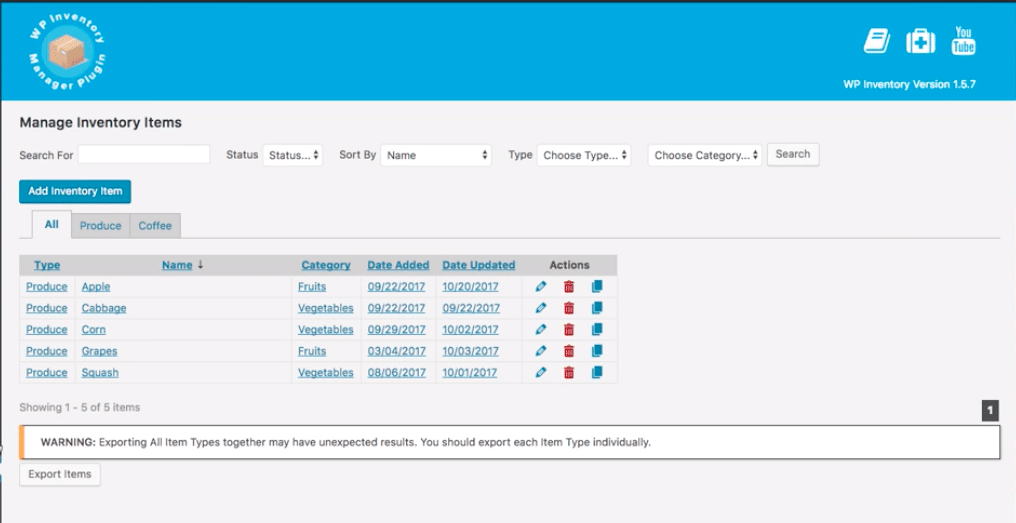
Similarly, on any page where the display shortcode is used, the user can now search and filter the inventory listings by any available Types.
Advanced Inventory Manager Settings
There are a few options specific to the Advanced Inventory Manager add-on available in the “Advanced Item” tab of the Settings page.
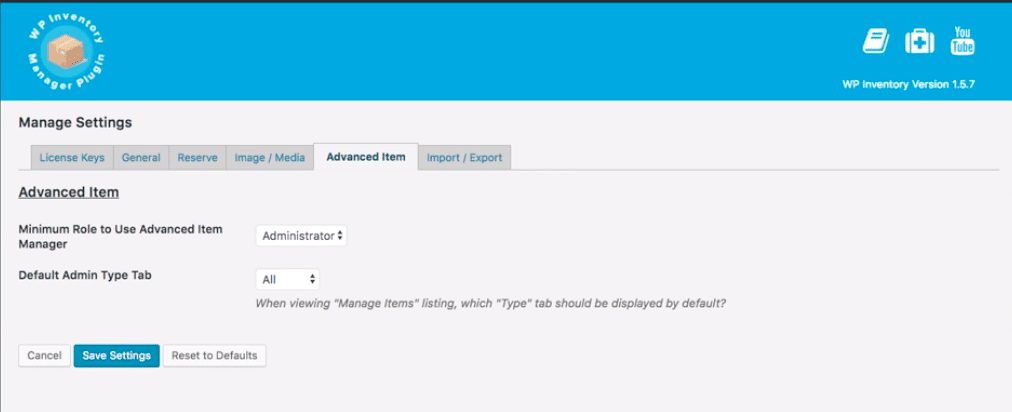
- Minimum Role to Use Advanced Item Manager – This sets the role that a user must have to create new Types and manage Type settings.
- Default Admin Type Tab – When viewing the “Manage Items” listing, this setting determines which “Type” tab is displayed by default. The default value is All inventory items, but it can be set to only show a specific Type of default.
