Adding inventory
Inventory items can be added and edited by clicking on the “Inventory Items” menu item in your dashboard. From there, you will see a screen that looks like the screenshot below. When you add any inventory items, they will automatically display in the table at the bottom. If you have numerous inventory items, you can search for specific ones with the fields above.

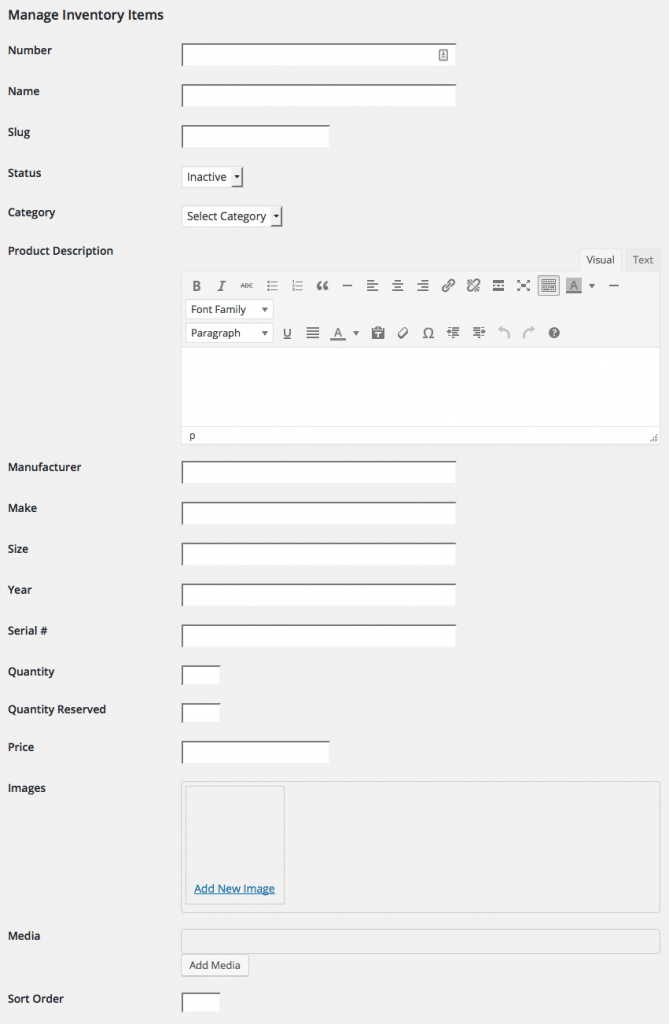
To add an item, simply click the “Add Inventory Item” button. You’ll be taken to a page that allows you to enter information to create your first item. Once you’ve finished, feel free to add as many items as you want, there is no limit. Below is what the form will look like where you can enter the information, with your own custom settings and labels displayed. For an in-depth breakdown of the fields, please refer to this page.
Congratulations, the WP Inventory Manager plugin is now configured for your use! Let’s move on to displaying your new inventory items using the shortcode.
