WP Inventory Settings
A complete and comprehensive guide
When you first arrive at the settings page you will be presented with a page that looks like this:
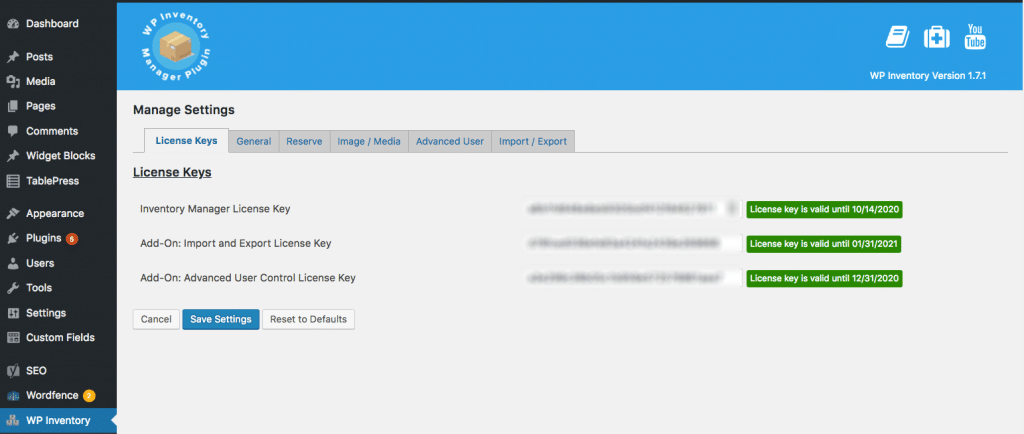
This screen itself is where you enter the license keys to activate WP Inventory Manager, as well as any extensions you have installed. However, at the top of the page, you’ll find a menu where you can find many more settings broken down by section. Let’s break each section down and describe what each setting does.
- General Settings
- Permission Settings (see image reference)
- Minimum role to add/edit items – This setting allows you to set what level of user your site must be in order to actually interact with the inventory aspect of your website. Where an editor by WordPress standards would have a great deal of power over normal WordPress content, checking administrator on this page will make it so only administrators have privileges to add or delete inventory items. Essentially your staff can see the inventory and all its information, but would not be able to make any additions or subtractions surrounding it.
- Allow users to edit – For this setting, you choose between “Any Items,” which allows users to edit the entire inventory, or “Only Their Own Items.” For example, if “Bob” went to an inventory item that was entered by “Ted”, then “Bob” would be able to see that item and its information, but would not be able to change that information. The only person that could do that would be “Ted.”
- Item Display Settings (see image reference)
- Use SEO URLs – By default, the plugin uses the inventory ID in order to display the inventory item. So a link would look something like: www.yoursite.com/inventory/?inventory_id=3. If you want that to have SEO value for search engines, you would want it to have more meaning. That is what the SEO URLs setting does. Ticking it to “yes” will make it so the URL uses the inventory name. So when it is being used, that same link above would look like this now: www.yoursite.com/inventory/product-name/. This gives the URL relevance, readability, and adds to the organization of your website.
- SEO End-point – This allows you to tell the URL structure what folder you want it coming off of. For example, setting this end-point to “shop” will produce a link that looks like such: www.yoursite.com/shop/product-name/. The end-point will be the point in the URL where all products are directed off of. This is highly valuable for SEO.
- Shortcode on Home? – If you’re using the WP Inventory display shortcode on your home page, enable this setting to ensure proper functionality.
- Theme – WP Inventory Manager comes with a default theme for a basic display of your inventory items on the front-end. If you’d rather use CSS to create your own page display, choose “No Theme.”
- Use Media Fields – This allows you to turn off the ability to add any media types other than basic images. Turning it on will do the reverse, allowing you to accept all types of media. Types of media include, but are not limited to, videos, file documents such as PDF or Word Docs, downloadable files, etc.
- Items Per Page – On the listing page, this is the number of items to show before the pagination occurs. By default, it is set to display 20 items on the listing page before it makes another page to display the next set of 20 items.
- Hide Items Low Quantity – This allows you to unlist inventory items when the quantity dips below a specified threshold. In the admin listing, items below the low stock threshold will display with a red background.
- Hide Items Below Quantity – This is the threshold for the “Hide Items Low Quality” setting.
- Date Format Settings (see image reference)
- Date Format – This allows you to choose from various different date display options for your inventory items. Choose one that fits your needs or preferences.
- Time Format – This allows you to choose from various different time display options for your inventory items. Choose one that fits your needs or preferences.
- Currency Format Settings (see image reference)
- Currency Symbol – This is the symbol you want to use to denote the type of currency your inventory items are in.
- Currency Symbol Location – Allows you to format the position of the currency symbol, either before or after the numbers of the price.
- Currency Thousand Separator – This setting allows you to choose what symbol you want to use for thousands differentiation in the price. The default value is a comma.
- Currency Decimal Separator – This setting allows you to choose what symbol you want to use for the decimal place in the price. The default value is a period.
- Currency Precision (decimal places) – This setting allows you to choose how finite you would like to set your pricing. The global standard is two decimal places. However, there may be special cases as not all cases are the same. For that reason, it may be necessary to have more control over the budget of inventory items.
- Search Settings (see image reference)
- Include Inventory in Search – Enabling this setting will return a result for your product inventory which leads to a specified page when a user uses the search functionality of your website.
- Search Results Link to – This is the specified page that will be linked for the inventory search result. You can choose any page that contains the WP Inventory Manager display shortcode.
- Permission Settings (see image reference)
- Reserve Settings
- General Settings (see image reference)
- Allow Visitors to Reserve Items – This setting will allow you the ability to allow users to reserve items or not. A user can give his/her information and reserve a specified quantity of the inventory item.
- Ask for Quantity When Reserving – This allows the user to specify the quantity when they are reserving an inventory item. Can be disabled to allow vendor-decided quantity.
- Decrease Qty in System on Reserve – If enabled, this setting will automatically decrease the quantity of an inventory item when a user reserves it.
- Send-to Email When Reserve – This allows you to specify an email address to send notifications to when a user reserves an inventory item. If left blank, it will default to the site admin email address.
- Send Reserve Confirmation – If enabled, this will send a notification to the user when they reserve an inventory item.
- Reserve Message – This allows you to customize the message that is displayed on the web page when a user reserves an inventory item.
- Form Settings
- These settings allow you to customize the reserve form that the user fills out to reserve an item. You can determine the form title, field titles, whether a field is required or not, and button text.
- General Settings (see image reference)
- Image / Media Settings
- Image Settings (see image reference)
- Placeholder Image – This allows you to set a default image for your inventory items when no other image is specified.
- Clicking Image Displays Larger Image – When enabled, this setting will add a link inventory item images on the listing page that will display a larger version of the image.
- Open Media in New Window – This setting allows you to determine whether inventory item image files will open in the same tab or a different browser window.
- Rebuild Image Thumbnails – When you change a product image size via media settings, etc., then it is necessary to rebuild or re-generate that thumbnail or image to be used in place of the previous one.
- Slideshow Settings
- This page allows you to customize the media file slideshow for inventory item listings. You can customize the slide speed, whether the slideshow is automatic or not, captions, size, and more!
- Image Settings (see image reference)
Any new extension you install (e.g. Advanced User Management or Import / Export) will create another tab on the settings page for the add on-specific settings. These will be covered more in depth in their specific section of the documentation. Next step, Labels!
