Default Theme Setup

Default Theme Setup

If you choose to use the default theme there are a few things you need to know.

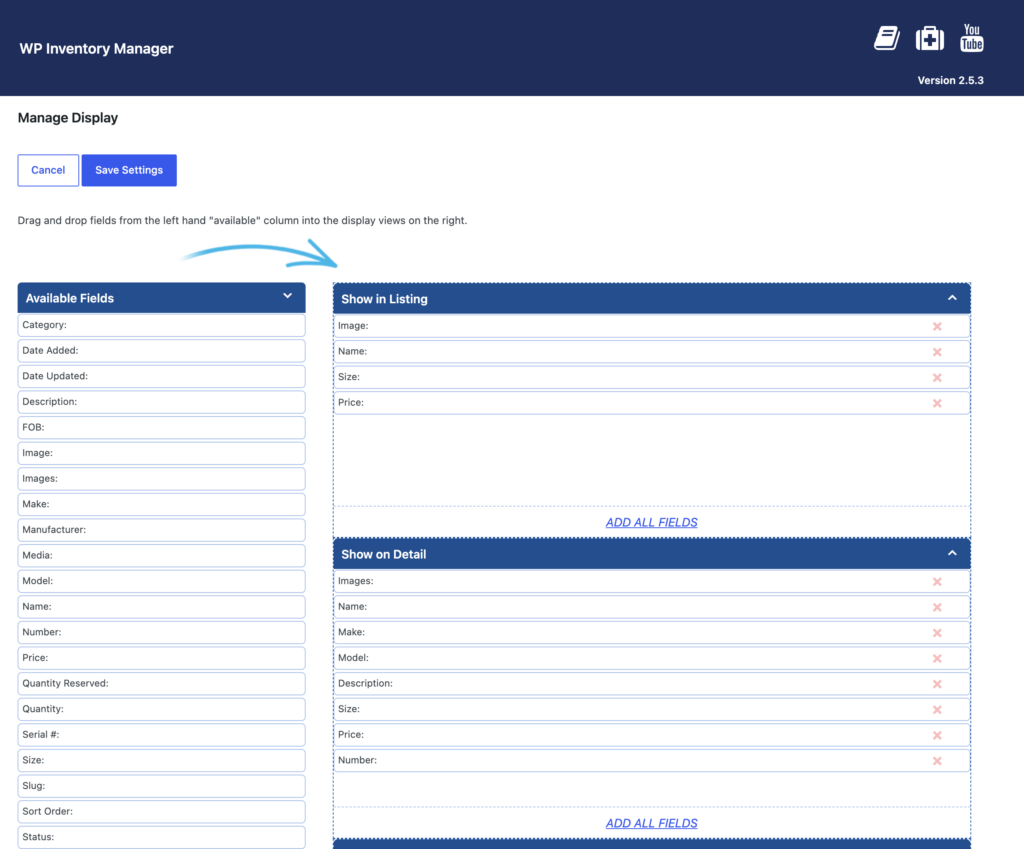
  1. Under the “WP Inventory” tab you need to go to “Settings”.  Then, the tab “General”.  Then the sub-tab “Item Display”.
  2. For the “Theme” option, select “Default Theme”.
  3. Now on the “Display” page you need to set the image or images at the top of the “Details” page settings if you want the two column display.  The system looks for the image or images field at the top of the list and if it is there, it lays-out the image/images to the left and all other fields to the right.  If you do not set the image or images at the top, it will layout in a single column.
  4. In addition, as an option, you can put the “Make” and “Model” field side by side if they come together in the sequence.  So in your display settings if you drag the “Make” field in, and then “Model” directly under it, the system will put them on one line separated by a ” – “.  Here is an example of what the page may look like once you take these actions:
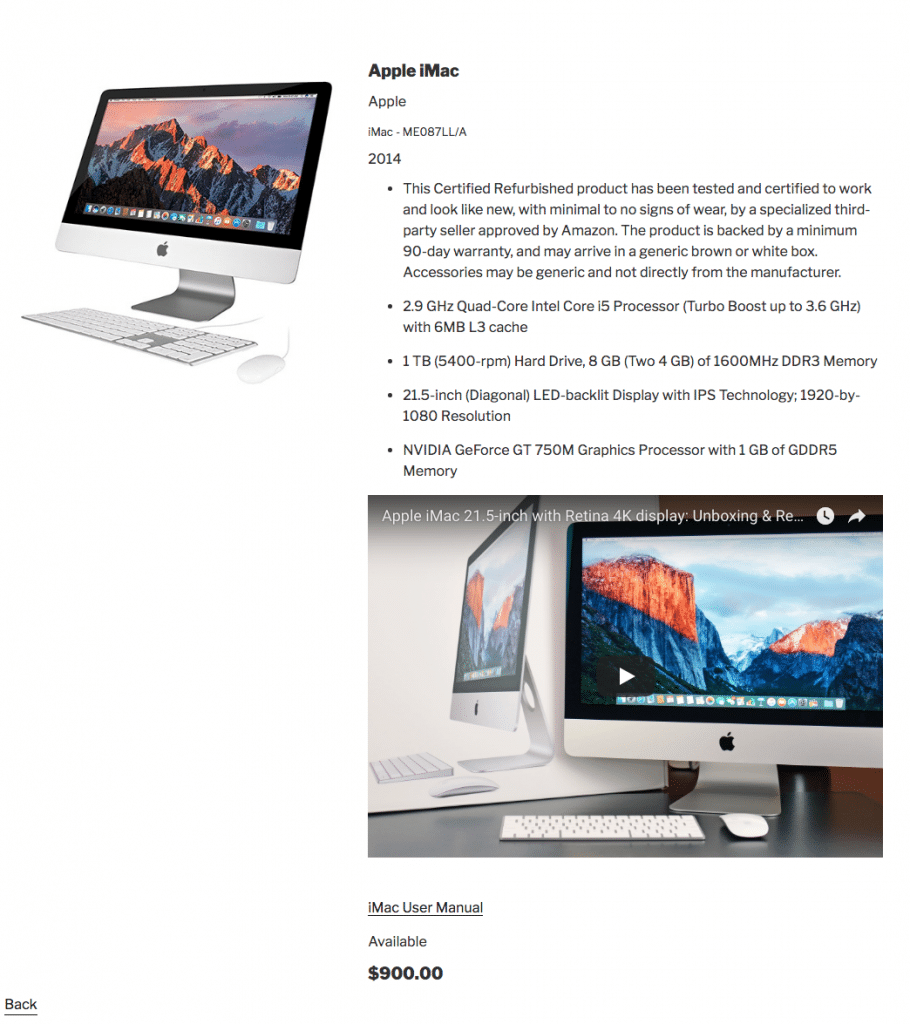
Default Style Options

Default style options

The WP Inventory Manager comes with a standard set of styling options. If you choose not to use our styles, you can turn them off in the settings. Our styles are meant for layout only and we try very hard not to do anything that will interrupt your theme’s styles. We don’t set font sizes, colors, and keep all styles contained within our html wrapper. Most of the styles revolve around the detail page layout to support a two column design. To achieve this, make sure that the image or images field is the first item in the display settings list here:

The Manage Display screen with Images first in the Show on Detail list, followed by Name, Make and Model

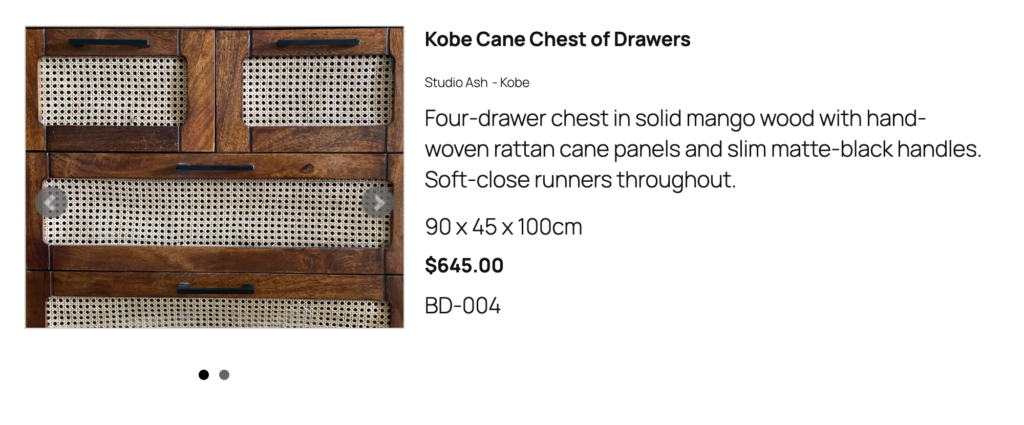
This would result in the details page looking like this:

An item detail page on the front end: image slideshow on the left, name, make and model, description, size, price and number on the right, without labels


Where the images are on the left, and all the rest is on the right.

Note: See how “Studio Ash” and “Kobe” are side by side? That is the “Make” and “Model” fields. If they are, put one after the other as they are in the screen shot label settings above; then they will display inline like this.

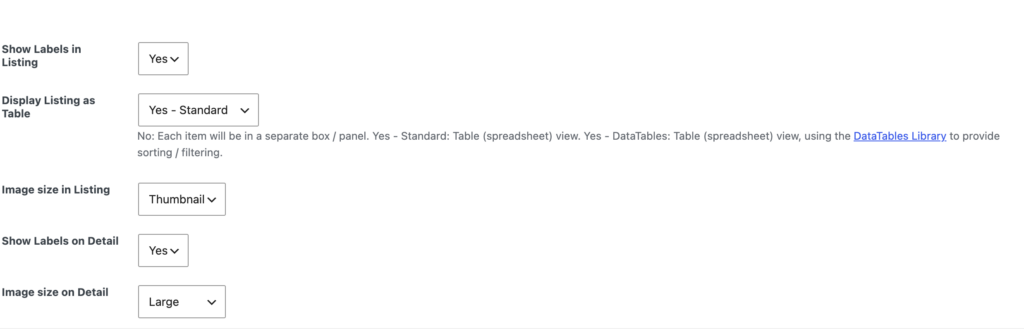
And lastly, if you want to make the labels show up with these, you just have to navigate to your Display settings page again and scroll down to the bottom. You will want to set the setting “Show Labels on Detail” as depicted in this screen shot:

The display settings with Show Labels on Detail set to Yes

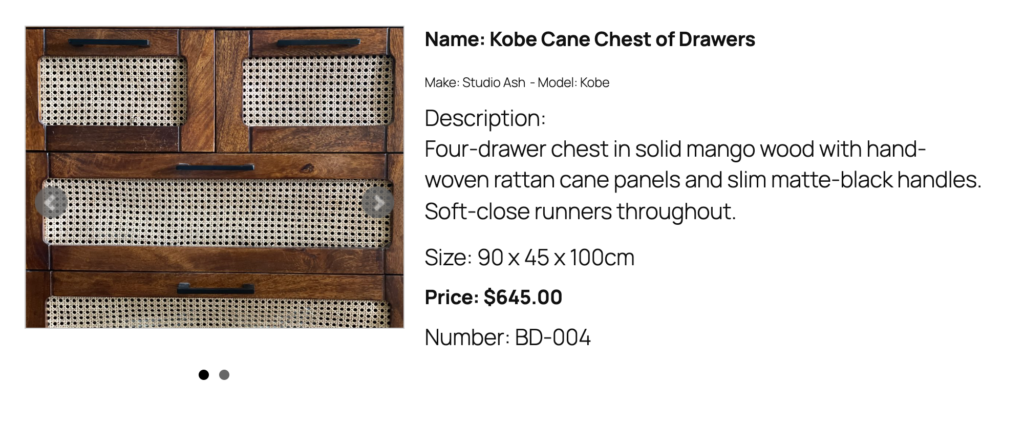
And after you save, you can go back to the front end. Refresh and it will now look like this:

The same item detail page with Show Labels on Detail turned on, so each field is prefixed with its label

30-day money-back guarantee

Reviews on WordPress.org

Trusted by 134,000+ businesses since 2013

★★★★★

"Created an online museum for my club. Really impressive plugin. Support was responsive and helpful."

@hackrepair

★★★★★

"Excellent, clean, simple inventory management. Well structured code — use it right away or customize it to your liking."

@techlocally

★★★★★

"We purchased the entire suite. Installation was easy, small issues were fixed immediately, and the guidance during setup was invaluable."

@design4dotcom

★★★★★

"Plugin support was helpful and rapid. Highest mark."

@drgar

★★★★★

"Great support. Very thorough when looking for a solution, and upfront with exactly how to fix it or institute a workaround."

@shoidahl

★★★★★

"I used this plugin and eventually hired the developers for all my WordPress work. Responsive, competent, and clean code. Would recommend to anyone."

@justenhong