Importing and Exporting Inventory Items
How can I import (or export) inventory?
You may be starting a new website and want to transfer all of your inventory items from the old one to the new one. You might want to keep a backup log each week, month, etc. of your inventory. Or, you may still be using the old Legacy version of Inventory and want to upgrade to the new version’s database structure. There are many reasons you may want to export and import as you can see, and we have made it fairly simple. You can either utilize the following instructions, or follow along with this tutorial video:
Installation
-
- Purchase and Download the Import and Export add-on.
- Install the add-on through your WordPress dashboard by navigating to the “Plugins” tab.
- After browsing and uploading the ZIP file, activate the plugin.
- After you enter your license key, there will be a new link under your “WP Inventory” tab in the dashboard called “Import/Export”, click it.
- You will see a page similar to this:
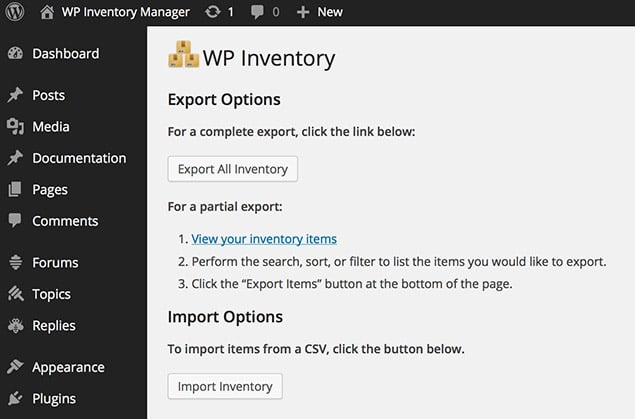
Exporting Inventory Items
- To perform a full export, simply click the “Export All Inventory” button, and all of your inventory data will be exported to a CSV file format (which can be opened with a variety of tools, including Microsoft Excel).
- To export only certain items, simply go to “WPInventory => Inventory Items, filter the items you want to export, and click “Export” at the bottom of the listing)
Importing Inventory Items
-
- First, check out the sample import file that is included in the plugin. It can be found inside the plugin folder, and is titled sample_import_file.csv. This file illustrates the various supported formats and columns.
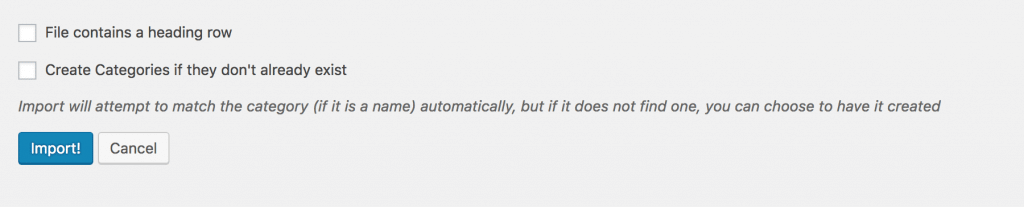
- When importing, you’ll be provided the opportunity to “map” the columns in your file to the fields that exist in the database. This is much easier to do if your CSV spreadsheet includes a row at the top with “Column headings” – the names of the columns that you want to map to.

- If you are importing categories, you have two choices:
- Ensure all categories exist in the system prior to importing, in which case they can be matched either by ID, or by name.
- Or, check the box to “create categories if not found”, and the categories will be created for you.
- If you do not need to import statuses, simply don’t include a status column, and all items will import as “active”. If you DO need to import statuses, please be sure that the statuses exist in the system, and that your “status” column matches properly. Just like categories, you can match EITHER by ID, or by name. Note that if a name is NOT matched, the system does not create the status, but rather will assign that item to the first “active” status that it finds in the system.
- If you are using Advanced Inventory Manager, and want to import multiple inventory “types”, the process is the same, however you will need to import each type in a separate CSV file so that the mapping can be performed properly.
- Remember – if you get an import wrong, you can simply start the import process again, and a notice will let you know that “there are X imported items already”, as well as give you an option to remove those items.
- To associate an image with item during import, first upload it to your WordPress media center, and then enter the link to that image as the data for an “Image” column in your CSV.
