Spreadsheets are often the right place to start managing inventory. Google Sheets and Excel are inexpensive, flexible and familiar. The question is when a spreadsheet stops being enough and when it makes sense to move to dedicated inventory management software.
This guide compares spreadsheet-based inventory management with a WordPress inventory system, explains the signs that you may have outgrown Excel or Google Sheets, and shows how you can continue using spreadsheets for imports and reporting after moving your main inventory into WordPress.
When a spreadsheet is enough for inventory management
Credit where due. For certain situations, a spreadsheet is the correct tool:
- Cost. Free, forever, no license renewals.
- Zero learning curve. Everyone on your team has used a spreadsheet.
- Total flexibility. Any column you can imagine, any formula you can write.
- Fast start. A working stock list exists ten minutes after you open a blank sheet.
If one person manages a relatively small inventory that does not need to appear on your website or connect to other workflows, a spreadsheet may be all you need. Sincerely. You do not have a problem a plugin needs to solve yet.
Signs you have outgrown spreadsheet inventory management
The trouble starts when the business grows past the sheet. The failure points are predictable.
It is not connected to your website
If your catalog, availability list or rental gear lives on a WordPress site, every spreadsheet edit is double entry. You update the sheet, then you update the site, and the day you forget one of them, they disagree. We wrote about the result in our out-of-sync inventory guide: nobody knows which number is right.
History gets overwritten
A spreadsheet cell shows the current value rather than a structured inventory transaction history. Google Sheets and Excel provide version-history tools, but reconstructing stock movements from document revisions is very different from maintaining a dedicated inventory audit trail. Version history in Sheets technically exists, but reconstructing stock movements from revision snapshots is nobody’s idea of a workflow.
Everyone edits everything
Spreadsheet permissions are primarily designed around files, sheets and ranges rather than inventory-specific responsibilities. As more people manage stock, controlling exactly who should update particular inventory records can become harder to maintain. There are no roles, no per-person limits and no record of responsibility.
No alerts
Low-stock alerts are not a native inventory workflow in a standard spreadsheet. You can build automations around Google Sheets or Excel, but that adds setup and maintenance that dedicated inventory software can handle directly. You find out when a customer asks for something you do not have.
What inventory management software adds beyond a spreadsheet
Moving inventory into a dedicated WordPress inventory system creates structured records and connects the inventory your team manages with the inventory your website displays. WP Inventory Manager keeps your inventory inside WordPress itself, which changes four things immediately:
- One source of truth. The list your team edits in the admin is the same list your website displays. Update once and both are current.
- Front-end display built in. A shortcode publishes your catalog to any page, filterable and searchable, with no copy-paste step.
- Accountability. WordPress user accounts provide controlled access, while optional inventory tools can add more granular permissions and inventory history.
- Alerts. Notifications. Optional inventory functionality can notify your team when quantities reach configured thresholds.
The trade-off is real: a plugin costs money past the free tier and asks you to learn a new screen. That is the honest price of moving from a private list to a system your team and website share.
Side-by-side comparison
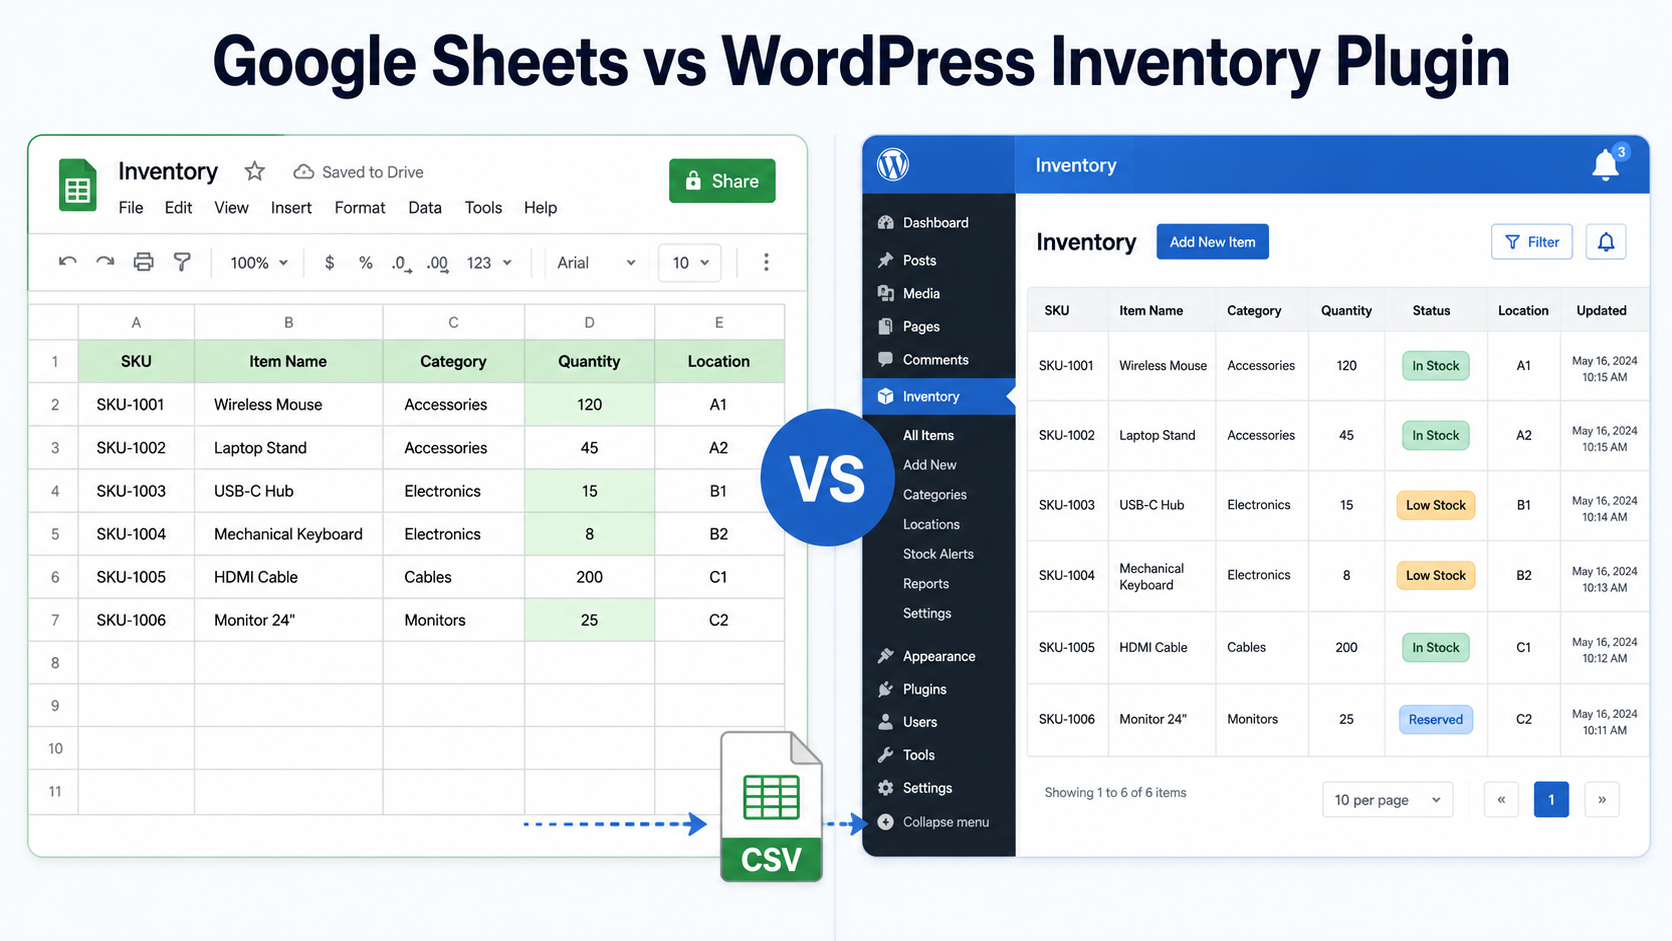
| Google Sheets | WP Inventory Manager | |
|---|---|---|
| Price | Free | Free core; optional paid licenses and add-ons |
| Setup speed | Very fast for a simple list | Requires initial configuration |
| Shows on your website | Possible through embeds or integrations | Yes, natively via shortcode |
| Multi-user control | File, sheet and range permissions | WordPress roles + Advanced User Control add-on |
| Stock history | Document version history | Change tracking (Pro), full ledger with costs and invoices (Ledger add-on) |
| Low-stock alerts | Requires custom automation | Available with inventory notifications |
| Flexibility | Unlimited formulas | Custom fields cover most needs |
You can keep using spreadsheets after moving to WordPress
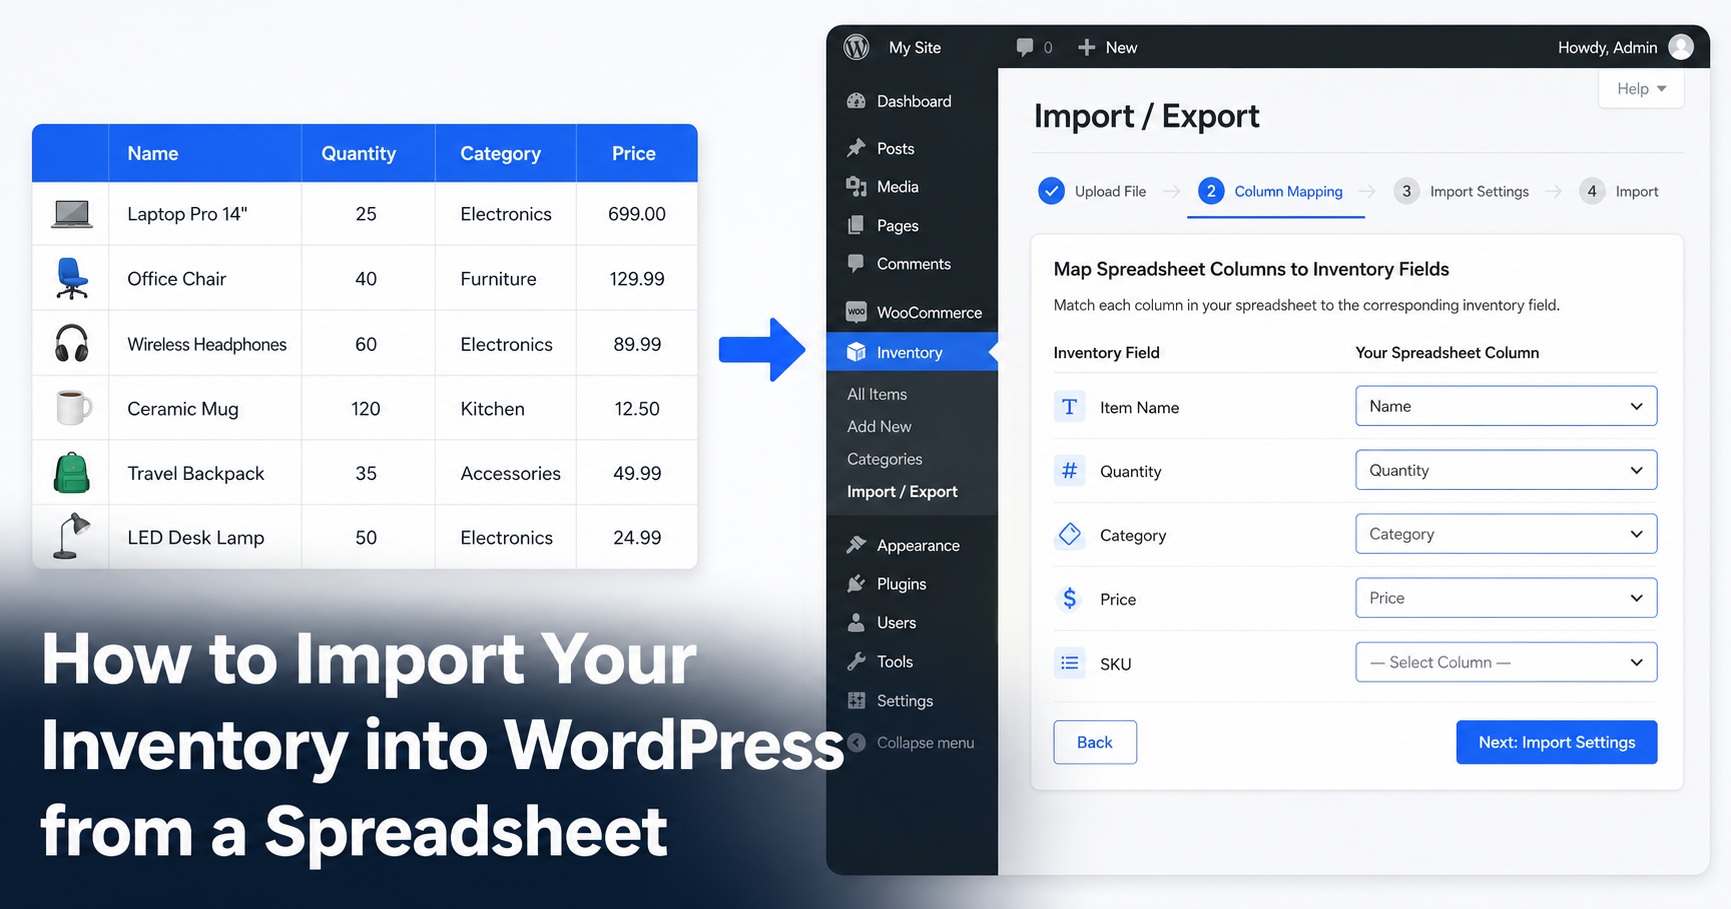
This is not a divorce. The Import/Export add-on connects the two worlds through CSV, which Google Sheets speaks natively.
- Build in Sheets, run in WordPress. Download your sheet as CSV and import it. Fields map automatically, categories are created on the fly and image URLs in your sheet are fetched remotely.
- Report in Sheets. Export all inventory, or just items matching a search, back to CSV whenever your accountant or board wants a snapshot.
- Undo button included. Imports can be rolled back, so a bad CSV does not wreck your catalog.
Step-by-step instructions live in our import tutorial and the Import/Export documentation.
If you are ready to move beyond a spreadsheet, see our complete guide to managing inventory in WordPress without WooCommerce.
Frequently asked questions
Not live. WP Inventory Manager exchanges data with Sheets through CSV files using the Import/Export add-on: download your sheet as CSV and import it, or export inventory back out for reporting. There is no real-time sync, which for most catalogs is a feature: your website is not one accidental cell edit away from being wrong.
Common signs include multiple people managing inventory, needing inventory data to appear on your website, difficulty understanding past quantity changes, or managing stock across several locations. These do not automatically mean you need dedicated software, but they are good reasons to evaluate whether a spreadsheet still fits your workflow.
No. Export your sheet as CSV and the Import/Export add-on maps your columns to inventory fields automatically, creates categories as needed and can even fetch images from URLs in your sheet. Imports are also reversible via rollback.
Sometimes it is. One person, a small catalog and no website display is a fine fit for Sheets. The free version of WP Inventory Manager exists precisely so you can test the switch without spending anything.
Yes. Export all inventory or a filtered subset to CSV at any time and open it straight in Google Sheets or Excel. Many businesses run WordPress as the source of truth and Sheets as the reporting layer.
When to move from a spreadsheet to WordPress
You do not need to abandon spreadsheets entirely. WordPress can become the primary inventory system while Excel or Google Sheets remain useful for imports, exports, analysis and reporting. Start with the workflow that is becoming difficult to manage, then decide whether moving the inventory itself into WordPress solves it.