Author Archive

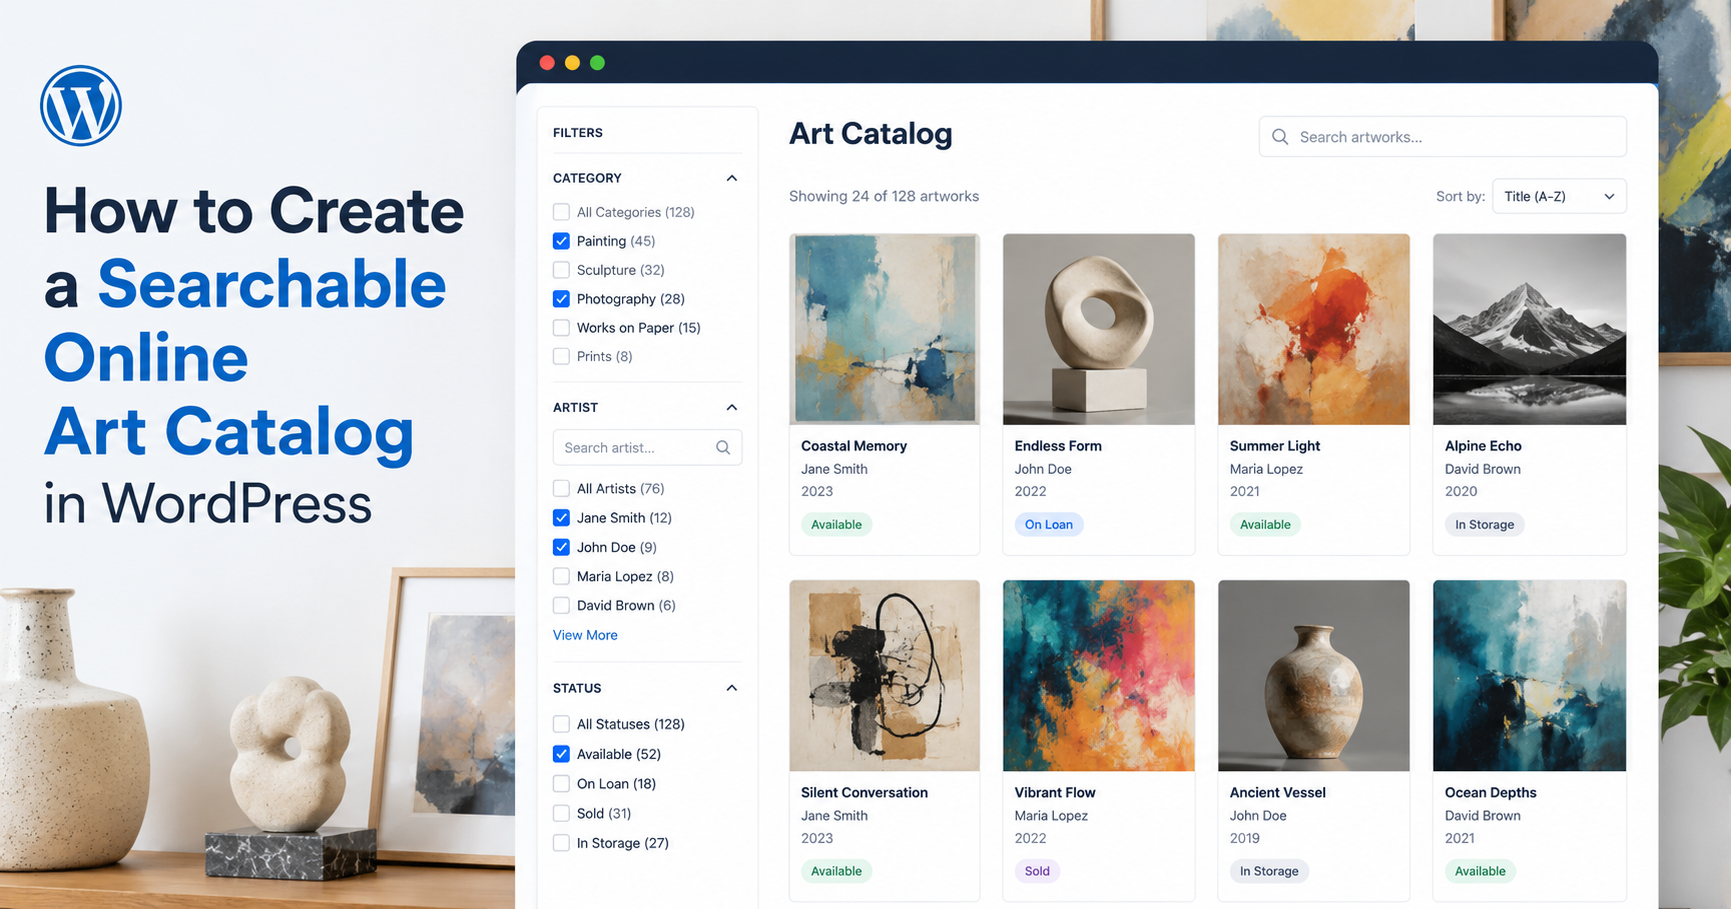
How to Create a Searchable Online Art Catalog in WordPress

An art collection becomes hard to manage long before it becomes large. The moment you have works in storage, on display, sold, loaned or spread across different locations, a spreadsheet starts turning into a liability.

For a small gallery, private collection, studio or cultural organisation, the problem is usually not storing the data. It is keeping the inventory useful.

You need to know where each work is, who created it, whether it is available, which collection it belongs to and which details should appear publicly. Ideally, the same records your team maintains internally should also power the catalogue visitors browse on your website.

If your site already runs on WordPress, you can do both without maintaining a separate gallery database.

This guide walks through how to create a searchable online art catalogue using WP Inventory Manager.

Start with one inventory record per artwork

The basic principle is simple: each artwork becomes one inventory item.

In your WordPress admin, go to WP Inventory > Inventory Items and create a record for each work.

A useful starting structure looks like this:

  • Inventory number: Your internal reference or accession number.
  • Name: The title of the artwork.
  • Description: Notes, provenance, exhibition history or public description.
  • Manufacturer: This can be renamed to Artist if you prefer.
  • Year: The year the work was created.
  • Size: Dimensions of the piece.
  • Price: Useful for commercial galleries, even if you do not display it publicly.
  • Inventory status: Available, Sold, On Loan, In Storage or another status that matches your workflow.

WP Inventory Manager lets you rename the default field labels under WP Inventory > Labels, so the terminology can match the way your gallery already works.

Example: A small contemporary gallery has 420 works from 34 artists. Instead of forcing the collection into generic product fields, it renames Manufacturer to Artist, Size to Dimensions and Inventory Number to Artwork ID. The underlying inventory system stays the same, but the admin interface now matches the language the team already uses.

Create fields that describe the artwork properly

The default inventory fields cover the basics, but art catalogues usually need more context.

You might want to record:

  • Artist
  • Medium
  • Dimensions
  • Year created
  • Edition number
  • Collection
  • Condition
  • Frame status
  • Provenance
  • Acquisition date
  • Insurance value
  • Current location

For more structured catalogues, the Advanced Item Manager add-on lets you define custom item types and fields rather than forcing every collection into the same template.

That becomes especially useful if you manage different kinds of objects.

A gallery might have paintings, sculptures and prints, while a museum might also have furniture, documents or archival material. Each type can carry the fields that actually matter to it.

Organise artworks into categories and collections

Categories give visitors and staff a simple way to move through a large catalogue.

You can use them for:

  • Painting
  • Sculpture
  • Photography
  • Works on Paper
  • Limited Editions
  • Current Exhibition
  • Permanent Collection

Go to WP Inventory > Categories to create the groups you need, then assign each artwork to the relevant category.

You can also create dedicated catalogue pages for specific collections rather than putting every work on one enormous page.

For example:

[wpinventory category=”Photography”]

That page now displays only photography.

Another page could show paintings:

[wpinventory category=”Painting”]

This is useful for visitors, but it also gives you cleaner pages that can rank independently for specific parts of your collection.

Track where every artwork actually is

Location becomes one of the most important fields once a collection stops living in a single room.

A work might currently be:

  • In Gallery A
  • In storage
  • At an external exhibition
  • With a collector on approval
  • On loan to another institution
  • At a restoration studio

The Locations Manager add-on lets you associate inventory with specific locations rather than writing the location into a free-text note.

That makes the data easier to search and update.

Example: A gallery operates one public space and two storage rooms. A sculpture moves from Storage B to the main exhibition floor. Instead of editing a description and hoping everyone sees it, the team updates the location attached to the inventory record. Anyone checking the item now sees the current location.

Add images to every artwork record

An art catalogue without images is not much of a catalogue.

Each inventory record can include artwork images, so the same record used internally can also appear as a visual item on the public side of the site.

For consistency, photograph works using the same basic setup where possible:

  • Use a neutral background.
  • Keep the main artwork centred.
  • Use similar image proportions across the catalogue.
  • Keep filenames descriptive rather than using camera-generated names.
  • Include detail shots when condition or texture matters.

The inventory page can then function more like an online collection than a spreadsheet.

Publish the collection on your WordPress site

Once the records are in place, the catalogue can be displayed on the front end with the standard inventory shortcode:

[wpinventory]

This is where WordPress becomes particularly useful for galleries.

You are not maintaining one internal inventory system and then manually recreating selected works on your website.

The inventory itself can power the public catalogue.

You can decide which fields appear, how the item pages are laid out and whether visitors see everything or only a selected collection.

For a broader overview of this setup, see our inventory management solution for galleries.

Add search and filters for larger collections

Once a catalogue reaches a few hundred works, browsing category by category is usually not enough.

Visitors may want to narrow the collection by:

  • Artist
  • Medium
  • Year
  • Collection
  • Availability
  • Condition

The free version of WP Inventory Manager includes a filter bar for keyword search, category, status and sorting.

For more advanced filtering, the Advanced Search Filter add-on lets you expose fields as checkbox or dropdown filters.

That gives you the familiar catalogue experience where visitors can select several criteria and narrow the results without manually opening dozens of artwork pages.

If you want the full setup, see our guide on adding search and filters to a WordPress inventory list.

Keep internal information off the public catalogue

Not every field belongs on the website.

A commercial gallery might want visitors to see:

  • Artist
  • Title
  • Year
  • Medium
  • Dimensions
  • Availability

But internally you might also track:

  • Acquisition cost
  • Insurance value
  • Owner details
  • Storage location
  • Condition notes
  • Internal reference numbers

Those do not all need to appear on the front end.

The important point is that you can maintain one structured inventory without treating every field as public website content.

The Advanced User Control add-on also lets you control which WordPress users can view, add or edit inventory records.

Import an existing art inventory from a spreadsheet

Most galleries do not start from zero.

The collection is usually sitting in Excel, Google Sheets or a CSV file already.

Re-entering hundreds or thousands of records manually would defeat the point of moving systems.

The Import Export add-on lets you upload a CSV and map the spreadsheet columns to your inventory fields.

A typical spreadsheet might contain:

Spreadsheet column Inventory field
Artwork ID Inventory Number
Title Name
Artist Artist / custom field
Medium Custom field
Dimensions Size
Year Year
Availability Status

Once the columns are mapped, the importer creates the records for you instead of requiring each artwork to be entered individually.

Full instructions are available in the user documentation.

Use statuses to track the lifecycle of a work

A catalogue gets much more useful when status means more than simply “in stock.”

For artwork, you might create statuses such as:

  • Available
  • Reserved
  • Sold
  • On Loan
  • On Exhibition
  • In Storage
  • Under Restoration

That gives the team a quick operational view of the collection without needing to interpret notes.

It also lets you filter the inventory by status.

For a commercial gallery, for example, you can keep sold works in the database for historical records while excluding them from the public list of currently available pieces.

One catalogue, two jobs

This is the main reason WordPress works well for smaller galleries and collections.

A conventional inventory database is mostly internal.

A conventional website is mostly public.

Using an inventory plugin means one structured set of records can do both jobs.

Your team manages the artwork in WordPress. Visitors browse the same underlying catalogue from the front end.

That reduces duplicate data, reduces manual updates and makes it much less likely that the website says a piece is available when the internal spreadsheet says it sold three weeks ago.

Frequently asked questions

Can WordPress be used as an art inventory system?

Yes. With an inventory plugin, WordPress can store structured records for artwork including titles, artists, dimensions, dates, images, statuses, locations and custom fields. The same records can also be displayed as a public catalogue on the website.

Can I create a searchable art catalogue in WordPress?

Yes. WP Inventory Manager can display inventory on any WordPress page and includes keyword, category, status and sorting controls. The Advanced Search Filter add-on adds faceted filtering by additional fields such as artist, medium or condition.

Can I keep some artwork information private?

Yes. You control which inventory fields appear on the public-facing catalogue. Internal information such as insurance values, storage notes or acquisition details does not need to be displayed publicly.

Can I import my existing gallery spreadsheet?

Yes. Export the spreadsheet as a CSV, then use the Import Export add-on to map each column to an inventory field. This is much faster than recreating every artwork record manually.

Can I track artwork across different locations?

Yes. The Locations Manager add-on can associate inventory with different galleries, storage rooms or other locations, making it easier to keep track of where each work currently sits.

Do I need WooCommerce?

No. WP Inventory Manager works independently of WooCommerce. You can build a searchable public catalogue without adding ecommerce, a shopping cart or checkout functionality.

Build your art catalogue in WordPress

If your gallery already runs on WordPress, you do not need a second system just to turn your artwork records into a searchable online catalogue.

Start with the free core plugin, add a few real artworks and see how the catalogue fits your workflow before moving the full collection across.
Download Free → See Gallery Inventory Features →

How to Add Search and Filters to Your WordPress Inventory List

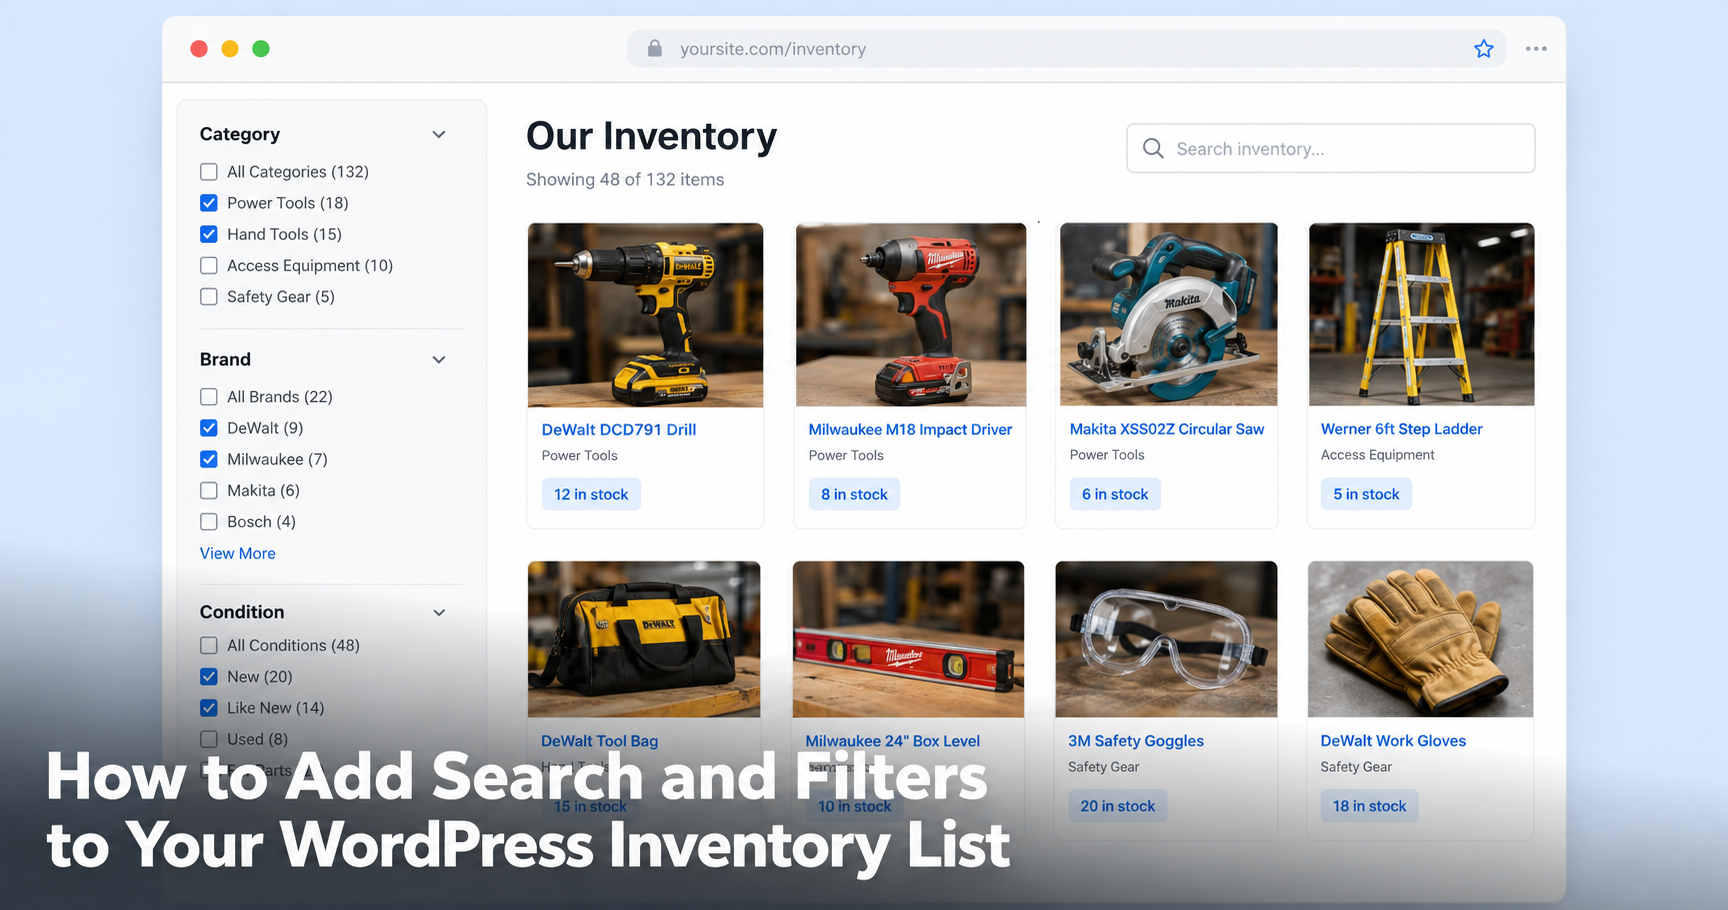
A WordPress inventory list works fine at 20 items. At 200, visitors need a way to search and narrow it down.

A WordPress inventory list works fine at 20 items. Visitors scroll, they find what they want, everyone is happy. At 200 items it stops working. People land on the page, scroll for four seconds, see no way to narrow anything down and leave. You never hear about it because nobody emails you to say your catalog was hard to browse.

The fix is already sitting in your plugin. WP Inventory Manager ships with a filter bar in the free version and most sites have simply never switched it on.

Search and filtering are one part of a larger inventory setup. For the full workflow, see our guide to managing inventory in WordPress without WooCommerce.

This guide covers how to enable it, how to control it from the shortcode and when to move up to faceted filtering.

Step 1: Turn on the built-in filter bar

The free version of WP Inventory Manager includes a filter form that renders above your item listing. It is controlled by a single setting.

In your WordPress admin, go to WP Inventory > Settings and find the option labelled Display Filter at Top of Item Listing. Set it to Yes and save.

That is the whole step. Reload any page that carries your [wpinventory] shortcode and the filter bar appears above the list.

Example: A tool rental shop in Portland lists 180 items on one page. Before switching the filter on, visitors had to scroll through concrete mixers to reach ladders. After switching it on, a visitor types “ladder” in the search box, picks the Access Equipment category and lands on eight items instead of 180.

What you get for free

The built-in filter bar gives visitors four controls without any extra plugin:

  • Keyword search. A text box that matches against your item fields.
  • Status dropdown. Filters by the statuses you have configured, for example Available, On Loan or Sold.
  • Sort dropdown. Lets visitors reorder the list by any field you have marked as sortable.
  • Category dropdown. Narrows the list to a single category.

All four submit together with one button. It is a plain form, so it works with caching, works without JavaScript and adds no measurable weight to the page.

Step 2: Control the starting view from the shortcode

The filter bar handles what visitors do. The shortcode handles where they start.

The [wpinventory] shortcode accepts parameters that pre-filter the list before anyone touches a control. The useful ones are category, category_id, inventory_status, inventory_search, order and page_size.

This matters more than it sounds. Instead of one enormous list with a filter bar on top, you can build several focused pages and let the filter bar refine each one.

A practical pattern

Say you rent equipment in three broad groups. Rather than a single page, create three:

  • A Power Tools page using [wpinventory category="Power Tools" page_size="25"]
  • An Access Equipment page using [wpinventory category="Access Equipment" page_size="25"]
  • A full catalog page using plain [wpinventory] for anyone who wants to browse everything

Each page now ranks for its own keyword, each one loads faster and the filter bar still lets visitors narrow further.

If you have not set up your listing pages yet, our guide on displaying inventory with the shortcode covers the parameters in detail and the full list lives in the user documentation.

Step 3: Know when the free filter runs out

The built-in bar covers keyword, status, sort and category. That is enough for most catalogs.

You have outgrown it when one of these is true:

  • You need to filter by custom fields. Manufacturer, size, colour, condition or model year. The free bar filters by category and status only.
  • Visitors need to combine filters. Red and size large and in stock, all at once, rather than one dropdown at a time.
  • A page reload each time is too slow. The free bar submits a form. Every refinement is a full page load.
  • You want filters in your sidebar. The free bar sits above the listing. It cannot move into a theme widget area.

Step 4: Add faceted filters with Advanced Search

The Advanced Search Filter add-on replaces the single-row bar with a checkbox sidebar that re-queries the list over AJAX.

Visitors tick boxes and the results update without a page reload.

Once the add-on is active, a new Advanced Search screen appears under the WP Inventory menu. The setup screen has two halves.

Choosing which fields become filters

The left column lists every field on your items with a checkbox beside each one. Tick a field to make it appear in the filter.

Drag the rows up and down to set the order they appear in on the front end.

Ordering the values inside each field

Click the folder icon next to a field and its distinct values load in the right-hand panel. Drag them into the order you want.

The panel also holds a More separator: values above it are visible immediately, values below it stay hidden until a visitor clicks View More.

This is the part most people skip and it is the part that does the work. A manufacturer filter with 40 brands is unusable as a wall of checkboxes. Put your top six above the More tag and the rest below it and the same filter becomes readable.

Example: A bike shop tracks 340 frames. They expose three filters: Frame Size, Brand and Condition. Brand has 22 values, so the four brands they actually stock in volume sit above the More separator. Average time to find a specific frame drops from open-ended scrolling to three clicks.

Placing the filter on your site

You have two options. Drop the shortcode onto the same page as your listing:

[wpinventory_advanced_search title=”Filter” display_as=”checkboxes” disable_ajax=”0″]

Set display_as="dropdowns" if checkboxes take too much vertical space.

Leave disable_ajax="0" to keep live updating, or set it to 1 if your theme conflicts with the AJAX call.

Alternatively use the bundled widget. Drag WP Inventory Advanced Search Filter into any theme widget area and it renders the same sidebar in your existing layout.

The add-on is included in the All Access plan alongside Pro, Locations Manager, Reserve Cart and Advanced User Control.

If the filter does not appear

Three causes account for almost every support ticket on this:

  • The setting is off. Check WP Inventory > Settings for Display Filter at Top of Item Listing and confirm it reads Yes.
  • Caching. Your host or CDN is serving the pre-change version of the page. Purge both layers, not just one.
  • Custom field facets are empty. Advanced Search can only expose custom fields when the Advanced Item Manager add-on is active and a field type is configured. Without a type, the values cannot be resolved and the facet stays blank.

One more worth knowing: the Advanced Search admin screen respects a role setting. If a staff member cannot see the screen, check which role you set as the minimum for managing Advanced Search.

Frequently asked questions

Does WP Inventory Manager include search in the free version?

Yes. The free version includes a filter bar with a keyword search box, a status dropdown, a sort dropdown and a category dropdown.

It is controlled by the Display Filter at Top of Item Listing setting under WP Inventory > Settings and is switched on by default.

Can visitors filter my inventory by custom fields like brand or size?

Not with the free filter bar, which covers category and status.

Custom field filtering requires the Advanced Search Filter add-on and the fields themselves come from the Advanced Item Manager add-on. Both are included in the All Access plan.

Do the filters update without reloading the page?

The free filter bar submits a standard form, so it reloads the page.

Advanced Search uses AJAX and updates the listing in place. You can turn the AJAX behaviour off with disable_ajax="1" if your theme interferes with it.

Can I put the inventory filter in my sidebar?

Yes, with Advanced Search. The add-on registers a widget that you can drag into any theme widget area, so the filter sits in your existing sidebar rather than above the listing.

Does any of this require WooCommerce?

No. WP Inventory Manager and all of its add-ons run independently of WooCommerce.

The search and filter features work on any WordPress site, including sites with no ecommerce functionality at all.

Set up your filters in ten minutes

Every parameter, setting and shortcode in this guide is documented with examples. Work through the listing and filter sections and your catalog becomes searchable this afternoon.

Read the Documentation → Browse Add-Ons →

Sortly Alternative for WordPress: App vs Your Own Site (2026)

You hit 100 items and the free plan stops. That is usually the moment people start comparing inventory tools seriously.

If you have searched for inventory software recently, Sortly probably came up first. Clean mobile app, photo-based items, QR labels and a free tier.

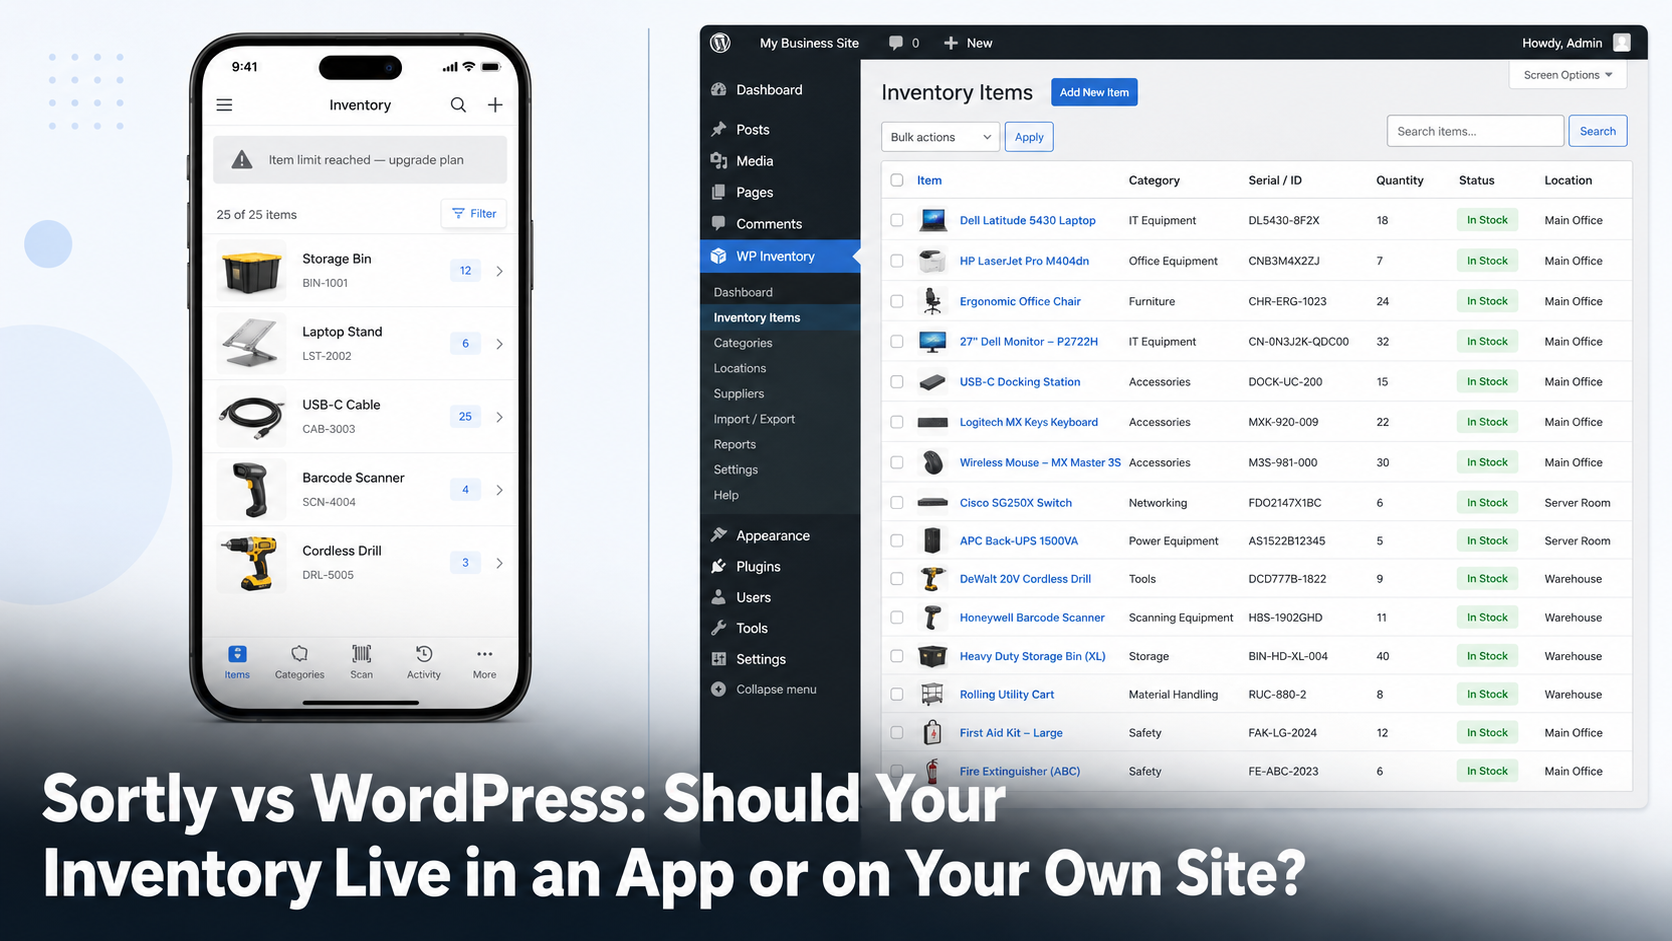
Then the caps arrive. Item caps, seat caps, custom field caps. The real choice is between a hosted app that charges by how much you track and how many people track it, or an inventory system that lives inside the WordPress site you already run.

Both are reasonable. They are reasonable for different businesses. This post is about telling which one you are.

Two different bets

Sortly is software as a service. You rent access, your data sits on Sortly’s servers and your bill scales with your catalogue and your team.

A WordPress inventory plugin is the opposite bet. The software runs on hosting you already pay for, your data sits in your own database and the cost does not move when your catalogue grows.

Neither model wins in the abstract. What matters is which set of constraints you can live with.

Where Sortly’s limits bite

Sortly’s pricing is built around caps. Here is what each plan allowed as of August 2026, taken from Sortly’s own pricing page.

Plan Per month Items Users Custom fields
Free $0 100 1 1
Advanced $49 500 2 5
Ultra $149 2,000 5 10
Premium $299 5,000 8 20
Enterprise Quote 10,000+ 12+ Unlimited

A 50% first-year discount applies to yearly plans for new customers, dropping to 20% after year one. Sortly’s help centre states there are no school or non-profit discounts.

Three caps cause most of the friction:

  • The item cap. Growth forces an upgrade, whether or not anything else about your operation changed.
  • The seat cap. Adding a part-time volunteer costs real money.
  • The custom field cap. The quiet one. Track five attributes today, need a sixth next year, change plans to add a text box.

Example: A community theatre catalogues costumes, props and lighting gear. It passes 500 items during its second season and needs six people updating stock during production week. On Sortly that combination pushes it to Ultra. On the WordPress site it already runs, the item count and the six staff logins cost nothing extra.

What Sortly does better

Being fair here matters, because picking the wrong tool wastes more than it saves.

  • Native mobile apps with offline access. If your team counts stock in a basement, a job site or a storage unit with no signal, WordPress does not match this.
  • In-app barcode and QR scanning. Phone camera, straight into the record.
  • Real-time sync across devices. Several people updating at once, everywhere, instantly.
  • Integrations. QuickBooks Online, Slack and Microsoft Teams on higher plans.

If your inventory work happens on a phone away from a desk, Sortly is built for that and a WordPress admin screen is not.

What WordPress does better

No item cap

WP Inventory Manager has no ceiling on item count. There is no row limit anywhere in the plugin. Catalogue size is a hosting question rather than a billing question.

Your existing users are your seats

Anyone with a WordPress login can be given inventory access. Ten staff cost the same as one. The Advanced User Control add-on narrows it further, setting each user’s view, edit and add rights to none, own items only or everything.

A public catalogue, not just a private database

This is the difference most comparisons miss. Sortly is an internal tool. WP Inventory Manager renders your inventory on the front end of your site with a shortcode, so the records your team manages can also be the catalogue your customers browse.

For a gallery, a rental yard or a parts supplier that removes an entire duplicate system. See how it plays out for equipment rental businesses.

Your data stays yours

Items live in your own database tables. Back them up, query them, export them to CSV and take them with you. Nothing goes read-only because a card expired.

Fields that match your business

Core ships with fields for number, name, description, size, manufacturer, make, model, year, serial and price. You rename or hide any of them under WP Inventory > Labels. When you need more, the Advanced Item add-on defines item types with their own text, number, dropdown and radio fields, with no cap on how many.

The three-year cost picture

Take a small organisation with 800 items and five people who need access. On Sortly that is the Ultra plan, which runs $888 for the first promotional year then renews near the standard yearly rate. Across three years you are looking at several thousand dollars. The number climbs again past 2,000 items.

The WordPress route uses hosting you already pay for. The core plugin is free. If you want the paid pieces, the All Access Pass bundles the add-on library for $199 a year. Item count and staff count do not change that figure.

The trade is real. You take on hosting, backups and updates yourself and you give up the mobile app.

Which one are you?

Five questions usually settle it:

  • Do you already run a WordPress site? If yes, the marginal cost of adding inventory to it is close to zero.
  • Does anyone need to see your inventory publicly? Customers browsing a catalogue or requesting a hold points hard toward WordPress.
  • Where does the work happen? Warehouse aisle with poor signal favours Sortly. Back office on a laptop favours WordPress.
  • How fast is your catalogue growing? Steady growth past a few hundred items makes per-item pricing expensive over time.
  • How many people touch it? Volunteers and seasonal staff get costly under seat licensing. WordPress accounts carry no per-seat fee.

Example: A construction firm tracking tools across three job sites should probably pay for Sortly. Crews scan items on their phones, often without signal. Nobody outside the company needs to see the list. The mobile app is the whole product for them.

Trying the WordPress route

Install WP Inventory Manager from the plugin repository and activate it. A WP Inventory menu appears in your admin sidebar with submenus for Status, Inventory Items, Categories, Labels, Display, Statuses, Add Ons, Settings and Support.

Go to WP Inventory > Inventory Items to add records, then WP Inventory > Categories to group them. Rename fields under WP Inventory > Labels. Then drop the shortcode on any page to publish the catalogue:

[wpinventory]

If your stock already lives in a spreadsheet, the Import Export add-on walks a CSV through a three-step upload, mapping and import wizard, so you are not retyping anything. Full steps are in the user documentation. Our roundup of the best WordPress inventory plugins covers the other options in this space.

If you’re still comparing inventory tools, see our guide to the best WordPress inventory plugins and how the main options differ by use case.

Frequently asked questions

Is WP Inventory Manager a direct Sortly replacement?

Not feature for feature. There is no native mobile app and no offline mode, so if your team works from phones in low-signal locations, Sortly still fits better. What WP Inventory Manager replaces is the item cap, the seat cap and the monthly bill. It also publishes your catalogue on the front end of your website, which Sortly does not do.

How many items can WP Inventory Manager handle?

There is no item limit in the plugin. Practical scale depends on your hosting rather than your plan. Catalogues in the thousands run fine on ordinary shared hosting.

Can I move my Sortly data across?

Yes. Export your Sortly inventory to CSV, then use the Import Export add-on to map those columns onto WP Inventory Manager fields. The importer can create categories automatically as it runs, so your existing grouping carries over.

Do I need WooCommerce for any of this?

No. WP Inventory Manager runs independently on any WordPress site, including sites with no ecommerce at all. There is no cart and no checkout unless you add a payment add-on deliberately.

What does it cost to run inventory on WordPress?

The core plugin is free from the WordPress repository with no item or user limits. Paid add-ons cover multi-location stock, reservations, advanced search, QR codes and import or export. The All Access Pass bundles the library for $199 a year. That figure does not change as your catalogue or team grows.

Load your real catalogue and see

The core plugin is free with no item cap and no seat cap, so you can import your actual inventory and judge it against your current tool before spending anything.

Download Free →  Browse Add-Ons →

How to Track Physical Assets in WordPress


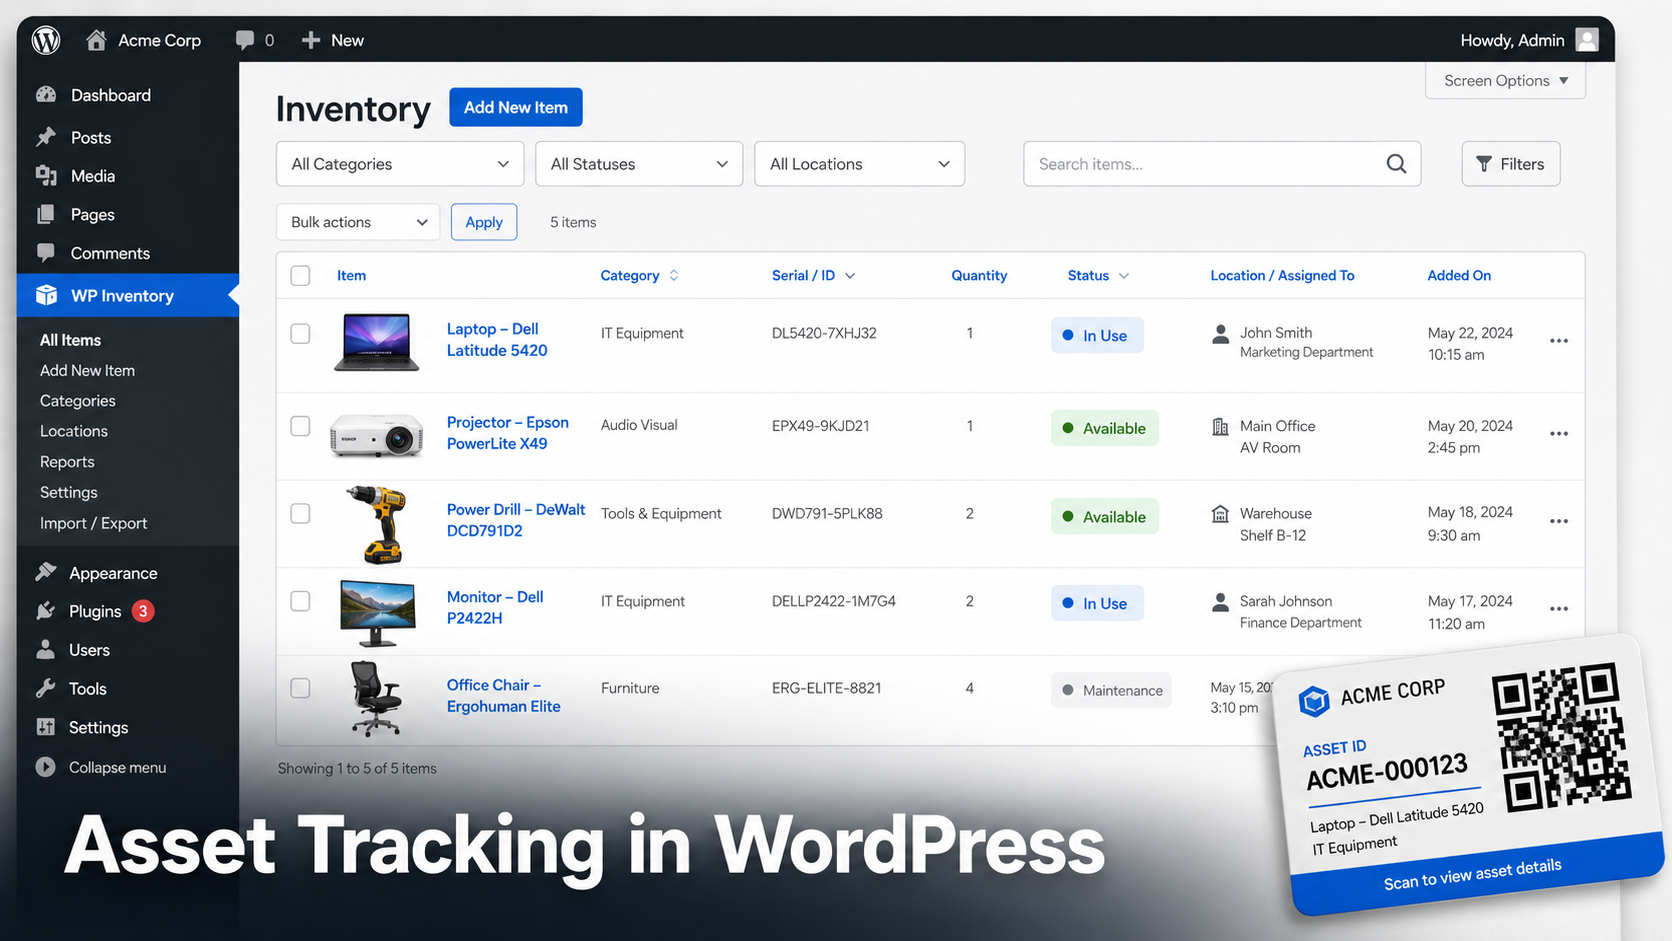
Inventory is what you sell. Assets are what you keep. The laptop your bookkeeper uses, the projector in the meeting room, the mowers in the shed, the folding chairs in the church basement. Nobody buys these from you, but losing track of them costs real money.

Most asset tracking software is priced for enterprises: per user, per month, forever. Spreadsheets are free but go stale the day someone forgets to update them.

There is a middle path. If your organization runs a WordPress site, you already own the platform your asset register can live on. This guide shows you how to build it, what the free version covers and where the paid add-ons earn their keep.

You can use WordPress for physical asset tracking by creating a central record for each piece of equipment, including its asset number, serial number, status and location. WP Inventory Manager adds this inventory structure directly to WordPress, while optional add-ons extend it with QR labels, multiple locations, history and user access controls.

Asset tracking vs inventory management

The two get lumped together, but they answer different questions:

  • Inventory management asks “how many do we have left?” It cares about quantities, reorder points and stock that flows in and out.
  • Asset tracking asks “where is it, what condition is it in and who has it?” It cares about individual items with serial numbers, locations and history.

A coffee shop tracks bags of beans as inventory and its espresso machines as assets. The beans get consumed. The machines get maintained, moved and eventually retired.

WP Inventory Manager handles both, because an asset register is really an inventory of things with a quantity of one and a lot of identifying detail. The item record already carries the fields asset tracking needs.

What a real asset register needs

A working asset register handles five things:

  • Identity: name, asset number, make, model, year and serial number. If it walked out the door, you could describe it to an insurer.
  • Status: in use, in repair, in storage, retired. Status tells you what portion of your equipment is actually working for you.
  • Location: which building, which room, which vehicle. Multi-site organizations need per-location counts and a record of transfers.
  • History: who changed what and when. An audit trail turns “I think we had three” into a number you can defend.
  • Access: staff need to look assets up fast while you keep control over who can see or edit which records.

Looking for the product setup rather than the broader methodology? See how WP Inventory Manager supports internal asset tracking in WordPress.

Building the register: free setup

Add your assets as items

Go to WP Inventory > Add Inventory. The item record includes fields built for asset work: item number, make, model, year and serial number, alongside name, description, quantity and an image. For most assets the quantity is simply 1.

Rename fields with Labels

Not every field name will match your vocabulary. The WP Inventory > Labels screen lets you rename any field across the whole system. “FOB” can become “Assigned To” and “Size” can become “Condition.” You shape the register around your organization without touching code.

Use categories and statuses

Build a category tree under WP Inventory > Categories (IT Equipment, Vehicles, Furniture, AV Gear). Then use WP Inventory > Statuses to define lifecycle states like In Use, In Repair and Retired. Together they answer the two most common questions: what kind of thing is it and can we use it right now.

Example: A community college media department registers 40 cameras, 25 tripods and 60 microphones. Each camera record carries its serial number, purchase year and a status. When a student reports a broken zoom ring, the tech sets that camera to In Repair. The checkout desk sees 39 available cameras instead of 40 and stops promising gear that is sitting on a workbench.

Put the register where people can see it

Add the shortcode to any page to display the register on the front end:

[wpinventory]

Show it publicly, or place it behind a login for staff only. The user documentation covers the display options in detail.

Custom fields for different asset types

A vehicle needs different fields than a laptop. The Advanced Inventory Manager add-on lets you define item types, each with its own custom fields: text, number, dropdown and more.

Define a “Vehicle” type with fields for license plate, VIN and next service date. Define a “Computer” type with fields for warranty expiry and assigned user. Each asset only shows the fields that belong to its type, which keeps data entry clean and your reports meaningful.

Locations and transfers

Once assets live in more than one place, “where is it” becomes the hard question. The Locations Manager add-on tracks quantities per location and records transfers when assets move, with an activity log that shows what went where.

  • See at a glance which office, warehouse or campus holds each asset.
  • Move assets between locations and keep the paper trail automatically.
  • Review location activity when something goes missing.

Example: A nonprofit with three offices tracks 25 donated laptops. When two laptops move from the downtown office to the shelter site for a job training program, the coordinator records the transfer. Six months later, during the grant audit, the activity log shows exactly when they moved and the auditor gets an answer in thirty seconds instead of thirty emails.

QR Code Asset Tracking in WordPress

QR code asset tracking connects each physical asset to its corresponding WordPress record. The QR Code add-on generates a QR code for each asset that points to its detail page and can bulk-print labels for your whole register in one pass.

Stick a label on each asset. Anyone with a phone camera scans it and lands on the record: what it is, what status it is in and where it belongs. No app to install, no scanner hardware to buy.

History and accountability

Knowing an asset’s current status is useful, but some organizations also need a record of how inventory changes over time.

For workflows that need a more detailed audit trail, the Inventory Ledger can help record inventory changes and associated cost information.

If different people manage different sites or inventory records, the Advanced User Control add-on provides more granular control over which inventory records users can access and manage.

Who tracks assets in WordPress

This approach fits any organization that owns more equipment than one person can remember. We have written specific playbooks for several of them: schools tracking Chromebooks and textbooks, nonprofits managing donated goods, churches and ministries and gyms tracking equipment.

The pattern is the same in each: WordPress is already there, the budget does not stretch to enterprise software and the register has to work for volunteers or part-time staff, not just IT.

Getting the full toolkit

The add-ons mentioned above are available individually on the WP Inventory Manager add-ons page. All Access combines the Pro license with all paid WP Inventory Manager add-ons.

Start with the core plugin, then add functionality such as locations, QR codes, inventory history or user controls when your asset tracking workflow requires it. See the current plans and pricing for details.

Start free, prove the register works for your team and upgrade when a specific gap shows up. That is the order that wastes the least money.

Frequently asked questions

Can WordPress really replace dedicated asset tracking software?

For small and mid-sized organizations, yes. WP Inventory Manager records identity, status, location and history for each asset, which is the core of what dedicated platforms sell. You give up telematics-style automation and gain a register with no per-user monthly fees on a site you already maintain.

Do I need WooCommerce for asset tracking in WordPress?

No. WP Inventory Manager runs independently of WooCommerce and does not require any ecommerce functionality at all.

How do I track which employee has a piece of equipment?

You can use a custom field or rename an existing field with Labels to record the employee, department or team responsible for an asset. WP Inventory Manager does not currently provide a dedicated employee check-in/check-out workflow, so organizations that require automated issue-and-return tracking may need a more specialized asset management system.

Can I print asset labels from WordPress?

Yes. The QR Code add-on generates a code per asset that links to its record and supports bulk printing, so you can label an entire room of equipment in one session.

Is there a free version I can start with?

Yes. The free version of WP Inventory Manager is on the WordPress plugin repository and covers asset records, categories, statuses and front-end display. Add locations, QR labels or history tracking later if you need them.

Start building your asset register in WordPress

If your organization already uses WordPress, you can start with a simple asset register and add capabilities such as locations, QR labels and inventory history as your requirements grow.

Download Free →  Compare Plans →

How to Display Inventory on Any WordPress Page (Shortcode Tutorial)

You have entered your inventory into WordPress. Items, categories, quantities, images. Now you want people to actually see it: customers browsing your catalog, staff checking what is on the shelf, or members viewing available equipment.

In WP Inventory Manager that takes exactly one step: paste a shortcode on a page. Everything else in this tutorial is refinement, showing a single category, changing the sort order, limiting the page size or displaying one featured item.

If you search for how to do this, almost every tutorial assumes WooCommerce and a full store. You do not need either. This works on any WordPress site with the free WP Inventory Manager plugin.

If you’re setting up your inventory for the first time, start with our complete guide to managing inventory in WordPress without WooCommerce, then use the shortcode options below to control how it appears on your site.

Step 1: Put your inventory on a page

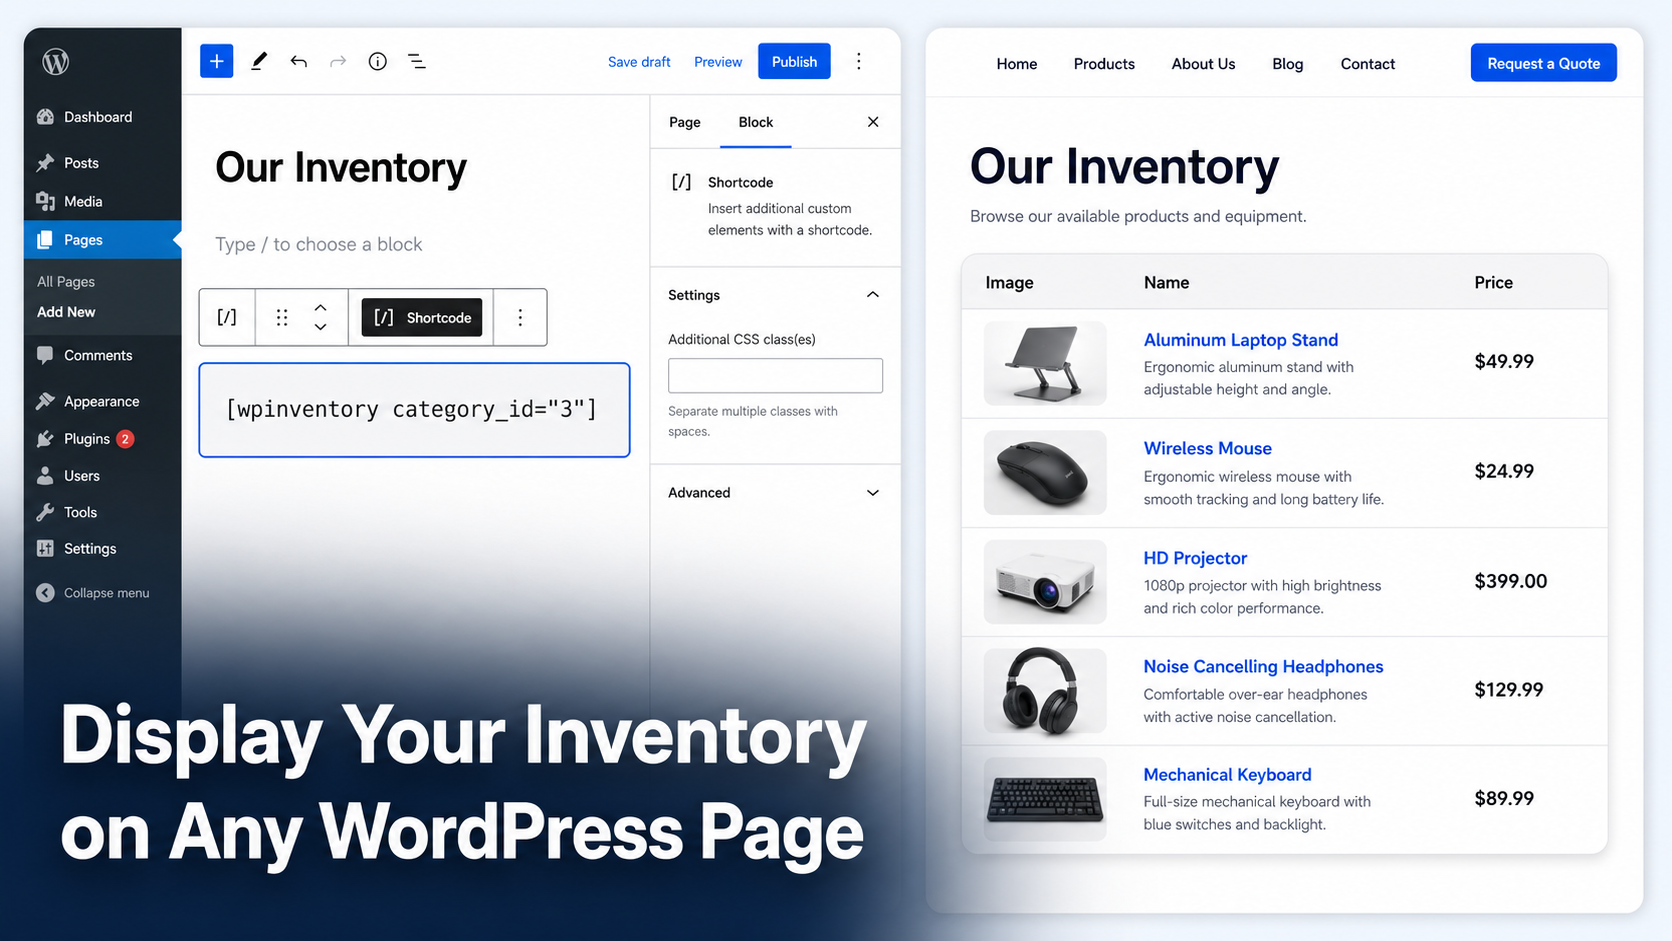
Create or edit any page, then add the shortcode:

[wpinventory]

In the block editor, use a Shortcode block (type /shortcode). In the Classic editor, paste it straight into the content. Publish the page and your full inventory appears as a browsable list, with each item linking to its own detail view.

That is the whole core tutorial. The rest is control.

Step 2: Choose what each item shows

The listing pulls its columns from your Display settings, not from the shortcode. Go to WP Inventory > Display to control which fields appear in the list view. By default the listing shows the item image, name, manufacturer, make, model and price.

  • Show quantity in the listing so visitors see availability at a glance.
  • Listing image size (thumbnail by default) controls load speed on large catalogs.
  • Field names come from WP Inventory > Labels. Rename “Make” or “FOB” to whatever fits your business and the listing updates everywhere.

Step 3: Show only one category

Most sites want more than one inventory page: a rentals page, a sale items page, a parts page. Point the shortcode at a category:

[wpinventory category_id=”3″]

Find the ID in WP Inventory > Categories. You can also use the category name with the category attribute. Build one page per category and add each to your menu, and visitors experience separate catalogs while you manage one inventory.

Example: A tool rental shop keeps three pages: Power Tools, Trailers and Lawn Care. Each page holds one shortcode with a different category_id. When a new chainsaw is added to Power Tools in the admin, it appears on the right page instantly with no page edits.

Step 4: Control sorting and page size

[wpinventory order=”inventory_name” page_size=”10″]

  • The order attribute sorts by any field: inventory_name, inventory_number (the default), inventory_price and so on.
  • The page_size attribute sets items per page. The site-wide default is 20, set in Settings.
  • Pagination appears automatically when your inventory exceeds the page size.

Step 5: Feature a single item

To spotlight one item on a landing page, pass its ID:

[wpinventory inventory_id=”42″]

This renders that item’s detail view. The backlink=”0″ attribute removes the back-to-list link when you want the item to stand alone.

Step 6: Make an internal inventory page (staff only)

Not every inventory belongs on the public site. Internal asset lists, staff equipment or member-only catalogs work the same way with one difference: the page’s visibility.

The simplest route is built into WordPress. Edit the page holding the shortcode and set its visibility to Private (visible only to logged-in editors and admins) or Password Protected (anyone with the password). For a proper members-or-staff area, any membership plugin that restricts pages will restrict your inventory page along with it, because the inventory is just page content.

This is the pattern our own internal asset tracking users rely on: full inventory in the admin, one protected page for staff lookups and nothing exposed to the public.

If the shortcode shows nothing

Three checks solve nearly every blank-listing report:

  • Items exist and are published. The listing only shows items with a status that allows display. Check WP Inventory > Inventory Items.
  • The shortcode is plain text. Page builders sometimes wrap pasted text in formatting that breaks shortcode parsing. Re-type the brackets by hand in a Shortcode block.
  • A category filter matches nothing. If you passed category_id, confirm the ID against WP Inventory > Categories. A typo returns an empty list, not an error.

Two more shortcodes worth knowing

  • [wpinventory_categories] outputs your category list, each linking to its items. Useful as a catalog landing page.
  • [wpinventory_latest_items] shows your most recently added items. Useful on a homepage to surface new stock.

Read the Documentation →  Compare Plans →

Both also exist as widgets for sidebars and footers. The full shortcode attribute reference is available in the shortcode options documentation.

When the shortcode is not enough

The built-in listing covers browsing. Two situations call for more:

  • Large catalogs need search. The Advanced Search add-on adds keyword search and field filters to your front-end display, so visitors narrow hundreds of items without paging through them.
  • Reservations need a cart. The Reserve Cart add-on lets visitors request items from the listing, without payments or WooCommerce.

Both are included in the All Access pass alongside Locations Manager and Pro.

Shortcode questions, answered

Where do I put the [wpinventory] shortcode?

On any page or post. Use a Shortcode block in the block editor or paste it directly in the Classic editor. The inventory listing renders where the shortcode sits.

Can I show different categories on different pages?

Yes. Use [wpinventory category_id=”X”] with a different ID on each page. Category IDs are listed under WP Inventory > Categories in your admin.

How do I change which fields show in the list?

Field visibility is controlled in WP Inventory > Display, not in the shortcode. Choose the fields for list and detail views there; the shortcode picks up the settings automatically.

Does the shortcode work with any theme?

Yes. The listing uses your theme’s page width and typography. If you need deeper styling control, the plugin supports custom templates through its theming system.

Can visitors search the inventory on the page?

Basic category browsing is built in. Keyword search and field filters on the front end come with the Advanced Search add-on, available separately or in the All Access pass.

Everything the shortcode can do, in one reference

The user documentation covers every attribute, display setting and template option, with examples you can copy straight into your pages.

Read the Documentation →  Compare Plans →

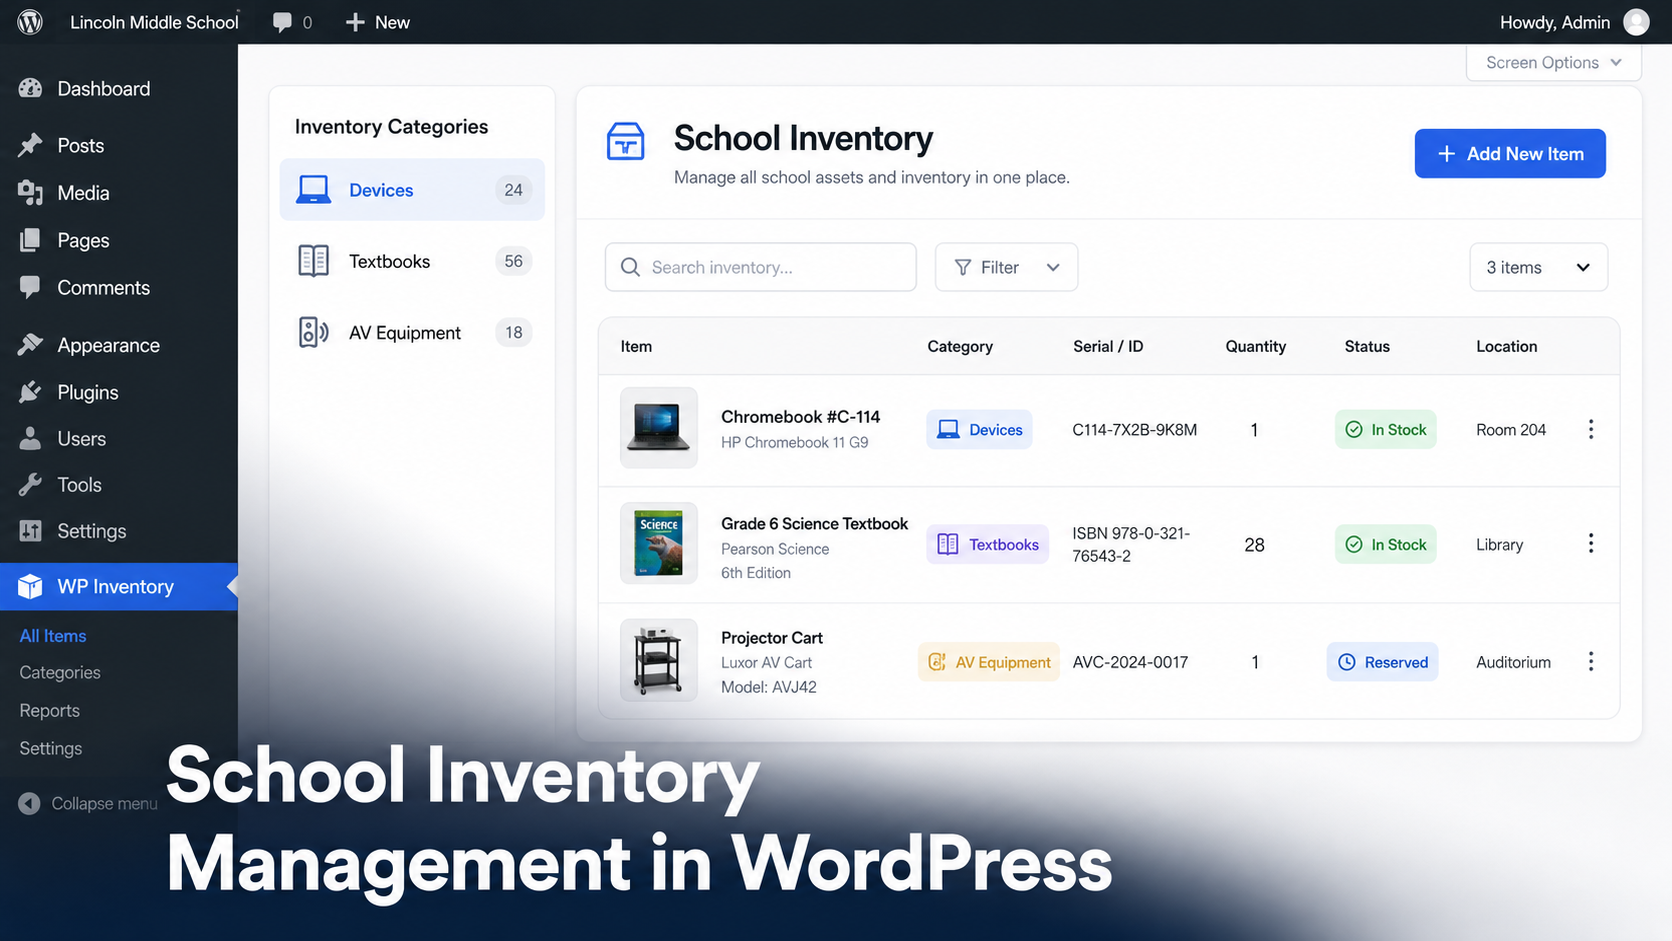
School Inventory Management in WordPress: Track Chromebooks, Textbooks and Equipment

Ask any school office manager where the third cart of Chromebooks is and you will get one of three answers: a shrug, a guess or a spreadsheet last updated in September.

Schools own a surprising amount of stuff. Student devices, textbooks, science lab kits, AV equipment, musical instruments, athletic gear, furniture. Most of it moves constantly between classrooms, students and storage. And most of it is tracked in spreadsheets that drift out of date the week after inventory day.

For equipment that stays with the school over time, such as laptops, projectors and AV gear, you can also use WP Inventory Manager for asset tracking for schools.

The software built for this problem is real but priced for districts. Platforms like VIZOR, Incident IQ and Frontline are excellent at 10,000-device scale, with contracts to match. A single school, a small private school or a homeschool co-op rarely needs that. What it needs is a shared, current list of what the school owns, where it is and who has it.

If your school website runs on WordPress, you already own the platform that can do this. Here is how.

What schools actually need to track

School inventory breaks down into five groups, and each one has a slightly different tracking need:

  • Student devices. Chromebooks, tablets and chargers. These need serial numbers, condition notes and a record of who each device is assigned to.
  • Textbooks and curriculum materials. Tracked by title and quantity. The question is rarely “where is this one book” and usually “do we have 28 copies for next term”.
  • AV and lab equipment. Projectors, microscopes, cameras and kits. High value, frequently borrowed, rarely returned to the right shelf.
  • Fixed assets. Furniture, playground equipment and appliances. Mostly static, but auditors and insurers want a current list with values.
  • Consumables. Art supplies, paper, first aid stock. Here the job is simple quantity tracking with a warning before you run out.

No spreadsheet handles all five well, because spreadsheets have no concept of check-outs, alerts or per-user views. An inventory system does.

Setting it up with WP Inventory Manager

The free WP Inventory Manager plugin adds an inventory system to the WordPress admin your staff already log into. Setup for a school looks like this.

Create your categories

Go to WP Inventory > Categories and mirror the groups above: Devices, Textbooks, AV Equipment, Lab Equipment, Furniture, Supplies. Categories keep a few hundred items browsable instead of overwhelming.

Rename fields to match school language

Every item in WP Inventory Manager carries fields for name, inventory number, serial number, make, model, year, quantity and description. Under WP Inventory > Labels you can rename any of these. Turn “FOB” into “Assigned To”, or “Year” into “Purchase Year” for audit purposes. The fields fit the school, not the other way around.

Add your items

From WP Inventory > Inventory Items, add each asset or batch. Serialized items like Chromebooks get one record each with the serial number filled in. Bulk items like textbooks get one record per title with a quantity.

Example: A K-8 school with 220 students enters 240 Chromebooks as individual records with serial numbers and condition notes, 35 textbook titles with quantities, and 35 AV and lab items. Total setup time was two afternoons with a student aide doing data entry. The librarian now answers “do we have enough copies of the 6th grade science text” in ten seconds from the school’s own website admin.

Publish a staff-facing list

Add the [wpinventory] shortcode to any page to display the inventory. Put it on a page behind a staff login and teachers can check what is available without emailing the office. The user documentation covers display settings and shortcode options.

Handling device and equipment check-outs

The single most common school request is a check-out flow: a teacher reserves the projector cart for Thursday, or a student is issued a Chromebook for the year.

The Reserve Cart add-on handles this without any payment system. Staff browse the equipment list, add what they need and submit a reservation request. The office approves it, quantities update and there is a record of who has what. When the item comes back, the reservation is cleared and the quantity is restored.

For annual device assignments, the serial number plus the renamed “Assigned To” field gives you a simple issue log: which student has which device, recorded on the item itself.

Multiple buildings and campuses

If your school spans more than one building, the Locations Manager add-on tracks quantity per location. The science department can see that the main building has two microscope sets while the annex has none, before anyone walks over there with a cart.

Pair it with the Advanced User Control add-on and each building’s staff manage only their own inventory. The front office keeps the full view. Both add-ons are included in the All Access pass, along with Reserve Cart and Advanced Search.

Never run out of supplies mid-term

For consumables, WP Inventory Pro adds low-stock email alerts and minimum quantity fields. Set the art room’s paint stock to alert at 5 units and the office gets an email before the shelf is empty, not after. Pro also records quantity history, so you can see usage patterns across the school year and budget the next one accurately.

What this costs a school

The core plugin is free with no item limits. A single-building school tracking devices and supplies typically adds Pro at $79 per year. A multi-building school that wants check-outs, locations and per-staff access takes the All Access pass at $199 per year. Compare that with dedicated K-12 asset platforms, which usually start in the thousands per year and are quoted per district.

Browse the full list of add-ons to see what fits your school’s setup.

School inventory questions, answered

Can we track which student has which Chromebook?

Yes. Enter each device as its own inventory item with its serial number, then rename an unused field to “Assigned To” under WP Inventory > Labels and record the student there. The device’s full record lives on one screen.

Do teachers need special software to check equipment availability?

No. The inventory displays on a normal WordPress page via shortcode. Teachers view it in a browser like any other page on the school site, behind a login if you prefer.

Is there a limit on how many items a school can track?

No hard limit. The free plugin handles catalogs with thousands of records. A typical school inventory of a few hundred items is well within comfortable range on ordinary hosting.

Can each campus manage its own inventory separately?

Yes, with the Locations Manager and Advanced User Control add-ons, both included in All Access. Each building’s staff see and edit their own stock while administration keeps the school-wide view.

We already have a spreadsheet. Can we import it?

Yes. The Import/Export add-on brings in existing inventory from a CSV file, so the spreadsheet you have today becomes the starting point rather than wasted work.

Put your school’s inventory where your website already lives

No new logins, no district-scale contract, no sync between systems. The free plugin sets up in an afternoon and the add-ons grow with you.

Browse Add-Ons →  Download Free →

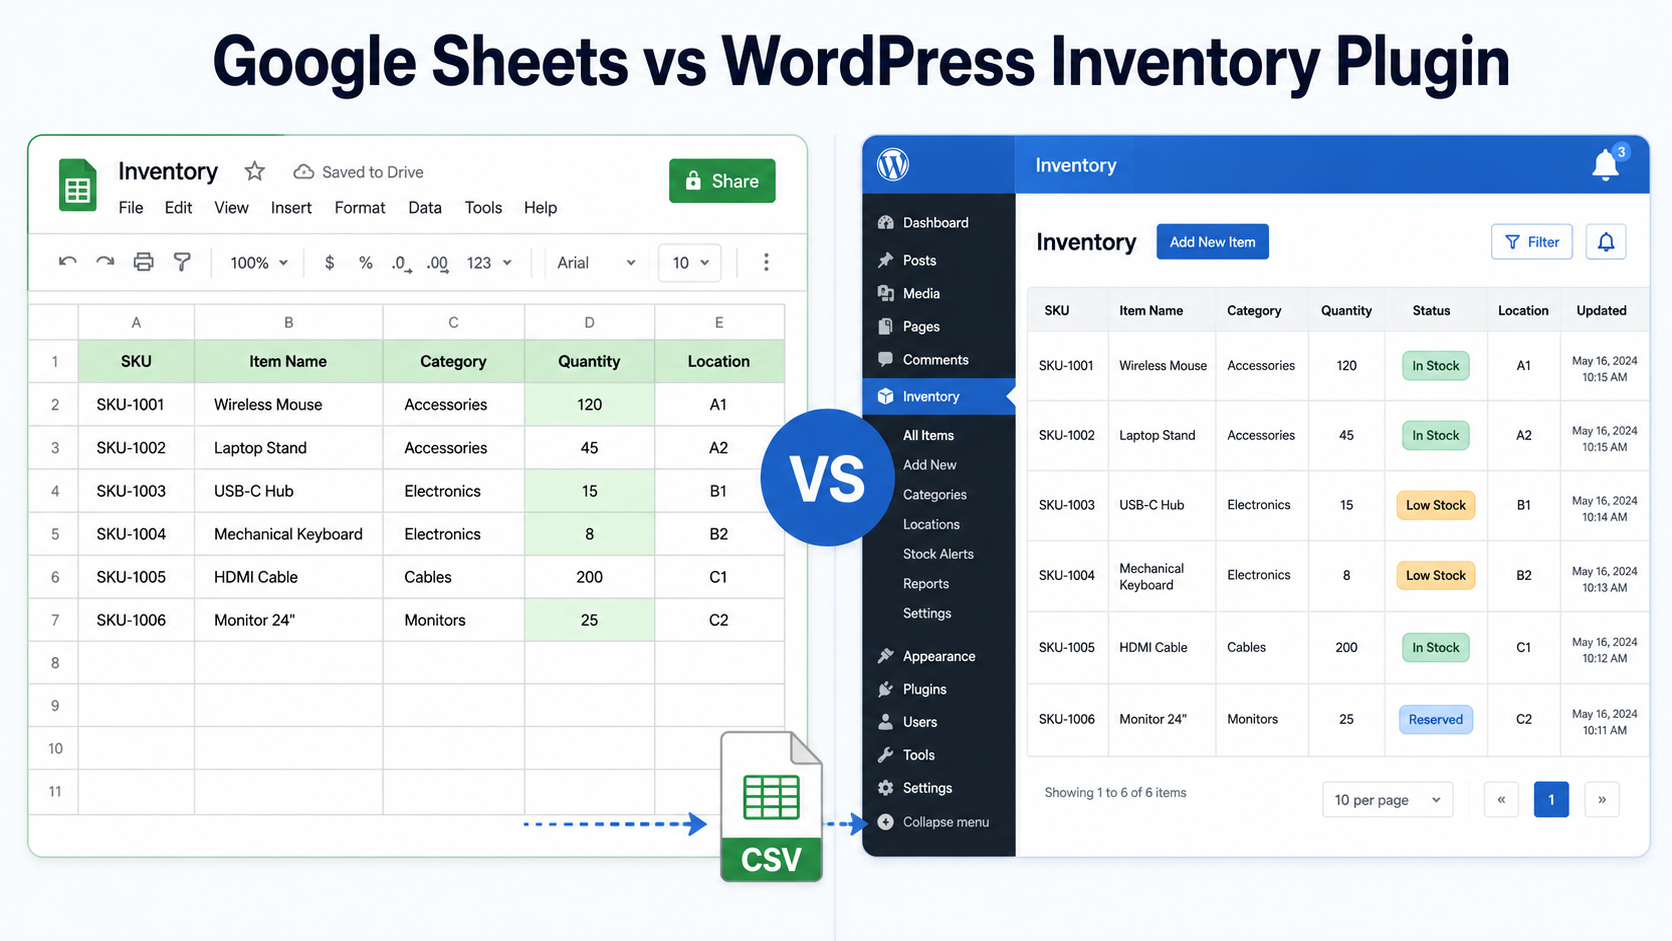
Spreadsheet vs Inventory Management Software: When to Move to WordPress

Spreadsheets are often the right place to start managing inventory. Google Sheets and Excel are inexpensive, flexible and familiar. The question is when a spreadsheet stops being enough and when it makes sense to move to dedicated inventory management software.

This guide compares spreadsheet-based inventory management with a WordPress inventory system, explains the signs that you may have outgrown Excel or Google Sheets, and shows how you can continue using spreadsheets for imports and reporting after moving your main inventory into WordPress.

When a spreadsheet is enough for inventory management

Credit where due. For certain situations, a spreadsheet is the correct tool:

  • Cost. Free, forever, no license renewals.
  • Zero learning curve. Everyone on your team has used a spreadsheet.
  • Total flexibility. Any column you can imagine, any formula you can write.
  • Fast start. A working stock list exists ten minutes after you open a blank sheet.

If one person manages a relatively small inventory that does not need to appear on your website or connect to other workflows, a spreadsheet may be all you need. Sincerely. You do not have a problem a plugin needs to solve yet.

Signs you have outgrown spreadsheet inventory management

The trouble starts when the business grows past the sheet. The failure points are predictable.

It is not connected to your website

If your catalog, availability list or rental gear lives on a WordPress site, every spreadsheet edit is double entry. You update the sheet, then you update the site, and the day you forget one of them, they disagree. We wrote about the result in our out-of-sync inventory guide: nobody knows which number is right.

History gets overwritten

A spreadsheet cell shows the current value rather than a structured inventory transaction history. Google Sheets and Excel provide version-history tools, but reconstructing stock movements from document revisions is very different from maintaining a dedicated inventory audit trail. Version history in Sheets technically exists, but reconstructing stock movements from revision snapshots is nobody’s idea of a workflow.

Everyone edits everything

Spreadsheet permissions are primarily designed around files, sheets and ranges rather than inventory-specific responsibilities. As more people manage stock, controlling exactly who should update particular inventory records can become harder to maintain. There are no roles, no per-person limits and no record of responsibility.

No alerts

Low-stock alerts are not a native inventory workflow in a standard spreadsheet. You can build automations around Google Sheets or Excel, but that adds setup and maintenance that dedicated inventory software can handle directly. You find out when a customer asks for something you do not have.

What inventory management software adds beyond a spreadsheet

Moving inventory into a dedicated WordPress inventory system creates structured records and connects the inventory your team manages with the inventory your website displays. WP Inventory Manager keeps your inventory inside WordPress itself, which changes four things immediately:

  • One source of truth. The list your team edits in the admin is the same list your website displays. Update once and both are current.
  • Front-end display built in. A shortcode publishes your catalog to any page, filterable and searchable, with no copy-paste step.
  • Accountability. WordPress user accounts provide controlled access, while optional inventory tools can add more granular permissions and inventory history.
  • Alerts. Notifications. Optional inventory functionality can notify your team when quantities reach configured thresholds.

The trade-off is real: a plugin costs money past the free tier and asks you to learn a new screen. That is the honest price of moving from a private list to a system your team and website share.

Side-by-side comparison

Google Sheets WP Inventory Manager
Price Free Free core; optional paid licenses and add-ons
Setup speed Very fast for a simple list Requires initial configuration
Shows on your website Possible through embeds or integrations Yes, natively via shortcode
Multi-user control File, sheet and range permissions WordPress roles + Advanced User Control add-on
Stock history Document version history Change tracking (Pro), full ledger with costs and invoices (Ledger add-on)
Low-stock alerts Requires custom automation Available with inventory notifications
Flexibility Unlimited formulas Custom fields cover most needs

You can keep using spreadsheets after moving to WordPress

This is not a divorce. The Import/Export add-on connects the two worlds through CSV, which Google Sheets speaks natively.

  • Build in Sheets, run in WordPress. Download your sheet as CSV and import it. Fields map automatically, categories are created on the fly and image URLs in your sheet are fetched remotely.
  • Report in Sheets. Export all inventory, or just items matching a search, back to CSV whenever your accountant or board wants a snapshot.
  • Undo button included. Imports can be rolled back, so a bad CSV does not wreck your catalog.
Example: A parts supplier with 900 SKUs built its master list in Google Sheets over three years. Moving to WordPress took one afternoon: export to CSV, import via WP Inventory → Import/Export, review the automatic field mapping and publish the catalog with a shortcode. The old sheet still gets a fresh export before every quarterly stock count.

Step-by-step instructions live in our import tutorial and the Import/Export documentation.

If you are ready to move beyond a spreadsheet, see our complete guide to managing inventory in WordPress without WooCommerce.

Frequently asked questions

Can WordPress pull inventory directly from Google Sheets?
Not live. WP Inventory Manager exchanges data with Sheets through CSV files using the Import/Export add-on: download your sheet as CSV and import it, or export inventory back out for reporting. There is no real-time sync, which for most catalogs is a feature: your website is not one accidental cell edit away from being wrong.
When should I move from a spreadsheet to an inventory plugin?
Common signs include multiple people managing inventory, needing inventory data to appear on your website, difficulty understanding past quantity changes, or managing stock across several locations. These do not automatically mean you need dedicated software, but they are good reasons to evaluate whether a spreadsheet still fits your workflow.
Will I lose my spreadsheet data when I switch?
No. Export your sheet as CSV and the Import/Export add-on maps your columns to inventory fields automatically, creates categories as needed and can even fetch images from URLs in your sheet. Imports are also reversible via rollback.
Is a free spreadsheet not enough for a small business?
Sometimes it is. One person, a small catalog and no website display is a fine fit for Sheets. The free version of WP Inventory Manager exists precisely so you can test the switch without spending anything.
Can my team keep using spreadsheets for reports?
Yes. Export all inventory or a filtered subset to CSV at any time and open it straight in Google Sheets or Excel. Many businesses run WordPress as the source of truth and Sheets as the reporting layer.

When to move from a spreadsheet to WordPress

You do not need to abandon spreadsheets entirely. WordPress can become the primary inventory system while Excel or Google Sheets remain useful for imports, exports, analysis and reporting. Start with the workflow that is becoming difficult to manage, then decide whether moving the inventory itself into WordPress solves it.

Compare Plans and Pricing →

What Is an Inventory Ledger? How to Track Stock History in WordPress

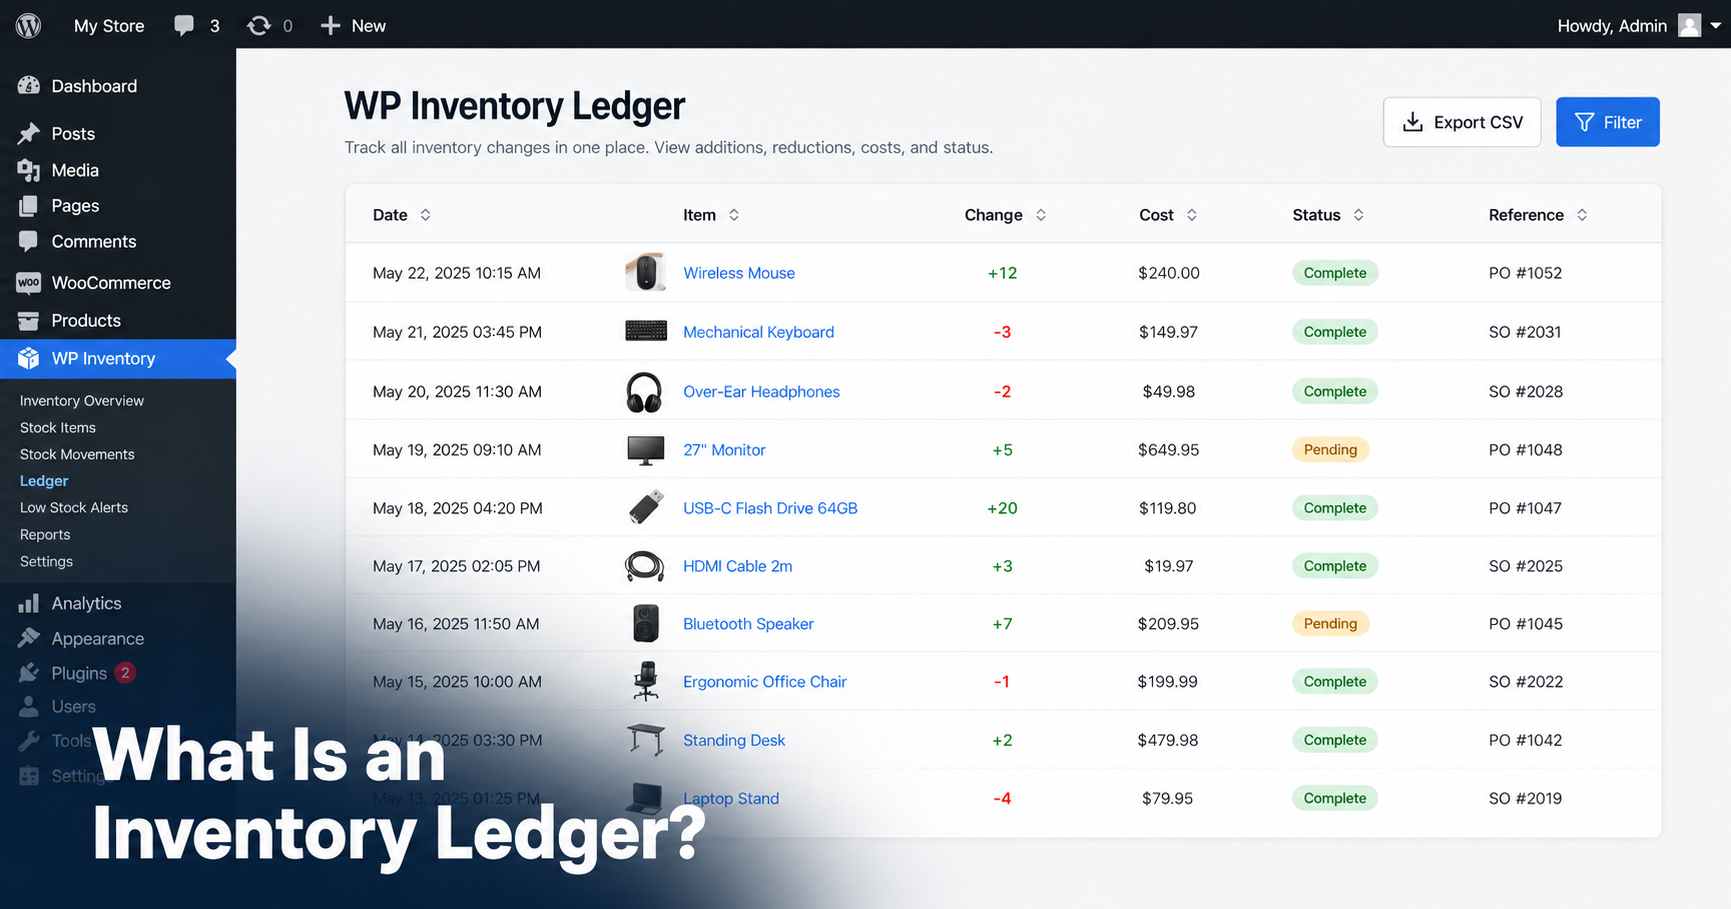
Inventory ledger in WordPress showing stock history entries in WP Inventory Manager

Every inventory system can tell you how much stock you have right now. Very few can tell you how you got there. If you have ever stared at a quantity field wondering who changed it, when and why, you already understand the problem an inventory ledger solves.

This post explains what an inventory ledger is, why a spreadsheet makes a poor one and how to keep a real ledger inside WordPress using the WP Inventory Ledger add-on.

An inventory ledger is one part of maintaining accurate inventory records. For the broader setup, see our guide to managing inventory in WordPress without WooCommerce.

What is an inventory ledger?

An inventory ledger is a running record of every stock movement: each addition, subtraction, reservation or transfer, logged with the date, the quantity involved and what the change was for.

Where a stock count answers “how much do we have,” the ledger answers “what happened.” Together they give you the two things every inventory question comes down to: the current state and the story behind it.

A useful ledger entry captures five things:

What it records Why it matters
Date Reconstruct any period after the fact
Item and quantity Which item moved and by how much
Description The reason: a delivery, a sale, a reservation, a write-off
Cost and value Turns a log into a financial record
Status Pending, complete or cancelled, so holds never blur into finished transactions

Why a spreadsheet makes a poor ledger

Most small businesses keep stock history in a spreadsheet, if they keep it anywhere. The problems show up within a month.

  • Overwritten history. A spreadsheet cell holds one value. Type the new quantity and the old one is gone, along with any record of why it changed.
  • No accountability. When three people share a sheet, nobody can say who made which change.
  • Manual discipline. The log is only complete if every person records every movement, every time. One busy afternoon breaks the chain.
  • Disconnected from the website. If your catalog lives in WordPress, every spreadsheet update is double entry. Eventually the two disagree, and you will not know which one is right.

That last point matters most. The fix for out-of-sync inventory is not more careful typing. It is keeping the record where the inventory already lives. We covered the sync problem in depth in our guide to fixing out-of-sync inventory in WordPress.

Keeping a ledger inside WordPress

The WP Inventory Ledger add-on adds a transaction ledger to WP Inventory Manager. Once activated, a Ledger screen appears under the WP Inventory menu in your WordPress admin.

The key difference from a spreadsheet: entries create themselves. The ledger hooks into WP Inventory Manager, so when an item’s quantity is saved or a reservation comes in through the reserve form, the movement is recorded automatically. You can also add entries by hand for anything that happens off the website.

What each entry records

Every ledger entry stores the date, an order ID, an order status, a description, the quantity moved and the cost. The ledger tracks cost separately from price, so you can record what an item cost you as well as what you charge for it.

Entries carry one of three statuses: Pending, Complete or Cancelled. The ledger screen filters by each, so open reservations never mix with finished transactions.

Reservations and invoices

If you use the reserve system, the ledger picks up each reservation as it arrives. A settings toggle controls whether stock is deducted the moment a reservation comes in or only after you review it.

From there you can generate an invoice directly from recorded entries and save it as a PDF. For rental businesses and B2B suppliers who take reservations through their reserve form, that closes the loop from hold to paperwork without leaving WordPress.

Example: A camera rental shop rents out a gimbal stabilizer. The reservation lands in the ledger as Pending with the renter’s details. When the gear ships, the shop marks it Complete and generates the invoice as a PDF. Two weeks later the owner asks why stabilizer stock dipped in June. The answer is one filter away, with dates, quantities and values attached.

Who can see the ledger

A permissions setting controls the minimum WordPress role allowed to use the ledger, from Administrator down to Subscriber. Your bookkeeper can read the history without being able to touch your plugin settings.

Setting it up: a 10-minute walkthrough

Assuming WP Inventory Manager is already installed:

  • Install and activate the Ledger add-on from your license keys page.
  • Go to WP Inventory → Settings and find the ledger section. Choose whether reservations deduct stock immediately or after review, and set the minimum role.
  • Open WP Inventory → Ledger and create your first manual entry to record current stock as a starting point.
  • From now on, quantity changes and reservations log themselves. Add manual entries for anything external, like a damaged unit or a trade show giveaway.

The full field-by-field reference lives in the Ledger documentation.

Ledger or quantity history: which do you need?

WP Inventory Pro includes quantity change tracking, which answers “who changed this number and when.” That is an audit trail, and for many businesses it is enough.

The Ledger add-on goes further: costs and values per movement, pending and completed statuses, reservation capture and invoice generation. The rule of thumb is simple. If you only need to see changes, Pro covers it. If you need to account for them, with values and paperwork, you want the ledger.

Both are available à la carte from the downloads page, and the All Access pass bundles Pro with the full add-on library.

Inventory ledger FAQ

What is an inventory ledger in simple terms?
It is a dated list of every stock movement: what came in, what went out, what it was worth and why it happened. Your quantity on hand tells you where you are. The ledger tells you how you got there.
Does WordPress have a built-in inventory ledger?
No. WordPress has no native inventory features at all. You need a plugin such as WP Inventory Manager for stock tracking, plus its Ledger add-on for full transaction history with costs, statuses and invoices.
Do ledger entries get created automatically?
Yes. The Ledger add-on records movements when item quantities are saved and when reservations come in through the reserve form. You can also create, edit and delete entries manually for movements that happen outside the website.
Can I create invoices from my inventory ledger?
Yes. The WP Inventory Ledger add-on generates invoices from recorded entries and saves them as PDFs, which is particularly useful when reservations stand in for orders.
Is an inventory ledger the same as an audit trail?
They overlap. An audit trail records who changed what and when, which WP Inventory Pro provides for quantities. A ledger adds the financial layer: costs, values, transaction statuses and documents like invoices.

Give your inventory a memory

Stock counts tell you where you are. The ledger tells you how you got there, and it starts recording the moment you activate it. Add the Ledger add-on to WP Inventory Manager and stop guessing what happened to your stock.

Get the Ledger Add-On →

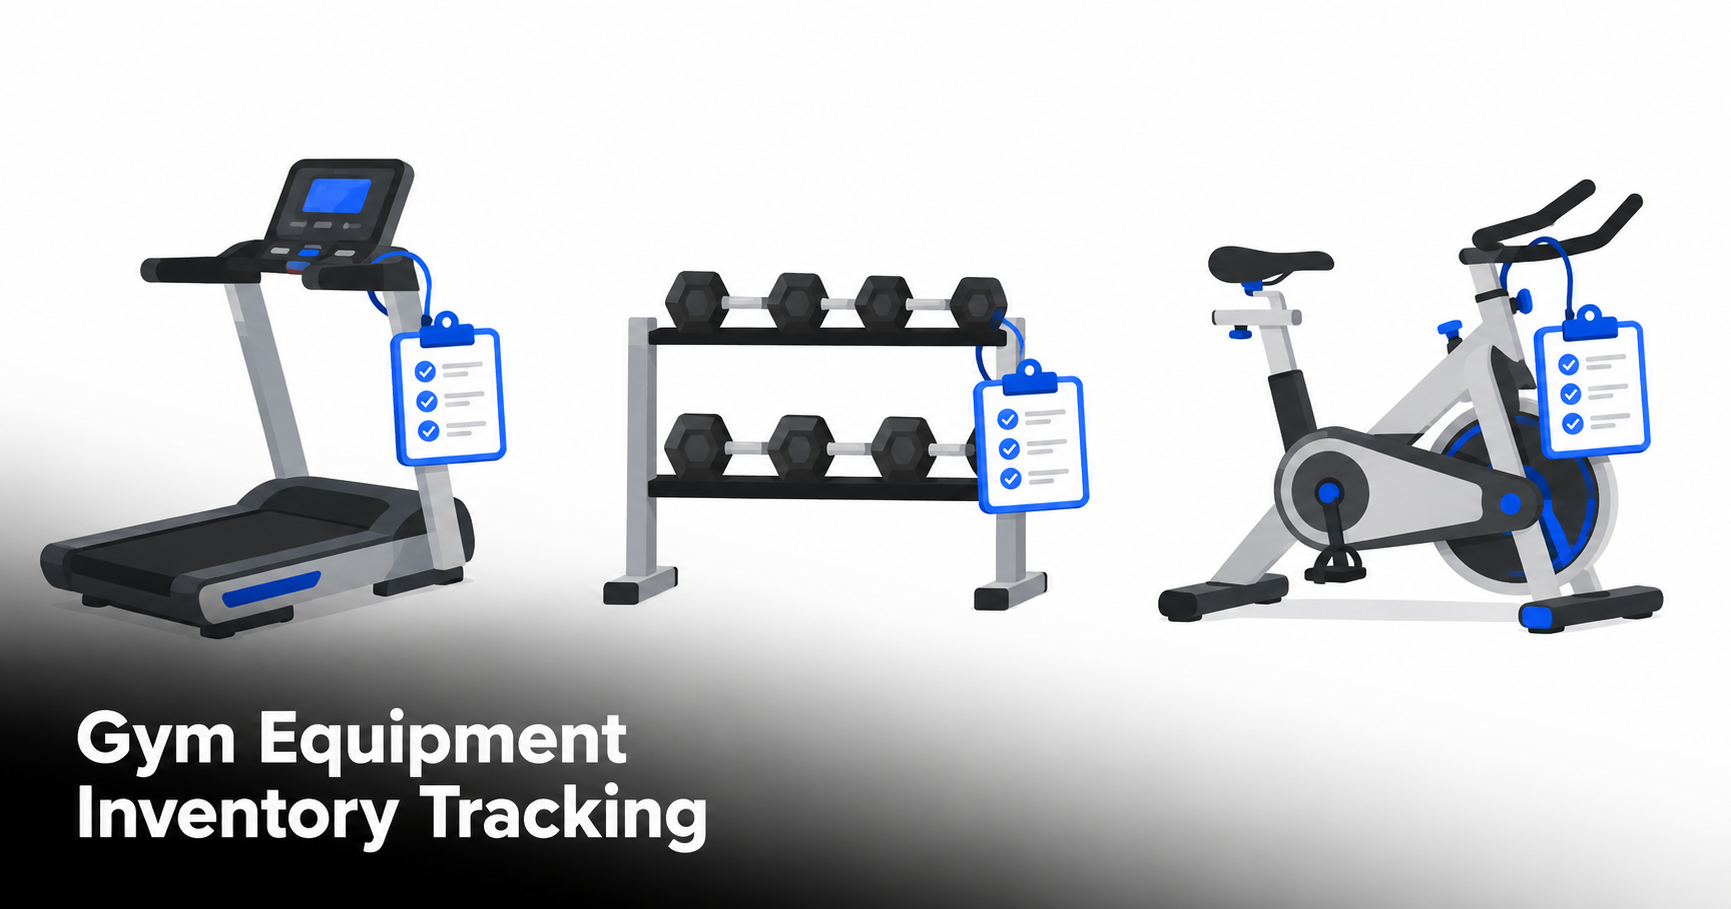
Gym Equipment Inventory Tracking in WordPress (No Expensive CMMS)


A boutique gym owner can usually tell you how many members renewed last month. Ask the same owner when the third treadmill from the left was last serviced, and the answer is a shrug or a whiteboard that hasn’t been wiped since spring. Equipment tracking is the part of running a gym that nobody budgets time for, until a machine breaks mid-class or an insurance audit asks for maintenance records you don’t have.

This guide covers how to track gym and studio equipment directly inside WordPress: serial numbers, service history, staff access and low-supply alerts, without a $50 to $200 a month CMMS subscription built for facilities teams three times your size.

Why gym management software doesn’t solve this

Most gym software (Mindbody, Glofox, Zen Planner and similar) is built for scheduling classes, billing members and running a front desk. None of it tracks whether the leg press machine is due for a bolt inspection or which spin bike has a wobbly pedal.

On the other end, dedicated equipment maintenance platforms like UpKeep, BlueFolder and Xenia do track machines well, but they’re priced and built for multi-site commercial facilities with maintenance crews and work-order routing. A 40-machine boutique studio ends up paying for features it will never touch, on top of the membership software it already runs.

The gap: Small and mid-size gyms need a simple equipment list with maintenance history and staff permissions, not a full CMMS. A WordPress-native option keeps the data on your own server, skips the extra monthly bill and sits inside the site you already manage.

What gym equipment tracking actually needs

Whether it’s a strength studio, a CrossFit box or a full commercial gym, the same handful of fields solve most of the problem:

  • Serial number and model for warranty claims and manufacturer support calls
  • Purchase date and warranty expiration so you know what’s still covered
  • Condition status (in service, needs repair, retired) visible at a glance
  • Last serviced date so nothing gets skipped between inspections
  • Location, if you run more than one studio or floor
  • Loaner gear like heart rate monitors, resistance bands and foam rollers that walk off the floor

A spreadsheet can hold this for a while. It stops working the moment two staff members edit it at the same time, or nobody remembers which tab has the current version.

For gyms tracking individual machines, serial numbers, locations and equipment status, this is also an equipment and asset tracking workflow in WordPress.

Setting up equipment tracking in WordPress with WP Inventory Manager

WP Inventory Manager is a free WordPress plugin that adds an inventory module to your dashboard. It runs independently of WooCommerce and keeps all data on your own site. Here’s how to set it up for gym equipment.

Step 1: Create your equipment types

Under WP Inventory → Manage Inventory, set up categories that match how your floor is organized: Cardio Machines, Strength Equipment, Loaner Gear, Studio Supplies. Each category can carry its own set of fields.

Step 2: Add custom fields for each machine

Under WP Inventory → Settings → Fields, add the fields that matter for equipment, not retail products:

Field name Field type Purpose
Serial Number Text Manufacturer support and warranty claims
Purchase Date Date Depreciation and warranty tracking
Condition Dropdown In Service / Needs Repair / Retired
Last Serviced Date Keeps inspection intervals on schedule
Floor Location Text Which room or zone the equipment lives in

These fields appear on every item’s edit screen and are searchable, so a front desk staffer can pull up “everything marked Needs Repair” in a few seconds.

Step 3: Log every repair and service call

The Ledger add-on keeps a dated entry for each machine every time something changes: a repair, a part replacement, a re-certification. Each entry can carry a note and a cost, so six months from now you have a real service history instead of a memory of “I think someone fixed that.”

Step 4: Give staff access without giving them admin rights

You don’t want every part-time trainer logging into your full WordPress admin. The Advanced User Control add-on lets you grant specific staff permission to view and update the equipment list only, without touching pages, plugins or settings.

Tracking equipment across more than one location

Studio chains and gyms with a second floor of equipment run into a different problem: the master list stops matching what’s actually on each floor. The Locations Manager add-on assigns each machine to a specific site, so staff can filter the list down to just their location.

Example: A three-location strength studio tags every rack, bike and bench with its home site. When a bike gets shuffled from Location B to Location A for a special class, staff update the location field and the owner can see exactly where the fleet sits from one dashboard, without calling each manager for a headcount.

Getting notified before supplies run out

Equipment isn’t the only thing gyms run short on. Resistance bands, chalk, loaner towels and cleaning wipes all disappear faster than anyone expects. WP Inventory Manager’s low-stock alerts flag items once quantity drops below a set threshold, so restocking happens before a member asks for a towel that isn’t there.

What you need and what it costs

The core plugin is free with no item limits, which covers a basic equipment list with categories and search. For most gyms, the useful add-ons are Advanced User Control (staff permissions), Ledger (service history) and, for multi-location studios, Locations Manager. These are available individually starting around $25 to $40 a year each, or bundled with everything in the All Access pass at $199 a year, well under the cost of a single month of most dedicated CMMS platforms.

Frequently asked questions

Do I need WooCommerce for this?
No. WP Inventory Manager works independently of WooCommerce. There’s no cart or checkout involved unless you specifically add the Reserve Cart add-on for equipment loans.
Can I track maintenance history for each machine?
Yes. The Ledger add-on logs a dated entry with a note and cost every time a machine is serviced, repaired or inspected, building a running history per item.
Can front desk staff update equipment status without full admin access?
Yes, with the Advanced User Control add-on you can limit a staff account to viewing and editing the equipment list only.
Does this work for a gym with more than one location?
Yes. The Locations Manager add-on assigns each item to a specific site and lets staff filter the list by location.
Is this cheaper than dedicated gym maintenance software?
For most independent gyms and studios, yes. Platforms built for facilities teams typically start around $50 to $200 a month. WP Inventory Manager’s core plugin is free, and the full add-on bundle runs $199 a year.

Get started

WP Inventory Manager installs in minutes from the WordPress plugin directory. The core plugin is free. If your gym needs staff permissions, service history or multi-location tracking, those add-ons are available individually or in the All Access bundle.

Browse Add-Ons →

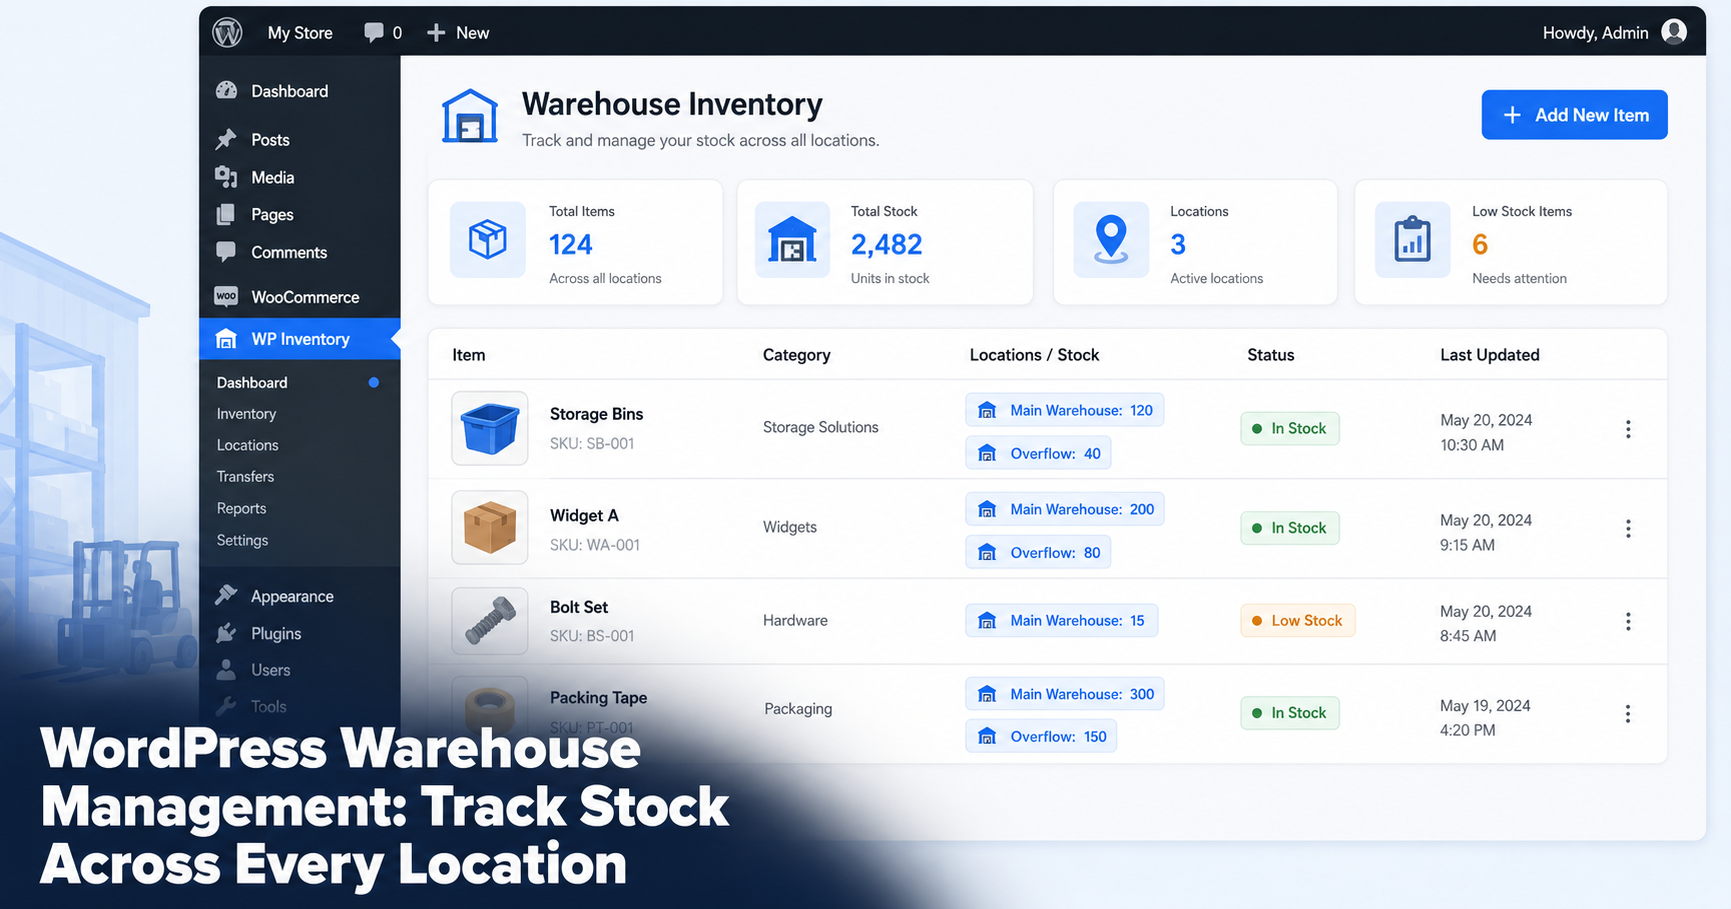
Multi-location Inventory Management in WordPress

Multi-location inventory management answers two basic questions: how much inventory do you have, and where is it? If your stock is spread across warehouses, offices, stockrooms, depots or other physical locations, WordPress can provide a central place to track those quantities without requiring WooCommerce..

This guide explains how to manage inventory across multiple locations with WP Inventory Manager, including location-based quantities, inventory transfers, search and user access. It is designed for lightweight inventory tracking rather than warehouse fulfillment, shipping or logistics management.

Multi-location tracking builds on the same core inventory structure. See the complete guide to managing inventory in WordPress without WooCommerce for the broader setup.

Do you need WooCommerce for multi-location inventory?

Not necessarily. WooCommerce is designed primarily around ecommerce transactions, including products, orders, checkout and payments. If you only need to track inventory quantities across physical locations, adding an ecommerce platform may introduce functionality you do not need. WooCommerce is built to sell products online: carts, checkout, payment gateways and shipping. A warehouse is about what sits on the shelf, not what is in a shopping cart.

You need to know quantities, locations, reorder points and who moved what. None of that requires a storefront. WP Inventory Manager runs on any WordPress site as a standalone system, so you get warehouse tracking without the weight of an ecommerce platform you will never use.

What multi-location inventory management requires

Before adding any tool, it helps to be clear on what a working warehouse system has to do.

  1. Accurate stock counts. A live quantity for every item that staff can update as goods move in and out.
  2. Location awareness. Stock assigned to warehouses, offices, stockrooms, depots or other physical locations, with quantities tracked by location.
  3. Reorder points. Minimum levels that warn you before an item runs out, not after.
  4. Fast search. The ability to find any SKU in seconds across a large catalog.
  5. Controlled access. Each team member sees and edits only what they should.

WP Inventory Manager combines core inventory records with optional add-ons for workflows such as multiple locations, advanced search and user access.

Track inventory across multiple locations

The Locations Manager add-on extends WP Inventory Manager for multi-location inventory. Each item can be associated with physical locations so your team can see where inventory is stored. Each item carries a separate quantity for every location you define, so you always know where stock actually sits.

With Locations Manager you can:

  • See total stock company-wide or drill into a single warehouse.
  • Set up as many locations as you need, from two depots to dozens of zones.
  • Transfer items between locations and keep both counts correct.

Example: A parts distributor stores fast-moving items in a main warehouse and overflow in a second unit across town. The dispatcher opens the item, sees 120 units in the main warehouse and 40 in overflow, then ships from the right one without a phone call.

Monitor stock levels across your inventory

Running out of a core item is what costs a warehouse money. WP Inventory Pro adds the fields that prevent it: minimum and maximum quantity per item, plus low-quantity email alerts.

Set a reorder point on each SKU and the system emails you when stock drops to that level. Pro also records quantity history, so you can see who adjusted a count and when, which matters when numbers do not add up.

Example: A reorder point of 25 is set on shipping boxes. When the count hits 25, an email lands in the manager’s inbox and the item is flagged in the admin, so the next order goes out before the shelf is empty.

Search across larger inventories

A warehouse catalog grows fast. Once you pass a few hundred SKUs, scrolling stops working. The Advanced Search add-on turns your inventory into a filterable database, so staff narrow results by category, location, custom field or keyword without paging through the whole list.

That speed matters most at the moment someone is on the floor trying to confirm whether an item is in stock.

For a detailed setup, see how to add search and filters to your WordPress inventory.

Control inventory access for your team

Not everyone should be able to change every count. The Advanced User Control add-on sets, per person, whether each user can edit all items, only the ones they added, or none, with the same control over viewing. A bulk user screen applies the rules to a whole team at once.

The result is a system the warehouse manager trusts: floor staff update what is theirs while the master count stays protected.

Import and update inventory in bulk

Warehouses live by the periodic count. The Import / Export add-on makes it a quick round trip rather than a week of manual edits. Export your current inventory to CSV, update the counts in a spreadsheet during the count, then import the file back to apply every change at once. New stock can be added the same way instead of one screen at a time.

What you need for multi-location inventory

The free WP Inventory Manager plugin provides the core inventory records, categories and front-end display. For inventory spread across multiple physical sites, Locations Manager adds location-based functionality, while other optional add-ons can extend the setup with advanced search, imports, inventory history and user controls.

See the WP Inventory Manager add-ons or current plans and pricing to choose the functionality your workflow requires.

Is WP Inventory Manager a Warehouse Management System?

No. WP Inventory Manager is designed for inventory tracking inside WordPress, including workflows where stock is spread across multiple physical locations. It is not a full warehouse management system for picking, packing, shipping, receiving, procurement or fulfillment automation.

If your main requirement is knowing what inventory you have and where it is stored, a WordPress-based inventory system may be sufficient. Businesses that need advanced warehouse operations should use dedicated WMS software.

Frequently Asked Questions

Can WP Inventory Manager track inventory across multiple locations?

Yes. Locations Manager extends WP Inventory Manager for inventory stored across multiple physical locations such as warehouses, offices, stockrooms or depots.

Do I need WooCommerce for multi-location inventory in WordPress?

No. WP Inventory Manager runs independently of WooCommerce. If you need inventory tracking without ecommerce checkout, you can manage inventory directly inside WordPress without installing WooCommerce.

How do reorder points and low-stock alerts work?

With WP Inventory Pro you set a minimum quantity on each item. When stock drops to that level, an email is sent automatically and the item is flagged in the admin so you can reorder in time.

Can I do a full stock count without editing items one by one?

Yes. The Import / Export add-on lets you export your inventory to CSV, update counts in a spreadsheet, then import the file to apply every change at once.

Can I limit which staff can change stock levels?

Yes. The Advanced User Control add-on sets per-user permissions for editing and viewing, so floor staff update only their own records while the master count stays protected.

30-day money-back guarantee

Reviews on WordPress.org

Trusted by 134,000+ businesses since 2013

★★★★★

"Created an online museum for my club. Really impressive plugin. Support was responsive and helpful."

@hackrepair

★★★★★

"Excellent, clean, simple inventory management. Well structured code — use it right away or customize it to your liking."

@techlocally

★★★★★

"We purchased the entire suite. Installation was easy, small issues were fixed immediately, and the guidance during setup was invaluable."

@design4dotcom

★★★★★

"Plugin support was helpful and rapid. Highest mark."

@drgar

★★★★★

"Great support. Very thorough when looking for a solution, and upfront with exactly how to fix it or institute a workaround."

@shoidahl

★★★★★

"I used this plugin and eventually hired the developers for all my WordPress work. Responsive, competent, and clean code. Would recommend to anyone."

@justenhong